About | Privacy Policy | Terms of Use | Support | Contact Us
Copyright © 2026 Tipard Studio. All Rights Reserved.
Windows

Rip your favorite Blu-ray/DVD movies or videos to popular formats

Powerful software to play Blu-ray/DVD videos and audio

Create Blu-ray disc/folder/ISO file with your own video

Backup/Copy your favorite Blu-ray to disc/folder/iso files
Mac

Rip your favorite Blu-ray/DVD movies or videos to popular formats on Mac

Powerful software to play Blu-ray and popular video formats on Mac
Windows

Rip DVD to any popular video format quickly of full quality

Create DVD from videos and burn video to DVD/Blu-ray freely

Copy DVD to DVD disc/folder/ISO files in a 1:1 ratio
Mac

Rip DVD to any popular video format quickly of full quality on Mac

Burn or author a DVD from videos with subtitles and chapters on Mac

Copy DVD to DVD disc/folder/ISO files in a 1:1 ratio on Mac
Windows

Rip DVD, convert 4K video, edit, and upscale videos to 5K/8K

Repair broken videos with high accuracy and support many formats

Convert any video to MP3, MP4, MOV, WAV, and other 350 formats

Upscale resolution, optimize brightness and remove video noise

The easiest tool to capture screen, game, audio, etc. with high quality

Convert any 2D video to 3D video and convert 3D to 2D video

Convert 4K video to 4K/1080P and common videos

Convert TS video to various popular video/audio formats
Mac

Rip DVD, convert 4K video, edit, and upscale videos to 5K/8K on Mac

Repair broken videos with high accuracy and support many formats on Mac

Convert any video to MP3, MP4, MOV, WAV, and other 350 formats on Mac

Upscale resolution, optimize brightness and remove video noise on Mac

The easiest tool to capture screen, game, audio, etc. with high quality on Mac

Convert any 2D video to 3D video and convert 3D to 2D video on Mac

Convert 4K video to 4K/1080P and common videos on Mac

Convert TS video to various popular video/audio formats on Mac
Desktop

Rip and convert DVDs to MP3 and support other audio formats

Reset Windows Admin and Standard user account password in seconds

Accurately Convert any PDF file to Word with OCR

Convert PDF to Word, Excel, HTML and Image with OCR
Online

Easily remove watermarks from many image file formats free online
Tipard 1 Click DVD Creator is the professional DVD Maker, which enables you to free create DVD from MP4/AVI/MOV/WMV/FLV/MKV/M4V, downloaded Facebook/TED videos, movies recorded by iPhone, Sony camcorder, etc. In addition, it has the capability to edit source video and adjust output DVD effects. The following description will show you how to do these step by step.
Click "Add Files" on the top list to import video to this DVD creating software.
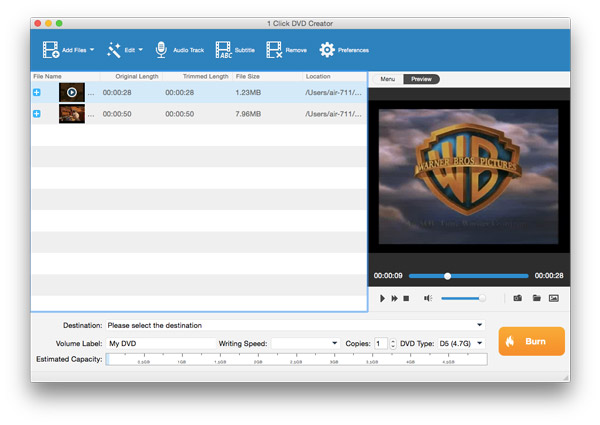
Click "Destination" and then select the suitable DVD type form the drop-down list. If you want to create DVD disc, you need to load a blank DVD disc to your computer firstly. You can rename the DVD by input the name in box of "Volume Label".
Click the "Convert" button on the bottom-right corner of the window. After a while, the target video will be changed to DVD disc, DVD folder or ISO file according to your need.
Before burning video to DVD, this powerful Free DVD Creator provides with multiple setting options for you to personalize the menu, customize DVD video effects, and add preferred subtitles and audio tracks and so on. In the following part, we will show you specific steps to do these.
Click "Edit" next to "Add files" and then select "Effect" in the "Edit" window.
You're free to adjust video brightness/contrast/saturation/hue/volume by dragging the slide bar of each parameter or directly input the value in the text area.
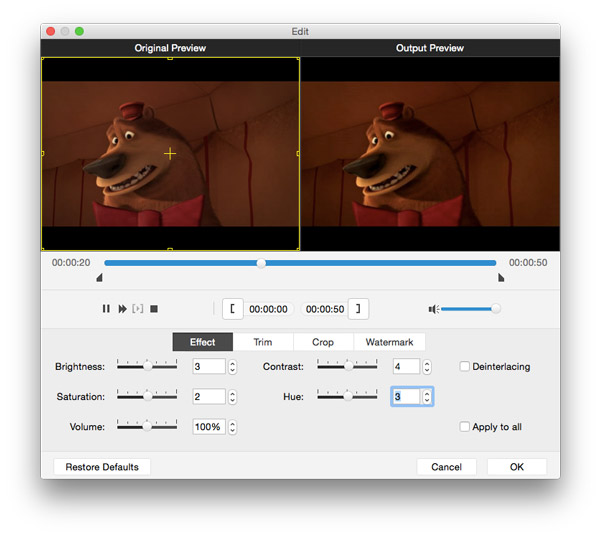
Click "OK" button to save these settings.
Click "Audio Track" on the top bar.
Tab "+" icon to add your prepared audio track to the output DVD disc/folder/ISO file.
You are also allowed to set language, volume, latency, encoder, bitrate, channel and more in the "Edit Audio/Subtitle" window.
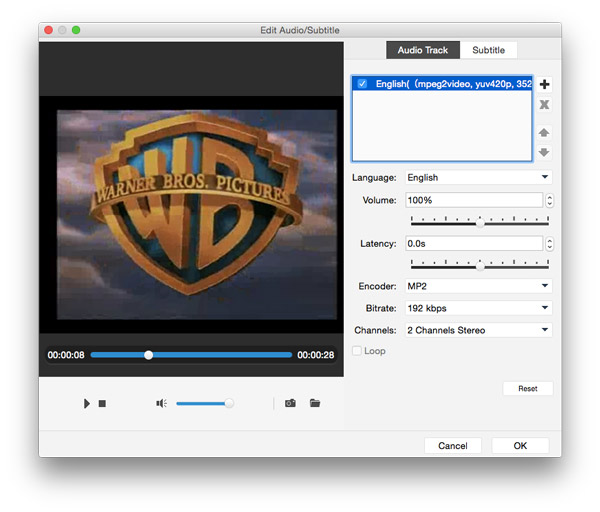
Click "OK" to save the settings.
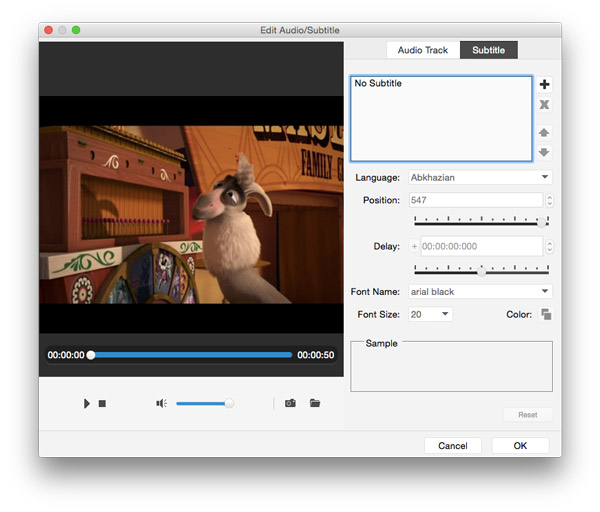
In the same window, click "Subtitle".
Tab "+" icon to add your preferred subtitle, and then drag the slide bar or input exact number to adjust the position and delay of the added subtitle. You can also set font name, font size and color.
In the preview window, click "Menu".
Tab the left/right arrow button to select background of the menu.
Click "Edit menu" and enter the "Edit menu" window. Besides "Menu", you are also free to set "Frame", "Button" and "Text"
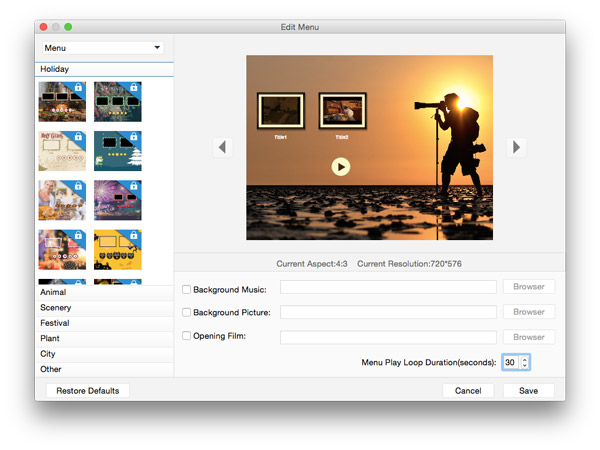
Click "Save" to confirm all the menu settings.
Tab "Trim" in the "Edit" window. You can drag the sliding button or directly input value in the box to set the starting and ending point.
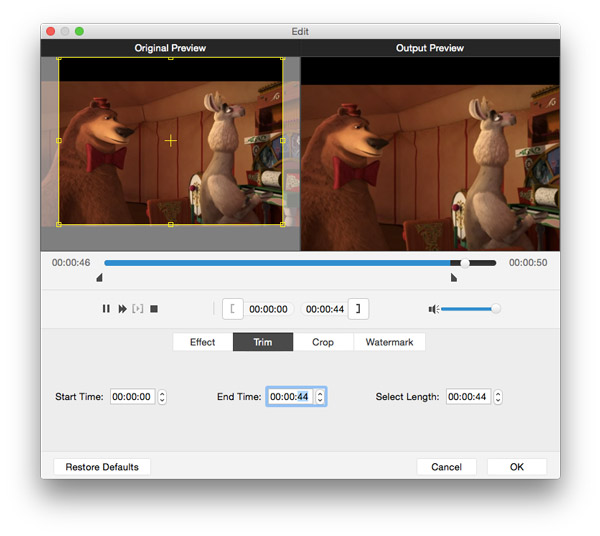
Click "OK" to save the video segments.
Back to the main interface, select the clips you want to merge, and then you can mark "Merge" button to merge the clips.
Click "Edit" button and tab "Crop".
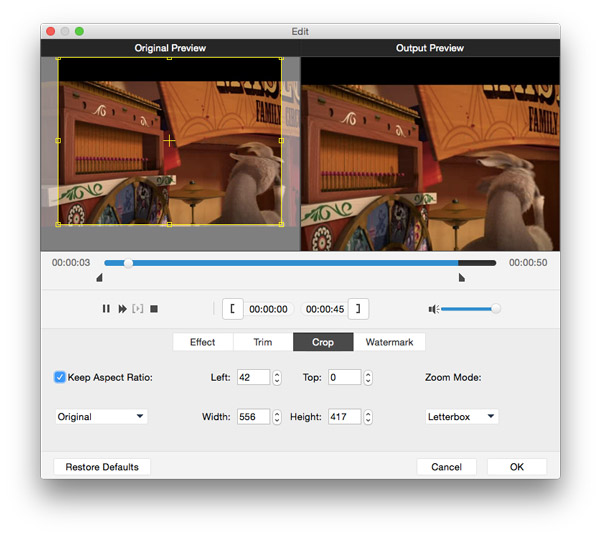
Mark the "Keep Aspect Ratio" option, you can freely choose "Original", "Crop area", "16:9" or "4:3 as the aspect ratio. And you're allowed to adjust the position of crop area and zoom mode.
Enter the "Edit" window and then tab "Watermark".
Mark "Enable Watermark", and then you can add text or picture to the output DVD video and adjust the size and position of the watermark.
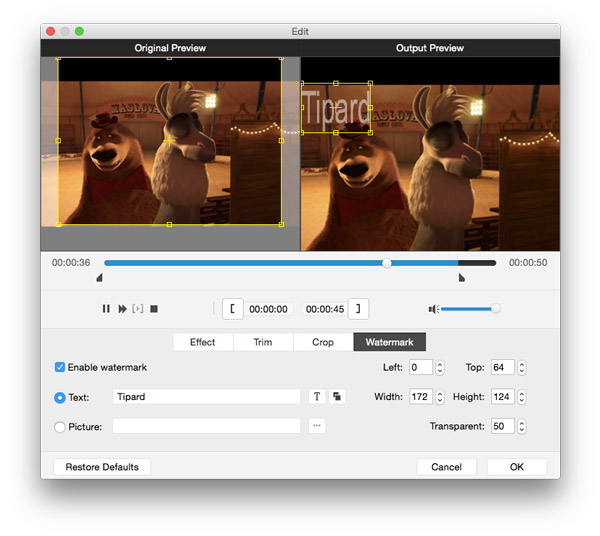
Tab "OK" button to leave watermark on the output DVD.
Click the "Play" button to play the video in the preview window. During the video viewing, you can free take snapshot of any specific moment you want by clicking the camera-like icon.