
- Part 1. Why Do You Need to Compress Video for Web
- Part 2. How to Compress Video for Web Easily
- Part 3. How to Compress Video for Web with HandBrake
- Part 4. Compress Video for Web with Adobe Media Encoder
- Part 5. How to Compress Video for Web with Online Tools
- Part 6. Tips for Video Compression for Web
- Part 7. FAQs of Compressing Video for Web
If you need to upload large footage online or share videos quickly, learning how to compress video for the web is essential. Reducing file size ensures faster uploads, smooth playback, and compatibility across devices and platforms.
- Part 1. Why Do You Need to Compress Video for Web
- Part 2. How to Compress Video for Web Easily
- Part 3. How to Compress Video for Web with HandBrake
- Part 4. Compress Video for Web with Adobe Media Encoder
- Part 5. How to Compress Video for Web with Online Tools
- Part 6. Tips for Video Compression for Web
- Part 7. FAQs of Compressing Video for Web
Part 1. Why Do You Need to Compress Video for Web?
There are many advantages to compressing videos to post online. Videos are easier to upload, quicker to load and all around more reliable to play. You also reduce the size of the videos while keeping the quality good.
1. Optimized videos reduce buffering issues and load quicker.
2. With compressed videos, both viewers and creators lose less bandwidth.
3. You can store and share videos more easily online when you compress them.
4. Videos uploaded to YouTube and Vimeo are less likely to be rejected when you use compression.
Part 2. How to Compress Video for Web Easily
Tipard Video Converter Ultimate is a versatile desktop tool that makes compressing videos for the web simple and efficient. It provides both basic and advanced compression options while maintaining good video quality.
Platform: Available on Windows and Mac computers.
- Offers easy workflow and high efficiency.
- Offers web-optimized video format presets for platforms like YouTube and Vimeo.
- Allows you to directly input a preferred size value or drag the slider to compress videos.
- Handles over 500 video and audio formats for flexible output options.

- Edit videos with trimming, cropping, and watermarking.
- Enhance videos.
- Good quality audio and video are kept.
- Fast compression with hardware acceleration.
- Very casual users might find the extensive options a little intimidating.
Step 1 Get the Tool and Install it
Run the Tipard Video Converter Ultimate installer and open the software after it is done.
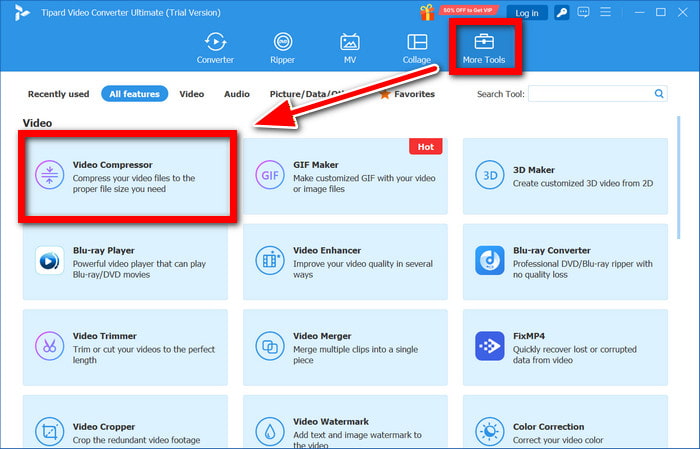
Step 2 Fire up the Video Compressor Tool
From the main screen, go to the More Tools section, select Video Compressor from the list of tools.
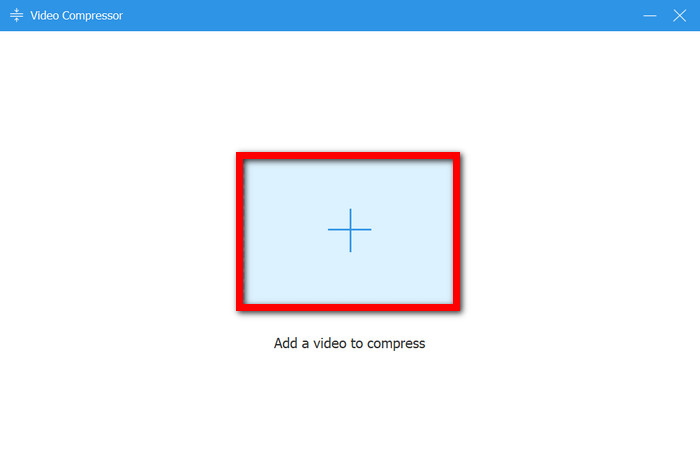
Step 3 Upload Your Video File
Hit the Add button to open the video compressor interface. Browse through the files and select the video you want to compress.
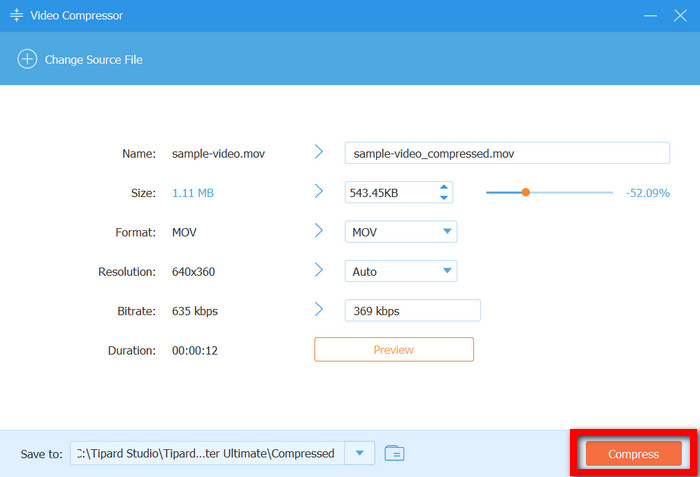
Step 4 Set Your Compression Preferences
Adjust the Size slider to choose the level of compression, or directly enter your size preference. You can also tweak the output format, resolution, and bitrate to match your requirements.
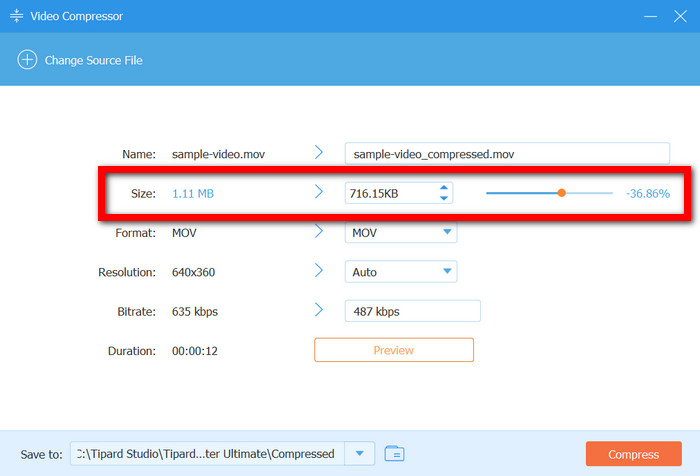
Step 5 Preview and Start Compressing
If you want to see what the compressed video will look like, hit Preview. Then, set the output folder where the compressed file will go, and hit Compress to begin the compression process.
Part 3. How to Compress Video for Web with HandBrake
HandBrake works great as a web video compressor. It is free and open-source, ideal for basic compression beginners to stay budget-friendly for quick results.
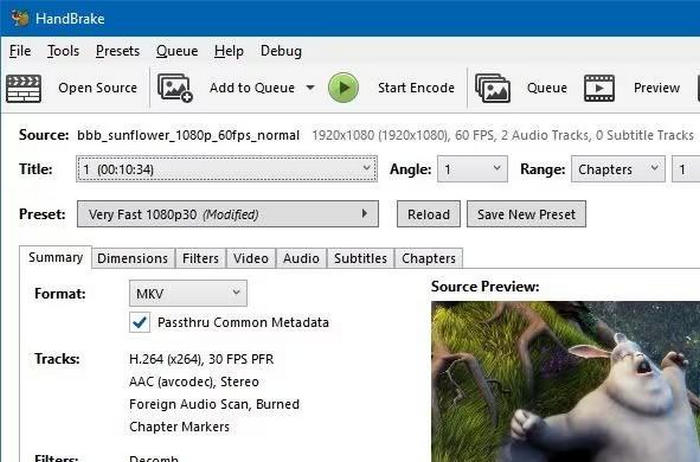
Step 1 Run HandBrake and load your video file.
Step 2 Select a preset, e.g., General HQ 1080p30Web YouTube
Step 3 Choose MP4 as the format and H.264 as the video codec.
Step 4 If required, change the video quality by adjusting the Constant Quality
Step 5 Choose the destination folder and click Start Encode
Part 4. Compress Video for Web with Adobe Media Encoder
Adobe Media Encoder is an example of an advanced program that you can use to have more options when it comes to compression settings. This is useful when you want to achieve a certain level of quality in a video and want to have more specific control over the bit rate and frame rate.
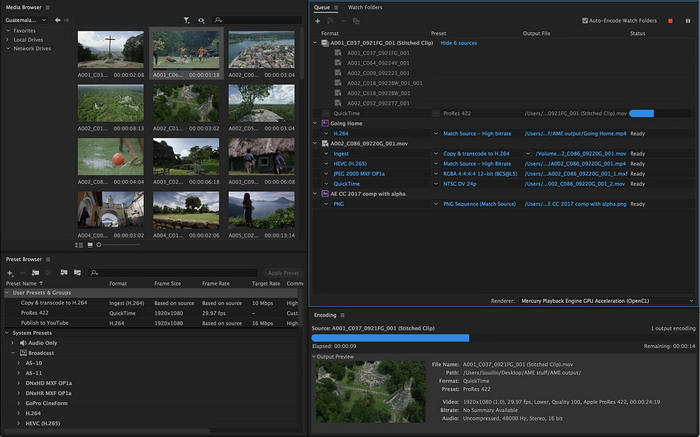
Step 1 Drag your video to the Queue window.
Step 2 Set the format to H.264.
Step 3 Select a preset such as YouTube 1080p HD.
Step 4 In the Export Settings, set VBR to 2-pass.
Step 5 Set the bit rate (web 0-16; Master 32-40)
Step 6 Set the location for the output and click the green play button to encode.
Part 5. How to Compress Video for Web with Online Tools
Video compressing tools that exist online are useful if you are trying to avoid downloading software. They operate directly in your browser and are optimal for quick and efficient video compression for the web.
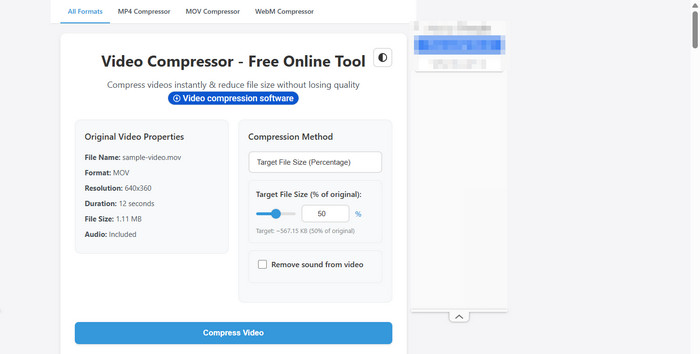
Step 1 Go to VideoCompressor.io and select the Upload Video or Select File button.
Step 2 Select the video that you want to upload from your device, or use drag and drop to upload it.
Step 3 Use the Settings button or select Compression Level to choose a preset that is web-compatible.
Step 4 If it is available, select the Resolution or Format button and select 1080p or MP4.
Step 5 Select the Compress Video button and wait for the video to finish compressing.
Step 6 After finishing, click Download to save the compressed video to your device.
Part 6. Tips for Video Compression for Web
Compressing videos helps ensure that loading time improves while the visual quality stays clear. This means that the videos will play smoothly and will be able to be viewed on various devices and platforms.
1. Always use the H.264 (MP4) format: This format balances quality and compatibility while ensuring it can be played back on the web.
2. Frame rate consistency: Always keep the same video frame rate as your original footage so that playback issues can be avoided.
3. Bitrate: Streaming on the web should use lower bitrates, while master or archival files should use higher bitrates.
4. Resolution: avoid exporting your videos at higher resolutions than needed, as this can drastically increase your file size while not improving viewing quality.
Part 7. FAQs of Compressing Video for Web
Is MOV or MP4 better for websites?
When it comes to websites, MP4 is better as it is more widely supported and compatible with different devices and browsers, and compresses the video with quality. You can also convert MP4 to WebM for additional web optimization.
What size should a video be for a website?
When publishing videos on the web, the size should always be under 100 - 200 MB for short clips, while for long videos it should be under 500 MB. This is not a strict rule as the size also depends on the length, bitrate and resolution. Smaller files guarantee that there will be smooth playback with a quick loading time.
Is MP4 or MOV more compressed?
MP4 files are typically more compressed than MOV, making them smaller and more suitable for web streaming. MOV files retain higher quality but are larger, which can make them slower to load and harder to share online.
Conclusion
Choosing the best video compression for web ensures your videos load quickly, play smoothly, and maintain quality. Using the right tools and settings makes sharing and streaming hassle-free across all devices.
More Reading


About the Author
