Easily Compress Any Videos Using the Final Cut Pro Compressor
Final Cut Pro is one of the top-used video editing applications for Apple devices. Apple officially released Final Cut Pro on June 21, 2011, and it is considered Apple's best video editing software. A new version of Final Cut Pro, Final Cut Pro X, has been released. But in today's topic, we will talk about Final Cut Pro. Although Final Cut Pro is a bit pricey, it will surely help you produce great, high-quality outputs. With its advanced editing features, you can compare, add transitions, add effects, and even add transitions to the video you are trying to edit.
Compress a video? Yes, you read that right! Final Cut Pro also has a feature where you can compress your video to have a smaller video size. By adjusting your file settings, you can alter the master settings to lower the size of your video. It depends on what type of settings you prefer for your output. So today, we will teach you how to compress videos using the Final Cut Pro Compressor.

Part 1. How to Compress a Video in Final Cut Pro
Final Cut Pro can only compress videos only one at a time. This outstanding video compressor can reduce your video's file size without losing its quality. Although the sharpness of your video might not look like the original, that's how video compression works. So, if you are curious about using Final Cut Pro, here is a detailed instruction on using Final Cut Pro to compress videos.
There are two ways to import videos on Final Cut Pro: first is by adding from Final Cut Pro itself or by adding them directly from your files.
How to compress videos using Final Cut Pro:
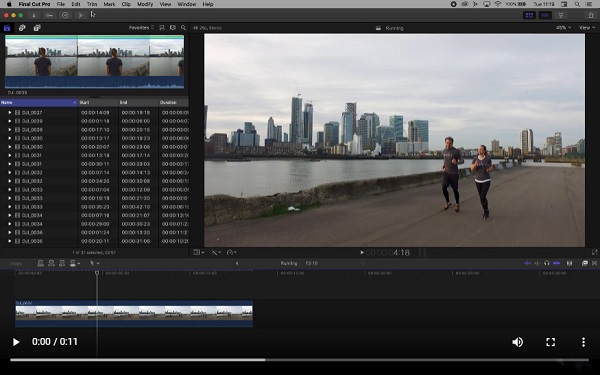
Step 1First, download the Final Cut Pro on your Apple device. Follow the installation process, then run the app on your device. Once opened, import the video by opening the Project ready for exporting.
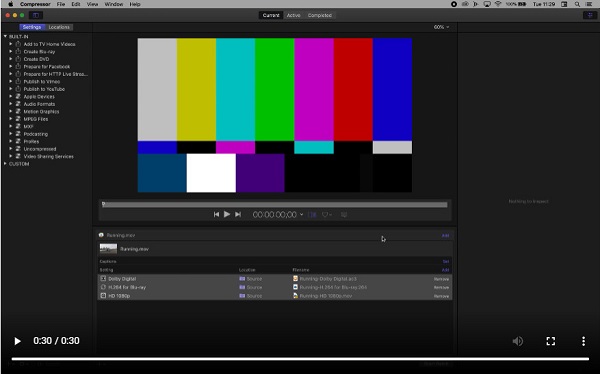
Step 2Then, select the File option from the Menu panel and click the Send to Compressor button. And then, the Compressor will launch.
Optional. You can also upload videos by ticking the Compressor, then click either Add File in the batch window or File > Add File.
Step 3Before your video appears on the Compressor, a window containing the list of presets will appear on the interface. On the disclosure triangle, the sub-options will appear for each destination.
Step 4You can select between single or multiple settings by clicking the + Command.
And in the resulting drop-down from the Location, select where your output will be saved. When you choose the Default (Source), Final Cut Pro will save it on the file location of your original file.
Step 5 Next, when the initial preset is input, you can add more by clicking the Add button on the right side of the column.
Step 6And then, open the sidebar to open the templates and presets. And under each heading, you will see specific settings, then drag-drop the setting onto the clip on the Batch list.
Step 7Open Inspector to open the detailed specification of each template. Each set will have certain elements that can be changed. In this guide, we will compress a video using Blu-ray compatibility.
Step 8Then, you can adjust the frame size, rate, and bitrate quality. After the changes have been made in the Inspector, rename the video. And then, drag and drop the icon from the batch list to the sidebar, below the heading Custom.
Step 9Finally, click the Start Batch button in the lower-right corner, or choose FIle > Start Batch.
And that's it! Following these instructions, you can compress video size using Final Cut Pro. Although it is challenging to compress videos using Final Cut Pro, it is still one of the best video compressor tools. But read the next part if you search for an easier way to compress videos. Click here to learn how to compress videos using Premiere.
Part 2. Best Alternative to Final Cut Pro
Final Cut Pro might not be your tool if you are new to compressing videos. As mentioned above, Final Cut Pro has a complex user interface that is hard to navigate for many users. But if you are a professional, Final Cut Pro is the best line of choice. Therefore, we will present another method to compress your videos in this part. So, better read this part comprehensively.
Tipard Video Converter Ultimate was originally a video converter application. But, this tool also has many advanced editing features, including a video compressor, video trimmer, video watermark, and more from the Toolbox. Additionally, using its video compressor feature, you can adjust your video's size, format, and resolution. By adjusting these factors, the size of your video will be drastically reduced. Also, it supports almost all video and audio formats, such as MP4, AVI, MKV, MOV, WMV, MP3, and 500+ more formats. Moreover, it has an easy-to-use software interface, which makes it a beginner-friendly tool. So if you are a beginner, Tipard Video Converter Ultimate is the best choice you can ever have.
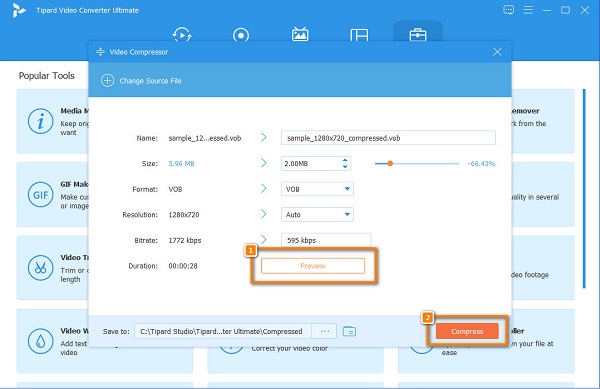
How to compress videos using Tipard Video Converter Ultimate:
Step 1First, download Tipard Video Converter Ultimate by clicking the Download button below. And then, follow the installation process then open the app on your device.
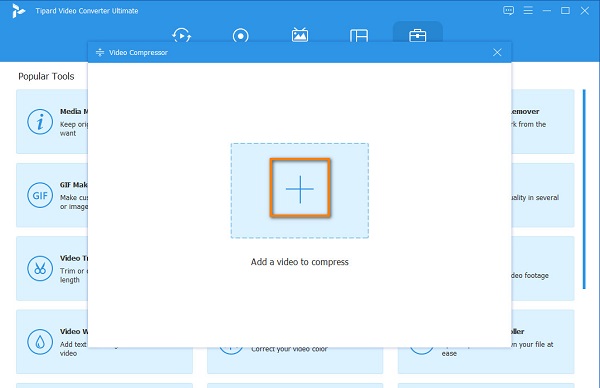
Step 2And on the software's main user interface, go to the Toolbox panel, and click the Video Compressor option.

Step 3Click the + sign button on the following interface to upload the video you want to compress. You can also drag-drop your videos from your computer files to import a video.
Step 4Then on the next interface of the video compressor, you can adjust your video's size, format, and resolution. But in this guide, we will adjust the size to reduce the size of your video. To do that, click the up/down arrow or move the slider to the percentage you prefer.
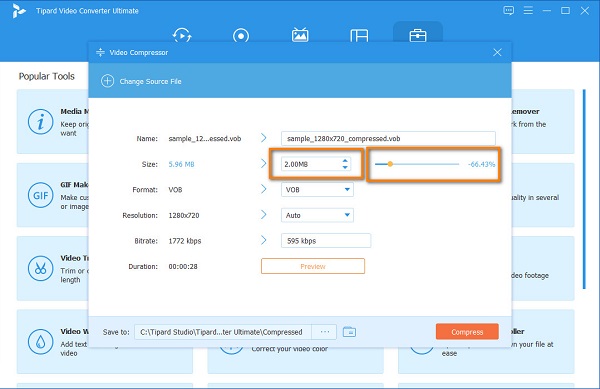
Step 5And lastly, you can preview your video before compressing it. Once satisfied with your output, click the Compress button to compress your video quickly.
Easy right? It is easier to compress your video using Tipard Video Converter Ultimate. With its simple and clean interface, you will indeed easily compress your videos.
Part 3. FAQs about Using Final Cut Pro to Compress Videos
Is Final Cut Pro better than Premiere Pro?
Comparing these two video editing applications is hard because they both have great features and produce high-quality outputs. But if you want a more professional tool with an incredibly customizable layout.
Can you get Final Cut Pro on Windows?
Unfortunately, you cannot get Final Cut Pro on Windows. Final Cut Pro only works on Mac devices, and you cannot download Final Cut Pro on Windows PC.
How much does Final Cut Pro cost?
This fantastic video editor for Apple costs $299.99. It has a much better deal than the Adobe Premiere Pro.
Conclusion
The Final Cut Pro Compressor is genuinely a powerful video editing app. This app will surely meet your expectations, especially with its price. Moreover, Final Cut Pro ensures you can compress your videos with great quality. Hence, if you want to use a tool that has an easy-to-use interface, we recommend using Tipard Video Converter Ultimate.