iMovie - Compress Video on Your Mac With These Simple Steps
iMovie is among the most powerful video editing applications available natively on Mac or other Apple devices, like iPhone and iPad. This amazing video editing software has many functions that you can use to enhance or edit your video. Editing functions of iMovie you can use are adding subtitles to videos, overlaying images to videos, adding transitions, and even compressing your video file. Moreover, iMovie is free to download on all Apple devices. Since iMovie is an application you can use to compress your videos, we will discuss below how to compress a video in iMovie.
Part 1. How to Compress a Video in iMovie
iMovie is the most outstanding video editing application for Apple devices, like iPhone, Mac, and iPad. This video editing software has many functions and tools that you can use to improve your video and add twists to it. Its amazing tools include media organization, color grading, speed, green screen effects, narration, and more. But not only that, many people do not know that iMovie also has a feature to compress video files. So, if you want to know how to compress video files in iMovie, read this part continually.
How to reduce a video size on iMovie on Mac:
Step 1 First, download the iMovie app on your Apple device. The older version of Apple devices already has downloaded the iMovie app. But the newer version requires you to download it first. Then, after installing the app, open it on your device.
Step 2 And then, edit your movie on the app before exporting and compressing it. You can use many tools to edit your video, and when you are satisfied with your video, proceed to step 3.
Step 3 To export your video, click the Share icon on the top right corner of the interface. A list of preset export options will appear, then click the File option.
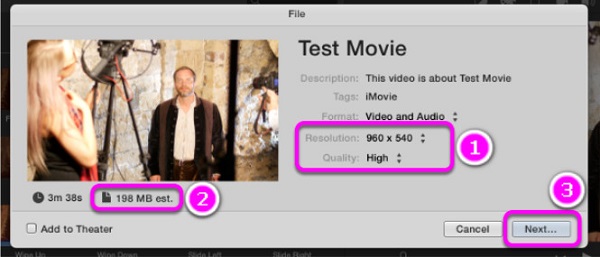
Step 4 And on the next interface, look for the options for changing the resolution of your video. By adjusting your video's resolution, your video's size will also be smaller. And on the screenshot below, you will observe that the original resolution of your video is 3.38 GB which is big for you to upload. So, click the up/down arrow button to adjust your video's resolution or the quality to compress your video file.
Step 5 To lower the size of your video, adjust your video's resolution to 960 × 540. And then, change the quality of your video to High. You will see that the size of your video is now 198 MB. Click the Next button to proceed to the next step.
Step 6 Finally, save your exported file on your device files. Type the name you want your video to have, and set your preferred location. Click the Save button to save your output. Then, wait for your video to finish saving, then you can now locate it on your files.
And that's how to compress a video using iMovie. With those simple steps, your video now has a smaller size.
Part 2. Best Alternative for iMovie
iMovie is an amazing video editing application available on all Apple devices. However, iMovie is not available on Windows systems. Therefore, if you are using a Windows device, you cannot download iMovie to compress your video. Luckily, there are many applications that you can download on your Windows computer that can help you compress videos. So, if you want to learn how to compress video files in an iMovie alternative. Continually read this post.
If you want the best video editing software for Windows devices, then Tipard Video Converter Ultimate is your application. This outstanding video editor has many features, including a video compressor, video merger, video watermark, color correction, and more. And in its video compressor feature, you can adjust your video's size, format, and resolution to compress your video file. Additionally, it supports almost all file formats, such as MKV, MP4, MOV, AVI, VOB, M4V, FLV, and 500+ more formats. Also, it is a user-friendly application because it has an easy-to-use interface.
Furthermore, it allows you to see the preview of your video before exporting it. Plus, it is available on all cross-media platforms, like Windows, Mac, and Linux. What's even great about Tipard Video Converter Ultimate is that it can compress any file format without losing its quality. So, if you want to compress your video using this tool on your Windows or Mac device, follow the simple and easy steps below.
Steps on How to make video size smaller on iMovie alternative:
Step 1 Download Tipard Video Converter Ultimate on your device by clicking the Download button below. And then, follow the installation process then run the app on your device.
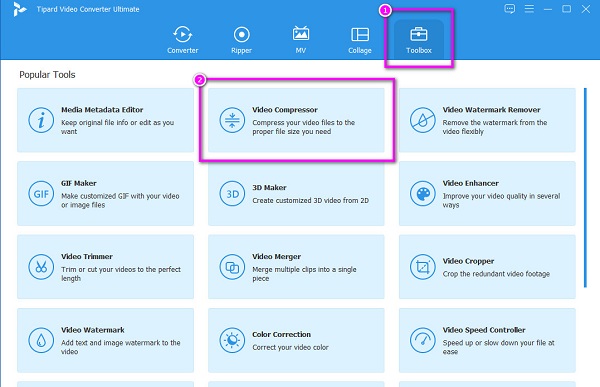
Step 2 And on the software's main user interface, go to the Toolbox panel, and select the Video Compressor feature.
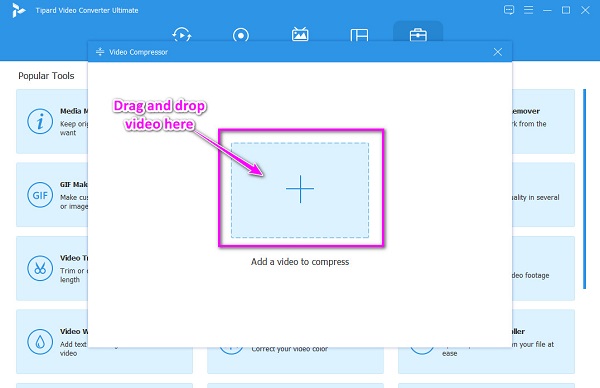
Step 3 Then, drag and drop your video from your computer folders to upload the video you want to compress. You can also click the plus (+) sign button to upload.
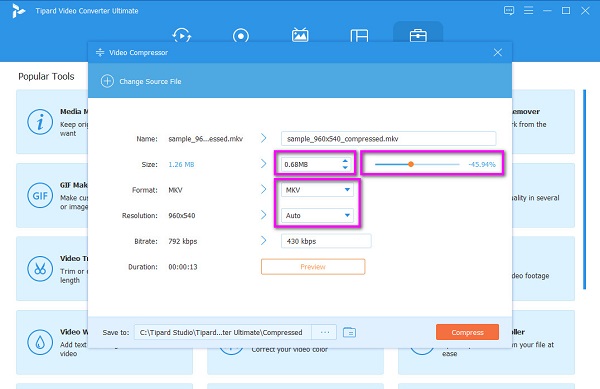
Step 4 Next, you will see the size, format, resolution, and bitrate options. To compress your video, click the up/down arrow or hold and drag the slider to your preferred size. You can also change the resolution or format of your video to compress it.
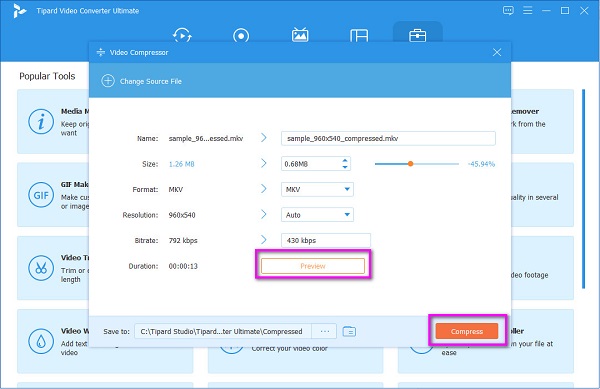
Step 5 Lastly, you can see the preview of your video by clicking the Preview button. And if you are satisfied with the output, click the Compress at the lower right corner of the interface. And in a few seconds, your compressed file will be ready in your computer folders. Click here to learn how to compress a video in Final Cut Pro.
Part 3. Things to Remember When Using iMovie
iMovie is the best video editing software you can download on all Apple devices. Since it is the best video editing app, we will note some things you can do to have the greatest video edit.
Here are the five most useful tips for iMovie:
1. Fade In
Select the audio clip, then press A to open the audio inspector. Manually choose fade, then drag your slider to your preferred fade. Then, click Done.
2. Slow Down
Go to the frame rate you want to edit, then right-click it. From the resulting drop-down menu, select the Split Clip option. And then, press I, and an inspector will open where you will set your preferred speed.
3. Zoom In
Select the video clip you want to zoom in on, then use the crop icon to crop a portion from your video. And then, drag the cropped window on the image and click the Done button.
4. Fill the Sound Gap
If there is a sound gap in your movie, select the purple audio clip, then go to edit > copy. Use edit then paste to fill the sound gap.
5. Export Videos to Facebook
You can export videos directly to other social media networks, like Facebook on iMovie. Go to iPhoto > Accounts, then login to your Facebook account.
Part 4. FAQs about How to Compress a Video in iMovie
Can you compress videos in iMovie without losing quality?
Your video may lose the original quality while compressing in the iMovie app because you will lower the resolution of your video.
Can I export or share iMovie projects?
Of course. You can export your projects via email, messages, and other platforms. You can also share your movie on the web.
Can iMovie be exported as MP4?
Yes, you can export iMovie outputs as MP4 with the help of a third-party app since the iMovie app does not support MP4.
Conclusion
Since you now know how to compress a video in iMovie, you can simply follow the steps to compress your video. With its simple interface, you can easily compress that video you want to reduce size. But if you prefer using a video compressor that has many advanced editing features, Tipard Video Converter Ultimate is the best application for you.