
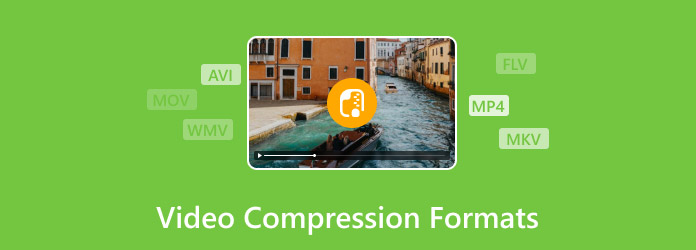
Choosing the best video format compressed for your project can be overwhelming, especially when you need to share videos online, store them efficiently, or maintain high quality for editing. Imagine finishing a 4K vacation video only to realize it is too large to email or upload smoothly. This guide walks you through lossy and lossless compression, popular video codecs, and practical steps to optimize your videos for any purpose.
Part 1. The Core Concept: Lossy vs. Lossless Compression
1. What is Lossy Compression?
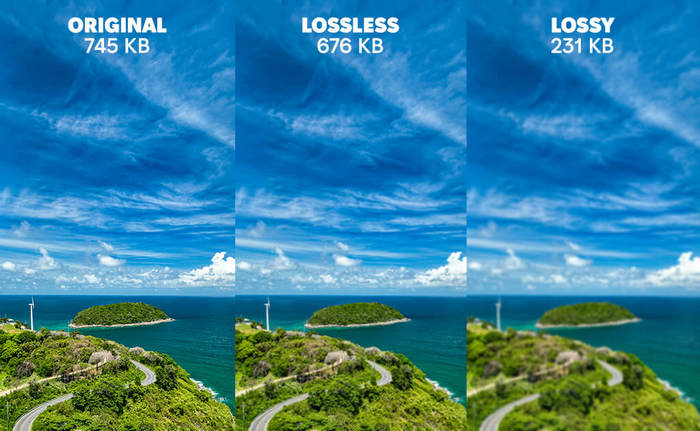
Lossy compression minimizes a file size by removing some data, typically the least important ones. It compresses videos by removing certain details that the viewers are unlikely to miss, allowing the file size to be significantly smaller while preserving the video and audio quality to a large extent.
Use Cases:
- Streaming video content (Netflix, YouTube).
- Social media video content (Instagram Reels, TikTok).
- Sending videos quickly via email or messaging apps.
Common Lossy Formats:
- MP4 (H.264/H.265): Compatible with most devices and platforms.
- WebM (VP9, AV1): Best for web streaming.
- MP3: Lossy audio format.
2. What is Lossless Compression?
Lossless compression maintains all the data, which means your video will be the same as the source. This is important in professional video editing and for archival storage, where every detail matters.
Use Cases:
- Professional video editing and post-production.
- Archival purposes and media libraries.
- Distributing source media files to collaborators.
Common Lossless Formats:
- AVI: High-quality video and editing.
- MOV (ProRes): Accepted in professional post-production.
- MKV: Flexible format that includes multiple audio tracks and subtitles, and layers.
- FLAC: Lossless audio format.
Part 2. Guide to Common Video Compression Formats (Codecs)
Here is a practical guide to the most widely used codecs and what they offer:
| Codec | Standard | Best For | Drawbacks |
|---|---|---|---|
| H.264 (MPEG-4 AVC) | Industry standard | Web videos, YouTube, social media | Larger file sizes than newer codecs |
| H.265 (HEVC) | Successor to H.264 | 4K/8K streaming, UHD content | Encoding-intensive, limited hardware support |
| AV1 | Open-source, royalty-free | Next-gen streaming, minimal bandwidth usage | Slow encoding, older device incompatibility |
| VP9 | Developed by Google | YouTube, web streaming | Not supported on all devices |
| Show MoreShow Less | |||
1. H.264 (MPEG-4 AVC)
H.264 is a very supported video decoder. It is compatible with almost all devices and platforms. It is great for streaming over the internet and web video and delivers the much-needed balance between quality and file size. Alas, it is not as efficient as the newer decoders, and it will take bigger files to decode the same visual quality.
2. H.265 (HEVC)
HEVC is a High-Efficiency Video Coding. It improves the compression efficiency of H.264 by almost 50 percent, making it ideal for comparing H.264 vs H.265 performance and very useful for high-resolution videos like 4K and 8K streaming. Its biggest downside, however, is that it requires more encoding power, and older devices may struggle to play it.
3. AV1
AV1 is a next-generation, open-source codec designed for high-quality streaming and low bit rates. It is used more and more by platforms such as YouTube and Netflix. The biggest disadvantage is that it has slow encoding, and the hardware for it is still developing.
4. VP9
VP9 is a streaming video optimized for the web and designed for YouTube. It is great for high definition video and compression efficiency that competes with H.265. It has the drawback of limited support on devices that are not from Google and on older devices.
Part 3. How to Choose the Best Video Format for Compression
Three considerations help determine the best format: your purpose, your audience, and your priorities. These will help you determine the best tradeoff between quality, size, and compatibility.
Question 1: What is your goal?
- For streaming or online sharing, pick H.264 and VP9 for compatibility and resource-efficient streaming.
- For archiving or editing, you will want lossless MOV and MKV that keep the quality.
Question 2: Who is your audience?
- For general viewers who possibly have older devices, H.264 will guarantee smooth playback.
- Tech-savvy audiences will have AV1 and HEVC, which offer better quality and smaller files.
Question 3: What is your priority?
- For size or streaming, H.265 and AV1 are lossy options that will shrink file size with minimal loss in quality.
- For quality, lossless is the way to retain every detail for editing and professional work.
- For playback efficiency, H.264 and VP9 formats achieve this with most devices.
Pro Tip: Consider a hybrid approach: use lossless formats for editing and master copies, and lossy formats for sharing or streaming. This way, you retain original quality, compress video online, and optimize accessibility for viewers.
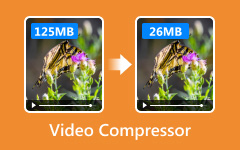
Part 4. How to Actually Compress a Video
Tipard Video Converter Ultimate has advanced to the point where it has become a professional tool for all-in-one video compressing, converting, editing, and quality enhancing. Video compression is now more straightforward and faster, with the option to change file sizes, file types, and save edited editions in your preferred file format.

- Convert videos to MP4, MOV, AVI, MKV, FLV, WebM, and more.
- GPU acceleration compresses videos up to 60× faster.
- Keep full HD or 4K/8K resolution while reducing file size.
- Crop, rotate, merge, trim, add filters, and adjust brightness or contrast.
- Compress videos, create GIFs, adjust resolution, and fix audio/video sync.

Step 1 Download and Install
Go to the Tipard website, where you can find both Windows and Mac options to download the software. After downloading it, execute the file and follow the instructions given to you. Finally, open the program to get started.
Step 2 Open the Video Compressor Tool
You will now see a software interface. Find the More Tools option, and click the Video Compressor option to start using the dedicated compression tool. This will allow you to compress the file to your preferred file size.

Step 3 Add Video
Click the Add to add the video you want to compress. It supports almost all video file types and formats. You will not have to worry about your video format.

Step 4 Adjust Video Size
You can choose the file size and format in the Size section. You can also make precise adjustments using the size box provided.
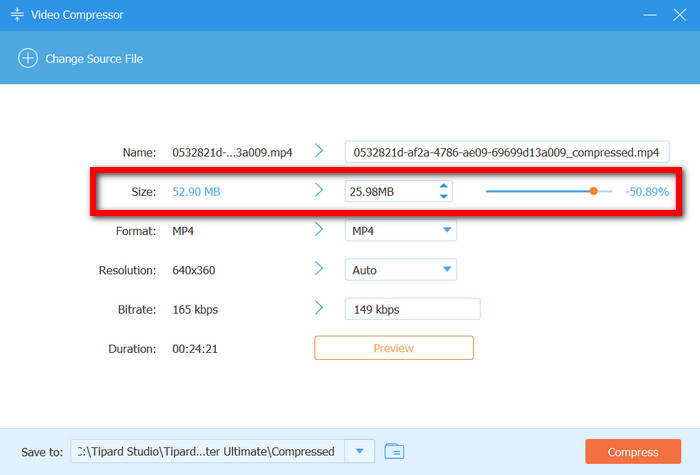
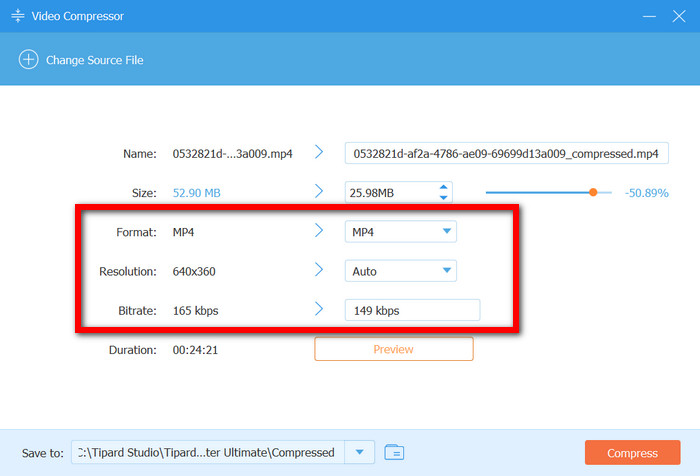
Step 5 Adjusting Format, Resolution, and Bitrate
Tailoring your compression settings begins with choosing your preferred output Format (choose between MP4, AVI, MKV, etc.), determining your Resolution (anywhere from 4K down to 720p), and finalizing the bitrate.
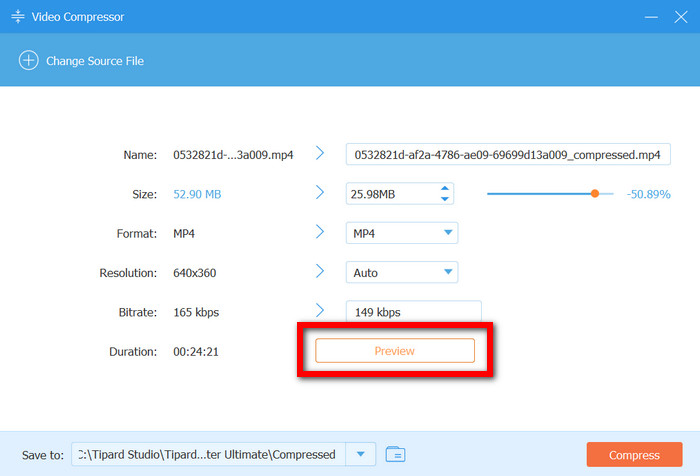
Step 6 Preview
This gives you the opportunity to assess how the compression settings you chose work and how they impact your video quality, and how they affect the video you are preparing to compress.
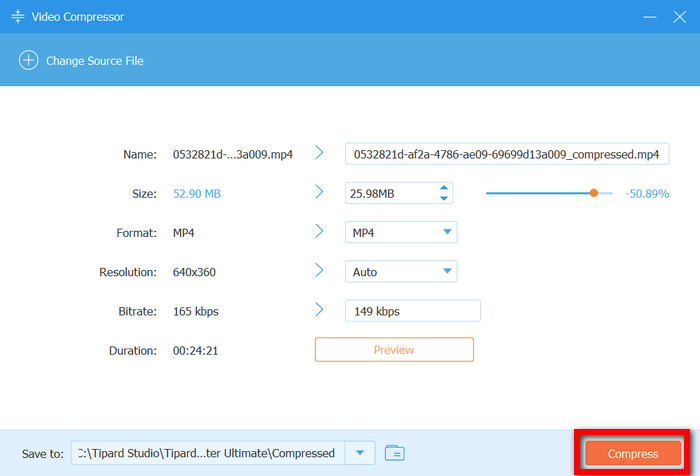
Step 7 Saving and Compression
After all the settings, you only have to press the Compress button. After which, it is going to perform all the steps in the background going to the PC.
Conclusion
Having the background on lossy compression of video gives you the ability to document your work logically, while also maintaining the desired quality and acceptable compatibility for the end user. This is also achievable by choosing the correct codec for your project and compression measures, editing, and sharing your material with Tipard Video Converter Ultimate.
More Reading
About the Author
