About | Privacy Policy | Terms of Use | Support | Contact Us
Copyright © 2026 Tipard Studio. All Rights Reserved.
Windows

Rip your favorite Blu-ray/DVD movies or videos to popular formats

Powerful software to play Blu-ray/DVD videos and audio

Create Blu-ray disc/folder/ISO file with your own video

Backup/Copy your favorite Blu-ray to disc/folder/iso files
Mac

Rip your favorite Blu-ray/DVD movies or videos to popular formats on Mac

Powerful software to play Blu-ray and popular video formats on Mac
Windows

Rip DVD to any popular video format quickly of full quality

Create DVD from videos and burn video to DVD/Blu-ray freely

Copy DVD to DVD disc/folder/ISO files in a 1:1 ratio
Mac

Rip DVD to any popular video format quickly of full quality on Mac

Burn or author a DVD from videos with subtitles and chapters on Mac

Copy DVD to DVD disc/folder/ISO files in a 1:1 ratio on Mac
Windows

Rip DVD, convert 4K video, edit, and upscale videos to 5K/8K

Repair broken videos with high accuracy and support many formats

Convert any video to MP3, MP4, MOV, WAV, and other 350 formats

Upscale resolution, optimize brightness and remove video noise

The easiest tool to capture screen, game, audio, etc. with high quality

Convert any 2D video to 3D video and convert 3D to 2D video

Convert 4K video to 4K/1080P and common videos

Convert TS video to various popular video/audio formats
Mac

Rip DVD, convert 4K video, edit, and upscale videos to 5K/8K on Mac

Repair broken videos with high accuracy and support many formats on Mac

Convert any video to MP3, MP4, MOV, WAV, and other 350 formats on Mac

Upscale resolution, optimize brightness and remove video noise on Mac

The easiest tool to capture screen, game, audio, etc. with high quality on Mac

Convert any 2D video to 3D video and convert 3D to 2D video on Mac

Convert 4K video to 4K/1080P and common videos on Mac

Convert TS video to various popular video/audio formats on Mac
Desktop

Rip and convert DVDs to MP3 and support other audio formats

Reset Windows Admin and Standard user account password in seconds

Accurately Convert any PDF file to Word with OCR

Convert PDF to Word, Excel, HTML and Image with OCR
Online

Easily remove watermarks from many image file formats free online

Points:0
Redeem
User Guide
Tipard Video Converter for Mac is comprehensive video converting software. With this video converter, Mac users are allowed to convert video/audio of almost any format to 2D/3D format that is compatible with other video playing devices, such as iPhone, iPad, PSP, Android phones, Windows7 phones etc. HD videos and all other popular formats are supported. If you are not satisfied with the playing effect, you have the right of editing the output file as you like. The following description will show you how to convert videos on Mac step by step.
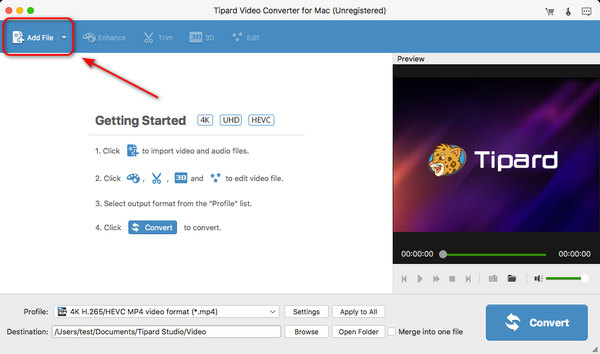
Step 1 Add video/folder
Click the button on top-left corner, choose the file you want to convert. Or you can directly drag the video to the program window.
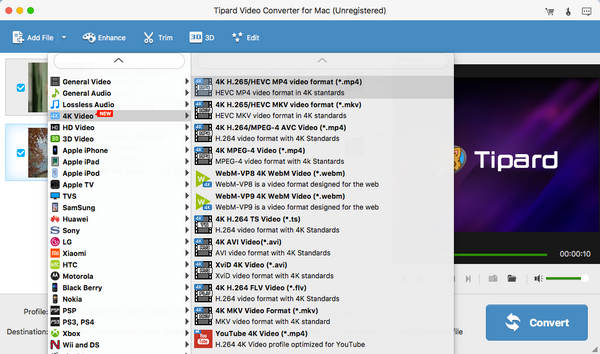
Step 2 Select output format
Click the drop-down window on the right side of "Profile" column. Then choose the output device and format you want to convert to.
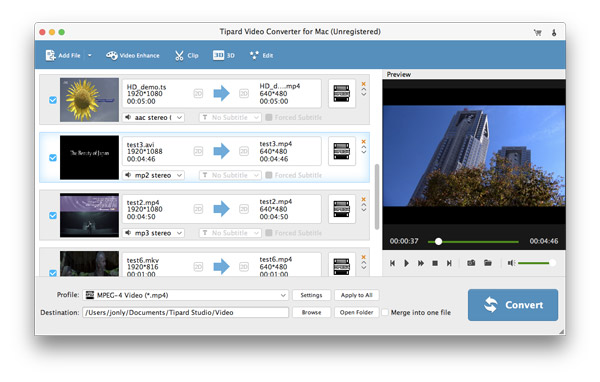
Step 3 Choose destination
Click "Browse" button to browse over your computer and select the folder where you want to save videos to.
Step 4 Convert
Click the "Convert" button on the lower-right corner of the window. Then your video will be converted in no time at super-high speed.
If the playing effect of the converted video is not satisfying, you can edit and prettify the video before you convert it.
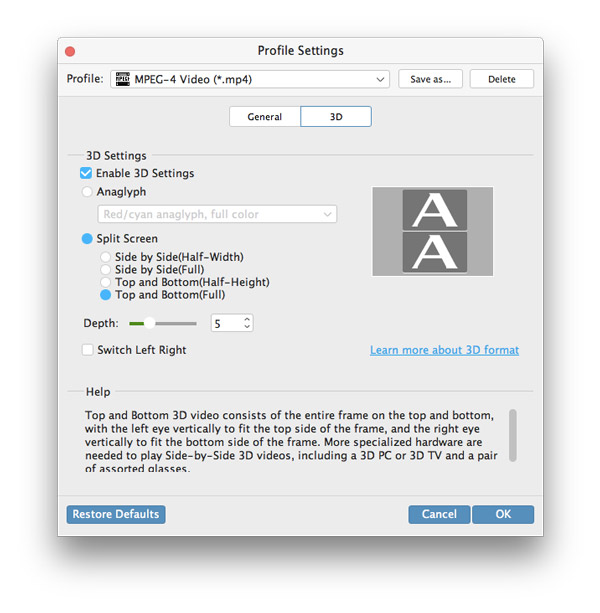
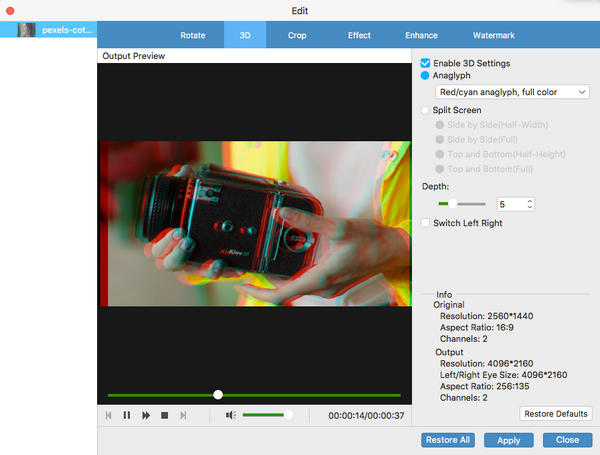
Step 1 Edit 3D video
Enable 3D editing, you can edit 3D video with Depth, Anaglyph, and 3D modes, etc.
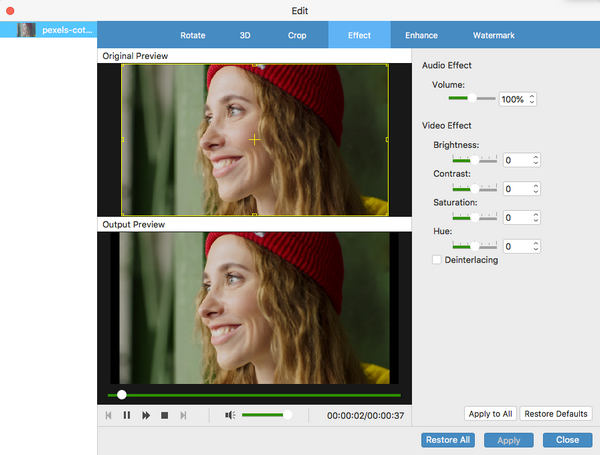
Step 2 Adjust the output effect
Click the edit button and you are allowed to adjust the brightness, saturation, contrast, hue and volume as you like.
Step 3 Clip video segment
You can clip any video segments and by click plus image to add clips.
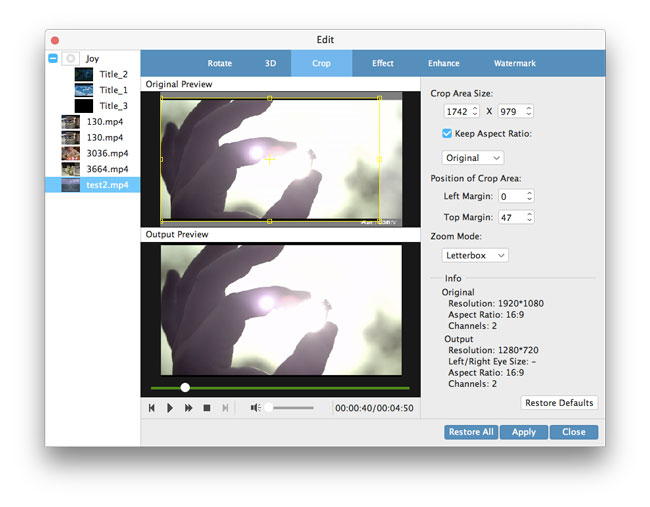
Step 4 Crop video
Choose the aspect ratio, zoom mode or set the height, width and other parameters to make the video adjusted to your screen.
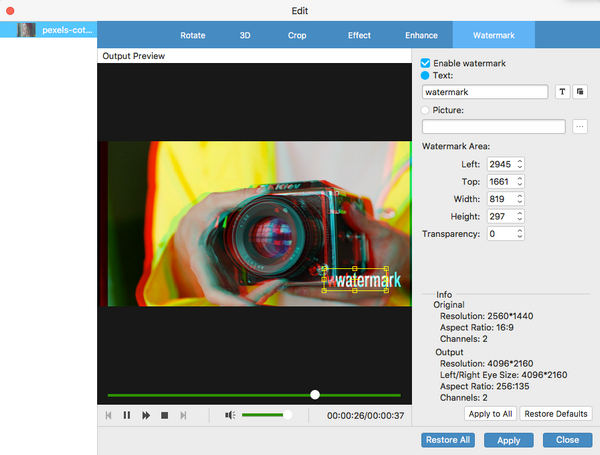
Step 5 Add watermark to your video
Enable watermark. Input text or select the picture you want to show. Also you can set the size, location and transparency of the watermark.
Step 6 Merge files into one
Select videos you want to merge and click the "Merge" button, you will get a new video consisting of several clips.

Step 1 Audio track and subtitle
Before the conversion starts, you are allowed to choose the audio track and subtitle you prefer.
Step 2 Video/Audio settings
In the Video Settings, you can select Encoder, Frame Rate, Resolution and Video Bitrate to convert your movie. While in the Audio Settings, you are allowed to select Encoder, Channels, Bitrate and Sample Rate.