 Mac Screen Capture
About | Privacy Policy | Terms of Use | Support | Contact Us
Copyright © 2026 Tipard Studio. All Rights Reserved.

Windows

Rip your favorite Blu-ray/DVD movies or videos to popular formats

Powerful software to play Blu-ray/DVD videos and audio

Create Blu-ray disc/folder/ISO file with your own video

Backup/Copy your favorite Blu-ray to disc/folder/iso files
Mac

Rip your favorite Blu-ray/DVD movies or videos to popular formats on Mac

Powerful software to play Blu-ray and popular video formats on Mac
Windows

Rip DVD to any popular video format quickly of full quality

Create DVD from videos and burn video to DVD/Blu-ray freely

Copy DVD to DVD disc/folder/ISO files in a 1:1 ratio
Mac

Rip DVD to any popular video format quickly of full quality on Mac

Burn or author a DVD from videos with subtitles and chapters on Mac

Copy DVD to DVD disc/folder/ISO files in a 1:1 ratio on Mac
Windows

Rip DVD, convert 4K video, edit, and upscale videos to 5K/8K

Repair broken videos with high accuracy and support many formats

Convert any video to MP3, MP4, MOV, WAV, and other 350 formats

Upscale resolution, optimize brightness and remove video noise

The easiest tool to capture screen, game, audio, etc. with high quality

Convert any 2D video to 3D video and convert 3D to 2D video

Convert 4K video to 4K/1080P and common videos

Convert TS video to various popular video/audio formats
Mac

Rip DVD, convert 4K video, edit, and upscale videos to 5K/8K on Mac

Repair broken videos with high accuracy and support many formats on Mac

Convert any video to MP3, MP4, MOV, WAV, and other 350 formats on Mac

Upscale resolution, optimize brightness and remove video noise on Mac

The easiest tool to capture screen, game, audio, etc. with high quality on Mac

Convert any 2D video to 3D video and convert 3D to 2D video on Mac

Convert 4K video to 4K/1080P and common videos on Mac

Convert TS video to various popular video/audio formats on Mac
Desktop

Rip and convert DVDs to MP3 and support other audio formats

Reset Windows Admin and Standard user account password in seconds

Accurately Convert any PDF file to Word with OCR

Convert PDF to Word, Excel, HTML and Image with OCR
Online

Easily remove watermarks from many image file formats free online

Points:0
Redeem
User Guide
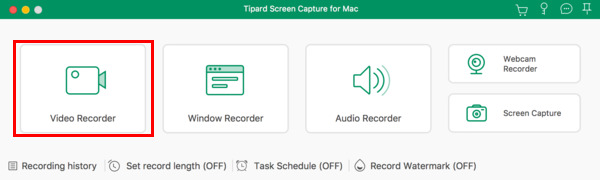
Step 1 Select Video Recorder
Open the program after installing it on your computer. Then select the Video Recorder option, if you want to capture your screen activities or record videos.
Step 2 Choose the capture size
When you capture your screen, video, or some other video tutorials, you should determine the capture size first. You can choose Full screen or customize the size by yourself.
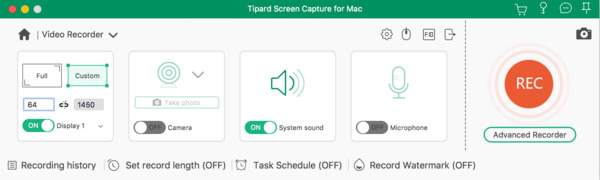
Step 3 Adjust webcam and audio settings
After choosing the recording area size, you need to decide whether to enable the Webcam, System Sound, and Microphone based on your needs.
Step 4 Record your screen/video
You can then click REC to start recording. While recording, you can add annotations and take screenshots as you like in real time. You can add shape, line, arrow, text, and more to the recording. If you want to capture the current scene on your screen, just click the Camera button to take a snapshot.
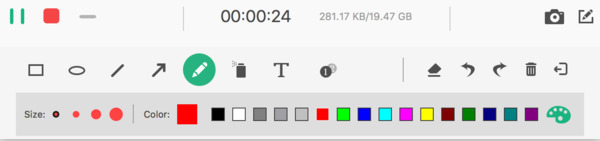
Step 5 Finish recording and preview
Once you complete the capturing process, click the red square to stop recording. And then the video preview shows up automatically. You can trim the video if you want to get rid of some unwanted parts. Then just click Save to save the video on your computer.
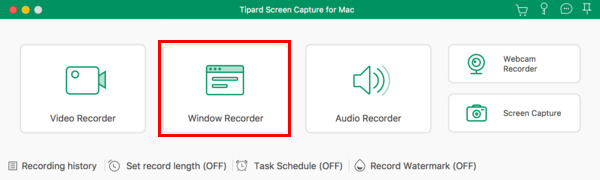
Step 1 Select Window Recorder
If you've opened multiple windows and would like to record one of them, select the Window Recorder option.
Step 2 Start recording
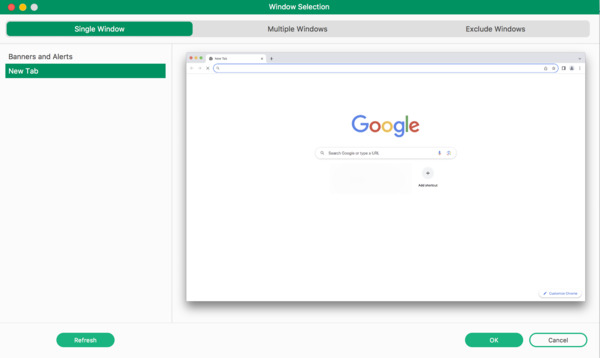
After that, you need to select the window you want to record.
Step 3 Adjust settings before recording
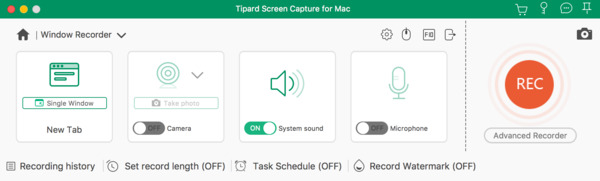
Decide if you want to enable the webcam, system sound, or microphone. Next, click REC to begin.
Step 4 End and save the recording
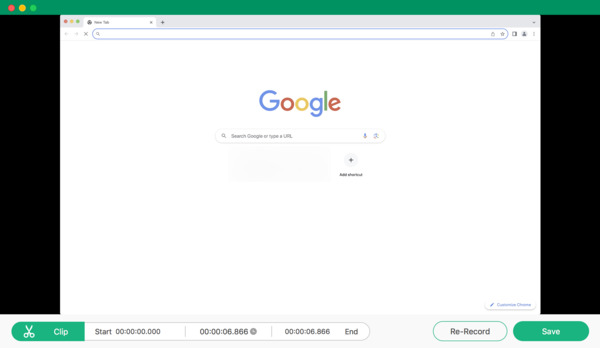
Click the Stop button to end recording. The editing window pops up, where you can clip the recording if needed. When you're done, click Save.
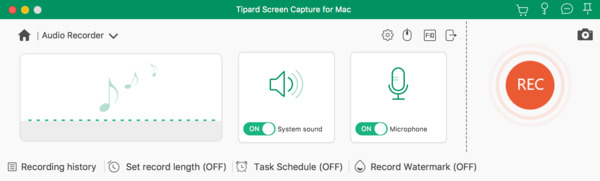
Step 1 Select Audio Recorder
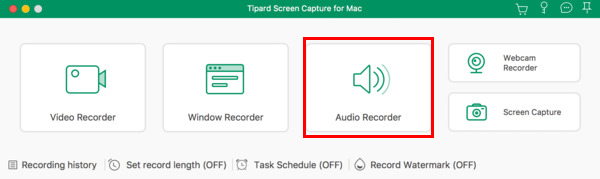
Select the Audio Recorder option if you want to capture any sound from your computer or microphone.
Step 2 Choose an audio source
Choose System Sound or Microphone as the audio recording source. Or you can select both of them according to your needs. When you're ready, click REC to capture your audio file.
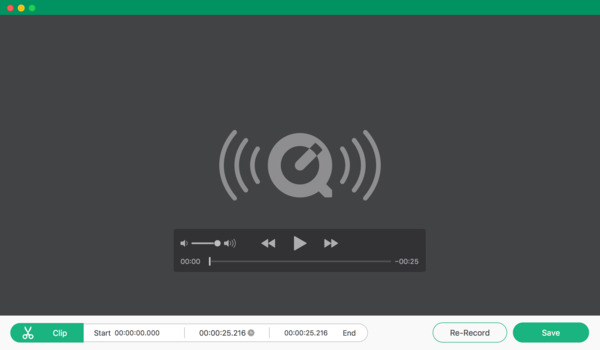
Step 3 Save recording and preview
After recording, please click the Stop button. Then you can pre-listen to the captured audio file. You can also clip the file as you like. Then click Save to save the audio on your computer.
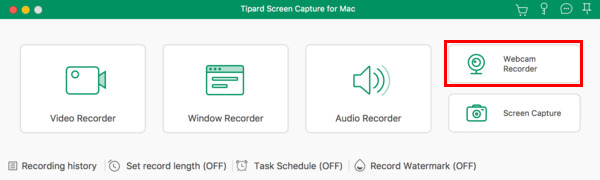
Step 1 Select Webcam Recorder
If you only want to record your webcam video, choose to the Webcam Recorder.
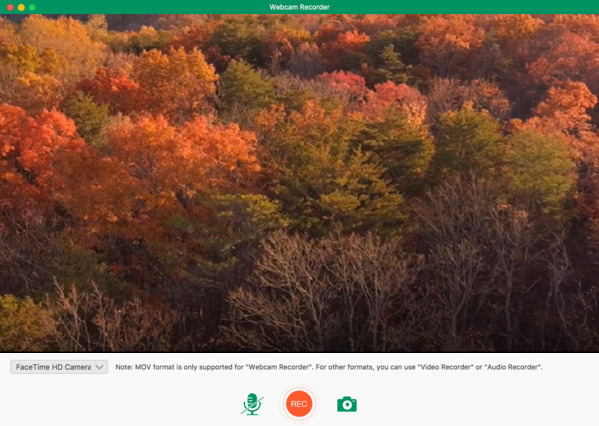
Step 2 Adjust webcam recording settings
Before you start recording, you need to adjust the settings for this webcam recording process. You can change your camera device and enable/disable your microphone. After setting, please click the REC button to start shooting.
Step 3 Capture your webcam video
You can end the recording by clicking the Stop button. Then the captured webcam video will be automatically saved to your computer.
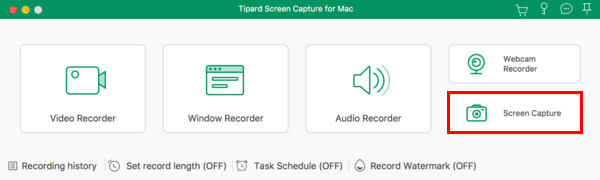
Step 1 Select snapshot
Want to take a screenshot of your screen? Select Screen Capture.
Step 2 Select capturing area
Drag your mouse to select the area you want to capture.
Step 3 Edit and save
You can add circles, text, arrows, and more to the screenshot as you like. After that, click the Save button.
