Best Way on How to Use DaVinci Resolve to Reverse Clips
Many people are searching for the best video reverser application they can use on their computers. Yet, other people could not find the video reverser software they prefer, especially since most of the best video reversers are hard to use. Fortunately, we found an application that can help you reverse your videos easily: DaVinci Resolve. DaVinci Resolve is a video editing application that allows you to reverse your videos. Read this guidepost more to learn the steps about how to use how to reverse a clip in DaVinci Resolve.
Part 1. How to Reverse Videos in DaVinci Resolve
DaVinci Resolve is a video editing application that is fully featured, incredibly amazing, and free to use. DaVinci Resolve is also among the most popular video editing applications because it has many video editing features that are easy to use, which makes it a user-friendly application. Moreover, DaVinci Resolve has advanced editing features, like stereoscopic 3D tools, FX filters, Fairlight FX audio plugins, advanced HDR grading, HDR scopes, and more. Its interface is clear and well-built, making it look like professional editing software, like Adobe Premiere Pro. In addition, this excellent video editing software's interface has seven pages, Color, Cut, Deliver, Edit, Fairlight, Fusion, and Media. There are also tons of transitions that you can use for editing your videos so that your output will be more fantastic and can pique the attention of your viewers.
You can use two methods to reverse your videos using DaVinci Resolve. First, the Speed Change option, and second, the Retime Curve option. Each method has different purposes; the first is for reversing the whole clip, and the second is for reversing a part of the clip. And without further ado, here are the methods on how to reverse a video in DaVinci Resolve.
Method 1. How to Reverse an Entire Video Using DaVinci Resolve
Step 1To begin, download and install DaVinci Resolve on your desktop, and open the app once installed. And then, import the video you want to reverse and select the video clip on your timeline.
Step 2Next, navigate to the Inspector Tab at the playback area's left.
Step 3And in the Inspector Tab, scroll down until you locate the Speed change window, then click it.
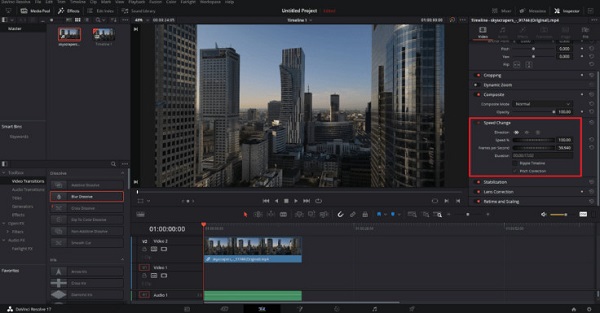
Step 4And then, you will see the Direction section, and click the arrows pointing to the left. And after clicking these arrows, you can play your video in reverse. You can find the controls for adjusting the speed of your video in the same menu.
Method 2. How to Reverse Part of Clip Using DaVinci Resolve
You can also reverse your video using the Retime Controls and the Retime Curve. Using this method, you can also make smooth acceleration and deceleration. This will allow you to create an amazing boomerang effect on your clip.
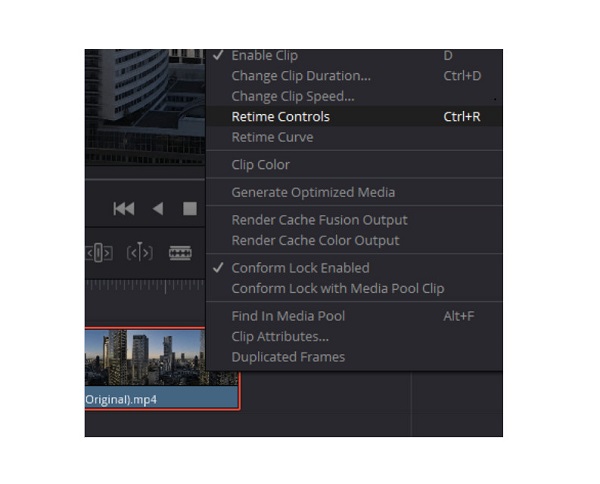
Step 1Import a video clip, then right-click it on the Edit tab. And then select the Retime controls option.
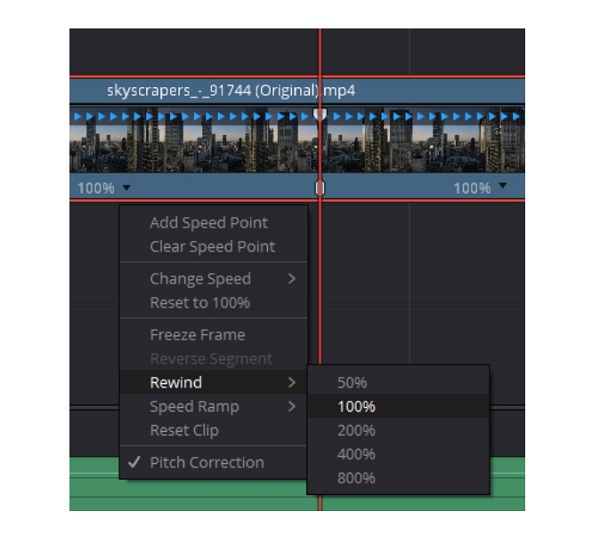
Step 2You will see some new controls on your timeline, then click the inverted triangle at the bottom part of the clip. And then a menu will appear.
Step 3You will then see that each of your segments has an inverted triangle. Click one of the inverted triangles on the clip that you want to reverse, and select the Rewind option. You can now select the speed for the reverse effect. You can select between 50, 100, 200, 400, and 800 percent speed.
Step 4After that, you will see two markers indicating the reverse segment's start and end. You can adjust these markers to select the part of the clip you want to reverse. For more exquisite speed controls, right-click the clip and select the Retime Curve.
Step 5And then, below your video clip, you will see a curvature graph where you can adjust the speed of your reversed clip and make smooth accelerations. Move your mouse to the curve where you want to put a keyframe, and press Alt + Click.
Step 6Create two keyframes; then, you can create fantastic speed transitions. Click the Curved keyframe icon to access the curvature handles to make smoother transitions.
Pros and Cons of Using Davinci Resolve
Pros:
- • It has many editing tools.
- • It has motion graphics and audio editing.
- • It supports high-definition videos.
- • It supports most standard video files.
Cons:
- • It needs many system resources.
- • It is a complex software that takes time to learn.
Part 2. Alternative Way to Using DaVinci Resolve
After using DaVinci resolve, many users sometimes search for a more convenient and easier-to-use application. And in this part, we will present the best video reverser for your computer.
Tipard Video Converter Ultimate is among the best video reversers you can use on your computer. This offline video reverser can reverse your video losslessly. You also have the option to reverse your video entirely or by selecting some part of it. Moreover, you don't need to worry about the video files you will upload because it supports all video formats, including MOV, MKV, FLV, VOB, MP4, MPEG, WMV, M4V, and 500+ more. Also, Tipard Video Converter Ultimate has tons of advanced editing features, like a video reverser, video watermark, volume booster, 3D maker, and more.
Furthermore, it is a user-friendly application with an intuitive user interface. It also supports videos with high quality and exports them in the same quality. Tipard Video Converter Ultimate is downloadable on all operating systems, like Windows, macOS, and Linux.
Step 1Download Tipard Video Converter Ultimate by clicking the Download button below. And then, follow the installation procedure, then launch the app.
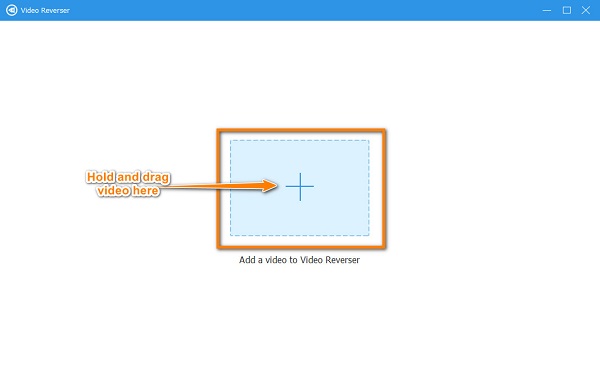
Step 2On the software's main user interface, go to the Toolbox, and select the Video Reverser feature.

Step 3And then, tick the plus sign button to upload the video you wish to reverse. You can also hold and drag your video file from your computer files to the plus sign box to upload videos.
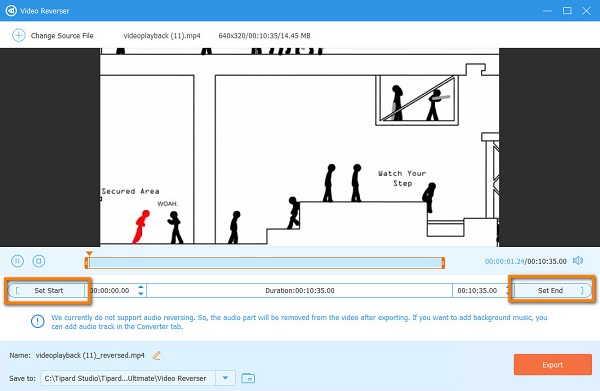
Step 4Next, after uploading your video file, Tipard Video Converter Ultimate will automatically reverse your video file entirely. Click the Set Start and Set End button to select the part you like to reverse.
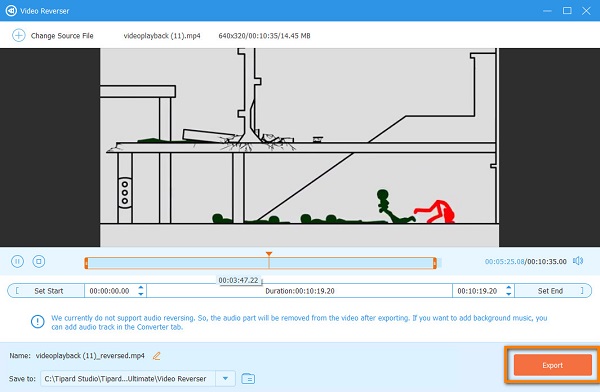
Step 5Lastly, click the Export button to save your output on your device. And that's it! You can now view your reversed video in your computer folders.
Part 3. FAQs about How to Reverse Videos in DaVinci Resolve
Is DaVinci Resolve available on Mac?
- Yes. DaVinci Resolve is downloadable on almost all operating systems, like Mac, Windows, and Linux.
Does DaVinci Resolve support AVI formats?
- DaVinci Resolve supports the most standard video formats, including AVI, MP4, MOV, and MKV.
How do I reverse action in DaVinci Resolve?
- Fortunately, DaVinci Resolve's developers created several ways to undo and redo actions. You can press CTRL + Z on your keyboard to undo an action.
Conclusion
Now that you know the steps about how to reverse a clip using DaVinci Resolve, you can now download it and follow the steps we provided. But if you prefer using an easier-to-use application with loads of video editing features, download Tipard Video Converter Ultimate now.