Learn the Steps on How to Reverse a Video in After Effects
After Effects is the leading 2.5D animation software used for animation, creating visual effects, and motion picture compositing. This video editing software is famous for many professional video editors because of its tools and features. Moreover, After Effects is commonly used in films, television shows, and web video creation. And with Adobe After Effects, you can also reverse your videos. Although After Effects is not a beginner-friendly tool, we will teach you how to reverse your video with simpler steps. Therefore, read this article to learn the easy steps to reverse videos in After Effects.

Part 1. How to Reverse Videos in After Effects
Many beginners have difficulty using Adobe After Effects because the interface and tools are difficult to understand. You need further practice and knowledge when using this amazing video editing application. And if you are searching for a great application that allows you to reverse your videos, then Adobe After Effects can be a choice. Do not worry because, in this part, we will show you an easier way to reverse a clip in After Effects. In this tutorial, we will show you four ways to reverse a video in After Effects.
1. Use the Time-Reverse Layer
Step 1 To begin, download the Adobe After Effects application, and install it on your PC. Open the video that you want to reverse. Then, save the section as a different or separate file for security purposes.
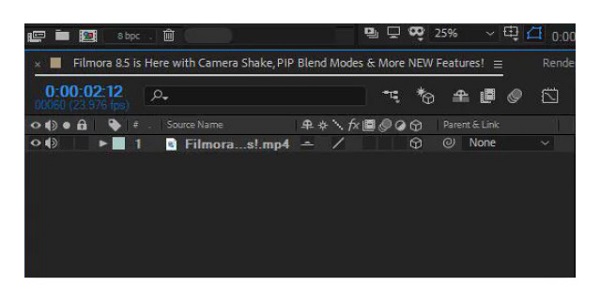
Step 2 Then, drag and drop your video file to the New Composition icon. Right-click the layer that you want to use for the reverse video effect. Then, a drop-down menu will appear on your screen.
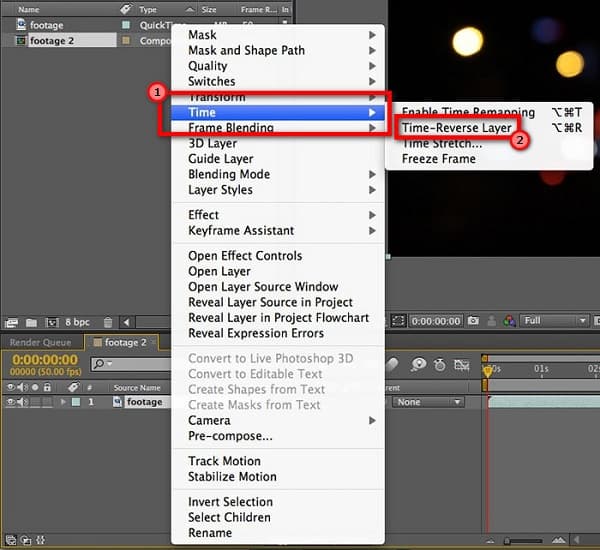
Step 3 Next, navigate to Time > Time Reverse Layer to open another window. In the new window, you can adjust the speed where you want to play the video clip.
Step 4 And then, click the apply effect button and wait for it to be rendered. You can then play the preview of your reversed video to check if it appeared as you want. Once you are satisfied with the output, you can save the file.
Step 5 If the video clip you save is in a separate file, you can save it and export it. You can now choose if you want to return the original file with the new one you reversed using Adobe After Effects.
Even though it is not easy to use After Effects to reverse clips, we hope these steps can help you achieve your goal.
2. Use Time-Stretch
Step 1 Open the After Effects application, then import your video into After Effects. And then, drag and drop your video file on the timeline.
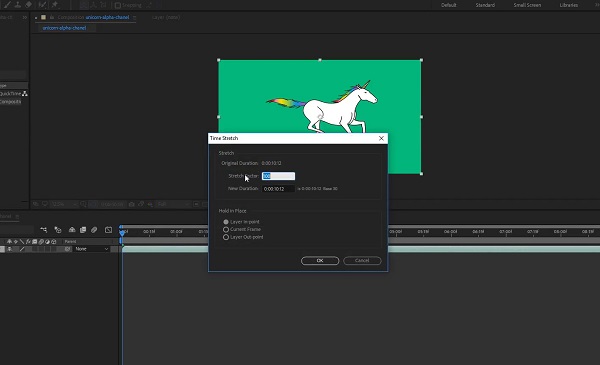
Step 2 In the timeline, right-click on your video layer and scroll up to the Time option.
Step 3 Then, select Time-Stretch and type -100% on the Stretch Factor. On your keyboard, press the [ key so that your layer will start where the blue indicator line is located.
3. Use Time-Remapping
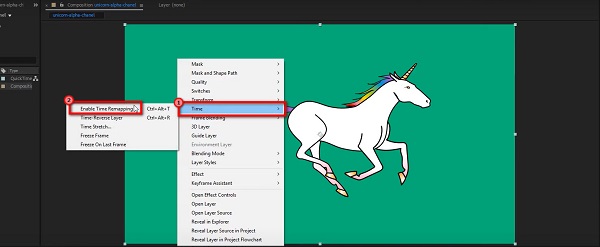
Step 1 First, open Adobe After Effects, then drag and drop your video file on the Timeline. And on your timeline, right-click on the video layer.
Step 2 Scroll up to Time and select the Enable Time Remapping option. Take the first keyframe, then drag it to your layer's end.
Step 3 Next, take the first keyframe, and drag it at the beginning of your layer. And adjust the keyframes of your video. Now, you can see your video play in reverse.
Tip. To increase the speed of your video, bring each frame closer together.
4. Use Time-Reverse Keyframes
You can use the Time-Reverse Keyframes option when you have a video with tons of keyframes. And without using the time-reverse option, you can still reverse the keyframes using After Effects.
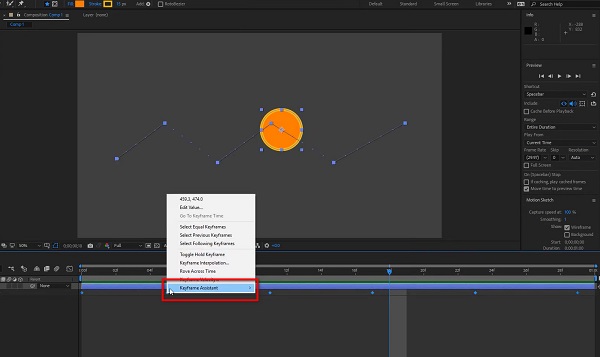
Step 1 First, highlight the keyframe that you want to reverse. And then, right-click and go to KeyFrame Assistant.
Step 2 After, select the Time-Reverse Keyframes.
Step 3 And that's it! You can now see the keyframes you select are switched and ordered in reverse.
And those are the four ways to make a reverse video in After Effects. Although it is quite challenging to use, it's still a great app for reversing a video.
Pros and Cons of Using After Effects to Reverse Videos
Pros:
- • With Adobe After Effects, you can use four methods to reverse your video.
- • The quality of the clip or video will not be affected.
- • You can use many editing features and tools to enhance your video.
- • It supports almost all video formats, like MP4, AVI, MOV, MKV, and WMV.
- • Downloadable on all operating systems, including Windows and macOS.
Cons:
- • It is not a beginner-friendly application.
- • It is not free to use.
Part 2. Easier Way to Reverse Videos than Using After Effects
As mentioned above, Adobe After Effects is not easy to use. So, many beginners are looking for an alternative to reverse their videos. Luckily, we found the best alternative to reverse your videos. In this part, we will show you an alternative for After Effects to play video backward.
Tipard Video Converter Ultimate is the most searched video reversing application that you can use offline. This software is initially a video converter with tons of advanced editing features, like a video reverser, video metadata editor, volume booster, video watermark remover, and more. In addition, it can reverse your video entirely or by selecting parts of your video. You can also upload files easily because it supports over 500+ video formats. Moreover, it has an easy-to-use user interface, making it a beginner-friendly application. Plus, it does not affect the quality of your video when you reverse it.
How to reverse a video file using Tipard Video Converter Ultimate:
Step 1 Download and install Tipard Video Converter Ultimate on your desktop by ticking the Download button below.
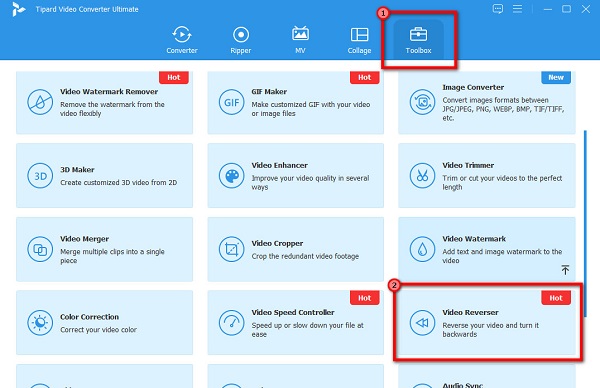
Step 2 And then, on the app's main user interface, go to the Toolbox panel. The list of video editing tools will appear. Select the Video Reverser feature.
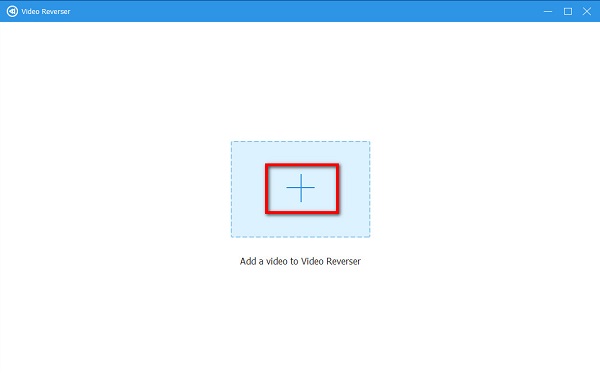
Step 3 Next, hit the plus sign icon to upload the video you want to play backward.
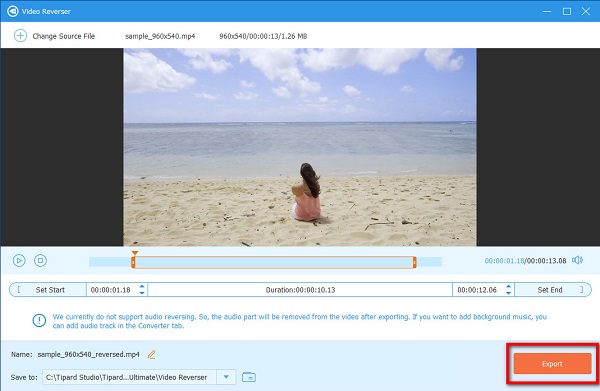
Step 4 After uploading your file, Tipard Video Converter UItimate will automatically reverse your video. You can also select the part you want to reverse by clicking the Set Start or Set End button.
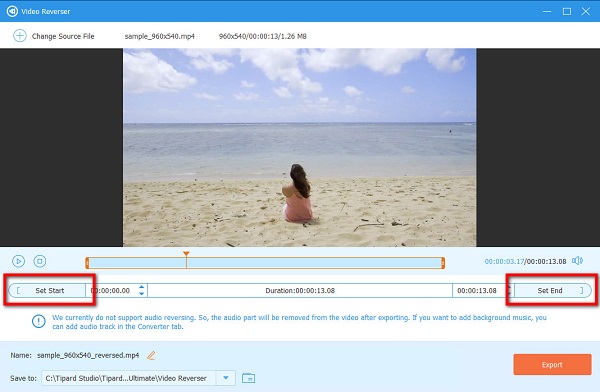
Step 5 And finally, click the Export button to save your output on your device.
Part 3. FAQs about How to Reverse Videos in After Effects
How much does Adobe After Effects cost?
Adobe After Effects has a 7-day free version. But after the free version, you need to purchase the app for $20.99 monthly.
Is Adobe After Effects a one-time purchase?
Adobe After Effects can only be purchased from Adobe by subscribing to Creative Cloud. And there is no way you can purchase After Effects for a one-time cost.
What should I use, Adobe After Effects or Premiere Pro?
Adobe Premiere Pro is best for cutting, arranging, and enhancing videos you have already taken. On the other hand, After Effects is the industry standard for editing motion graphics and visual effects.
Conclusion
Now that you know how to play video in reverse in After Effects, you can work independently. Whether what ways you want to use to reverse your video in After Effects, you can surely reverse your video effectively. But if you prefer an easier method, download Tipard Video Converter Ultimate now.