
Lots of people like to reverse videos for many reasons. You can make a dropped ice cream jump back on its cone, or you can make water go back into a glass. You may want to rewind a funny moment to laugh again. Some kids even reverse sports clips to look like they are superheroes. It is also good if you need to fix a scene and tell the story backward. All these fun ideas are easy to do with iMovie. Right here, you will learn how to reverse videos in iMovie step by step. Let us get started and have some fun!
Part 1. How to Reverse Videos in iMovie (Mac)
On a Mac, iMovie makes it easy to reverse videos if you want to play something backward. You can pick any clip, turn on the reverse option, and it will play from the end to the start. It works well for small home videos or even school projects. Right here, you will see how to make a video reverse in iMovie on your Mac to make videos play backward in a simple way.
Step 1 Open iMovie on your Mac and press the Plus button to make a new movie project.
Step 2 Bring in your video by clicking Import Media. After that, drag your video to the timeline at the bottom.
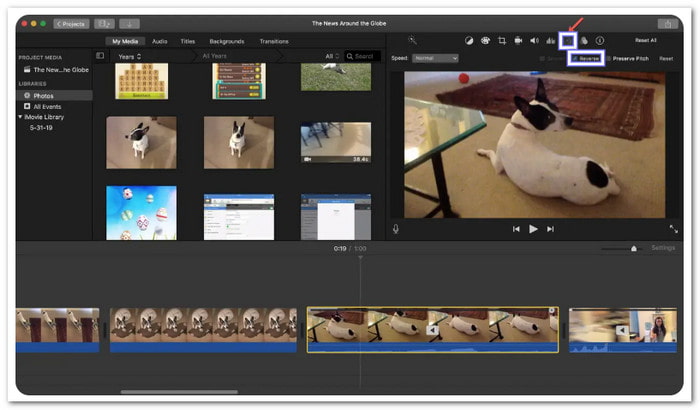
Step 3 Click on the video in the timeline to pick it, and then click the Speed button above the preview window.
In the speed controls, check the box that says Reverse. A backwards arrow will show on your clip to let you know it worked. If you want, you can also move the speed slider to make your clip faster or slower.
Step 4 If the reversed audio sounds weird, you can mute it. Right-click the clip, click Detach Audio, and then delete the sound part. You can add music instead if you like.
Step 5 Play your project by hitting the spacebar to see how it looks. When you are happy, click Share from the File menu to save your reverse video.
Part 2. Reverse on iPhone/iPad (Mobile Version)
Unfortunately, iMovie on your iPhone or iPad cannot reverse videos on its own. But you can still do it by using another application, and one good application is Reverse Cam. It is simple and free and lets you flip videos backward fast. You can even record straight from the application or pick clips from your file.
After you use Reverse Cam to reverse your video, you can move it to iMovie to finish your edits. iMovie is good for adding text, trimming parts, putting in background music, and adding filters. You can also modify how fast the video plays. That helps if you want slow motion or a fast rewind style.
Step 1 Get the Reverse Cam from the App Store, and once installed, open it on your device.
Step 2 In Reverse Cam, you can record a new clip or pick one from your library; choose the one you want to reverse.
Step 3 Tap Reverse, and please wait for it to finish. When done, the reversed video will be saved to your Photos.
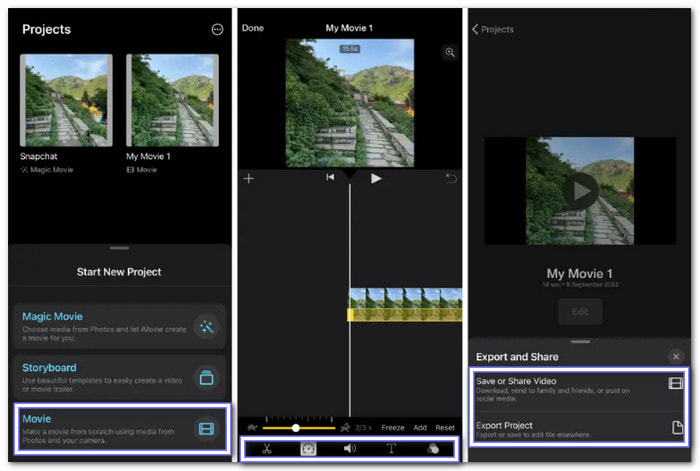
Step 4 Open iMovie and bring in the reversed clip from your Photos. You can now add music, trim, or even add text. This way, you still get to make your video go backward and give it more style with iMovie.
Part 3. Advanced Techniques
Reversing a video is fun, but you can do way more with it. You can add neat tricks that make your video clips look super cool. Here is how you can try some advanced ideas in iMovie on a Mac.
1. Partial Reverses
Let us say you want to reverse just part of a clip, not the whole thing. First, split the clip. You can do that by right-clicking the clip in the timeline and picking Split Clip. After you split, choose the part you want to reverse. Click the Speed tool and turn on the Reverse box for just that part. This way, only one piece plays backward, while the rest play forward like normal.
2. Combined Effects
You can also stack more edits on top of a reversed video. After you reverse, you can trim, crop, or even change the colors. Just treat the reversed clip like any other clip in your project. You can move it, shorten it, or layer titles and sound.
3. Reverse + Slow motion
You can make a backward video even cooler with slow motion. First, reverse the clip by checking the Reverse box in the Speed menu. Then, move the Speed slider to the left to slow it down. When you play it, you will see your video go backward in slow motion.
4. Reverse + Filter
Adding a filter on top of a reversed video is easy. After you set your clip to reverse, click the Clip Filter button above the viewer. Pick a filter you like, such as black-and-white or vintage. It gives your backward video a whole new look. You can test out different filters until you find the one that fits your story.
Part 4. Best iMovie Alternative to Reverse Your Videos
Tipard Video Converter Ultimate is the top alternative to iMovie if you want to reverse your videos. It works on Mac just like iMovie, and it also runs on Windows. With its video reverser feature, you can flip your video backward in seconds. You can reverse the whole video or just part of it. Moreover, it provides editing features to refine and level up your video before exporting.
Below is the guide on how to reverse your videos using Tipard Video Converter Ultimate; it is easy, so it will not take much of your time.
Step 1 Get Tipard Video Converter Ultimate
First and foremost, download and install Tipard Video Converter Ultimate on your Mac or Windows.
Step 2 Go to Toolbox
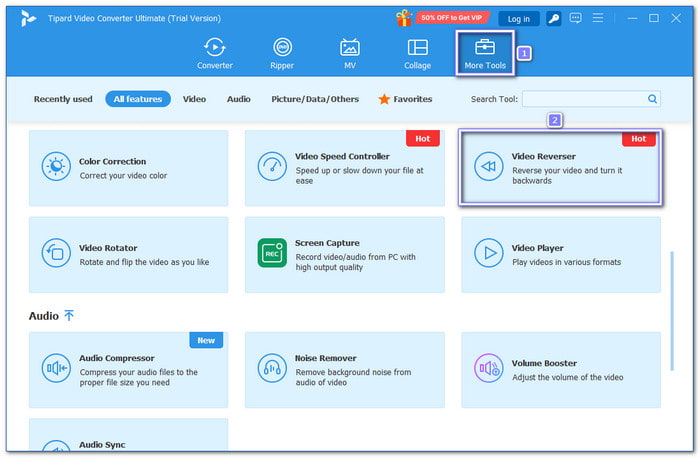
When Tipard Video Converter Ultimate is open, look at the top tabs and click on More Tools. Inside More Tools, find and select the Video Reverser option. It is what you need to reverse your video.
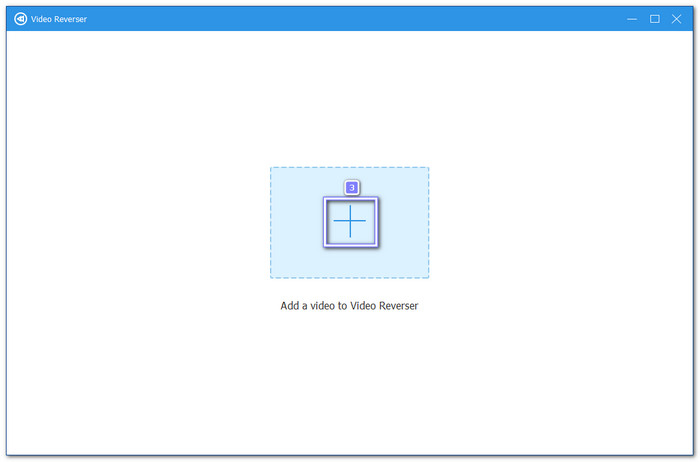
Step 3 Import Your Video
Click the Plus button in the center of the screen. It lets you pick your video from your computer. Once you pick it, it will load it for you to edit.
Step 4 Choose What to Reverse
You can reverse your whole video or just part of it. Pick the part you want by setting the start and end points. If you want the whole clip backward, leave it as is.
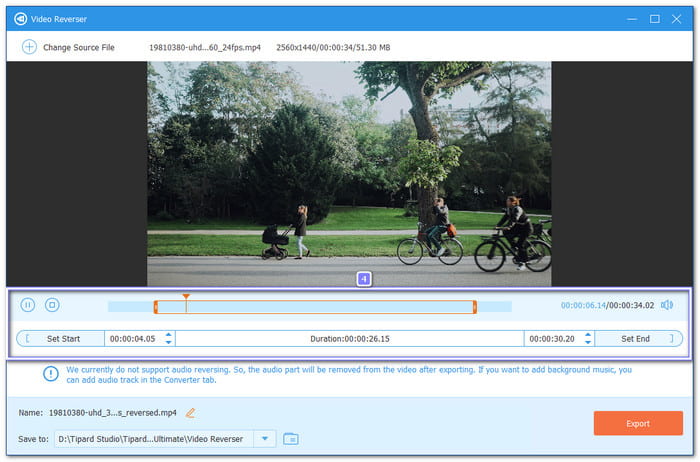
Step 5 Export Your Reversed Video
Lastly, click the Export button. Tipard Video Converter Ultimate will save your reversed video to your computer. Now, you can watch it or share it with friends.

Tipard Video Converter Ultimate does not support audio reversing right now. So, after you export, the video will have no sound. But do not worry! You can add audio if you want; you can do this under the Converter tab.
Conclusion
It is so easy to learn how to reverse a clip in iMovie. You click a few buttons, and your video plays backward in seconds. But if you still want another option, we are happy to recommend Tipard Video Converter Ultimate. It can also reverse your videos and even works on Windows and Mac. Additionally, it has other tools to help you make your videos look even better. Try it!
More Reading


About the Author
