Learn the Best Way on How to Use Shotcut to Reverse Videos
Shotcut is one of the most known video editing platforms that you can use to edit your videos professionally. This video editor has many editing options that you would expect only in advanced and paid video editors. And did you know? This fantastic video editing software has a feature to reverse your videos. Yes, that is correct! If you want to highlight a specific part of your video, then Shotcut might be the best tool for you. Continue reading this blog post to learn the steps on how to use Shotcut to reverse videos.
Part 1. How to Reverse a Video in Shotcut
Shotcut is a video editing software that you can use offline. It is one of the video editing programs used by pro and novice editors. Shotcut became famous also because it is free to use. The Shotcut video editor was released in 2004 and is wholly restructured into its current form. Moreover, it is a cross-platform video editor, which means users can switch systems without experiencing compatibility issues. You can reverse your video with Shotcut by going to the Properties panel. And as mentioned above, Shotcut offers tons of video editing features, like timeline builder, audio features, video effects, and more.
Furthermore, it supports numerous file source formats, such as HEVC, GIF, MP4, HDC, GXF, and more. Importing files to Shotcut is made a lot easier because it uses a process known as native timeline editing, which means that files do not need to be uploaded or converted by the software. Plus, keyframing and transitions are available in this software, and exporting a project is easy.
In addition, you will not have trouble with the system requirement of this video editing software because it is downloadable on Mac, Windows, and Linux devices. It is easy to reverse a video using Shotcut, so better read the steps below to learn how.
How to reverse a video on Shotcut
Step 1To begin, download and install the Shotcut video editor on your computer. After installing it, launch the application on your device.
Step 2Once you open the app, import your video by dragging and dropping your video file into the interface. And then, select your video by left-clicking your mouse.
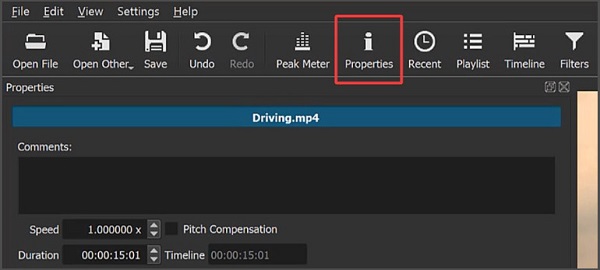
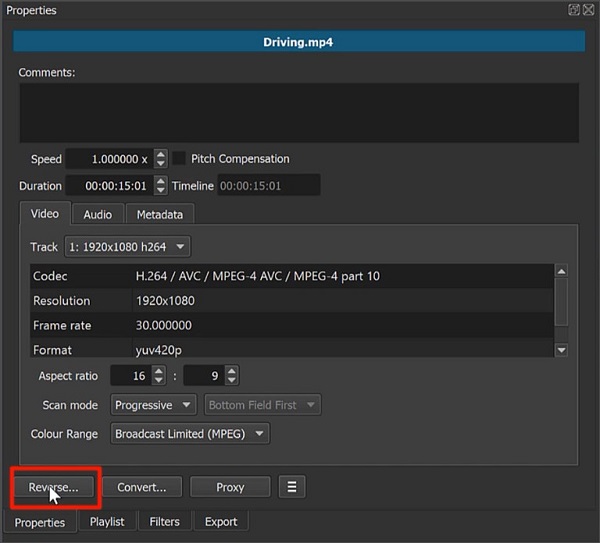
Step 3With the selected video, click the Properties tab on the top of the interface to prompt the properties panel on the left side of your screen.
Step 4A new panel will appear where you should locate the Reverse option. If you cannot find the reverse feature on the panel, you are probably using the older version of the application. But if you found the Reverse button with three lines, click this button.
Step 5Clicking Reverse will bring up a panel that contains a slider where you can choose the quality of your conversion. If you want to edit your video continually, move the slider toward the best.
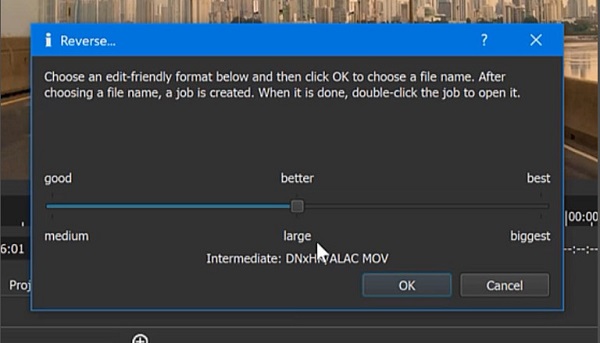
Once you are finished, you can save the newly reversed video on your hard drive. Then on the right panel, the conversion process will start, and the original video will be replaced with the reversed video.
Note:The reverse function of Shotcut reverses both the audio and the video. Therefore, if you want to dissociate the video from the audio, or if you want to mute the audio of your video, right-click on the video and click Detach audio.
Pros and Cons of Using Shotcut to Reverse Videos
Pros:
- • You can download the software for free.
- • It has tons of fantastic editing tools.
- • Accepts multiple video file layers.
- • It has a drag and drop function.
Cons:
- • It has no preview for effects and transitions.
- • Has applied effect changes; for instance, it has lag issues when you are color grading.
Part 2. Alternative Way to Using Shotcut to Reverse Videos
Shotcut is a complete package when it comes to video editing software. However, it has a list of setbacks, just like other video editing applications. Shotcut does not have a preview effect which many people are searching for when reversing a video. So, if you want a video reverser with a preview feature, consider your problem solved.
Tipard Video Converter Ultimate might be the best choice for you when searching for the best video reverser software. This application is initially a video converter with many advanced editing features, including a video reverser, video merger, video trimmer, volume booster, and many more. And on its video reverser feature, you can entirely reverse your video or select a portion you want to reverse. Additionally, you can upload high-resolution videos to the application in any video format, such as MP4, AVI, M4V, WebM, VOB, FLV, and 500+ more formats. Also, Tipard Video Converter Ultimate has an intuitive user interface, which makes it a beginner-friendly application. You also do not need to be anxious about the quality of your videos because it can reverse your video files without compromising the quality.
Furthermore, it has a preview feature where you can assess your output before exporting it. Tipard Video Converter Ultimate is available on all platforms, like Windows, Mac, and Linux. If you are interested in using this excellent video reverser, follow the simple instructions below.
Step 1 First, download Tipard Video Converter Ultimate on your device by clicking the Download button below for Windows or Mac. Follow the installation process, then launch the app once installed.
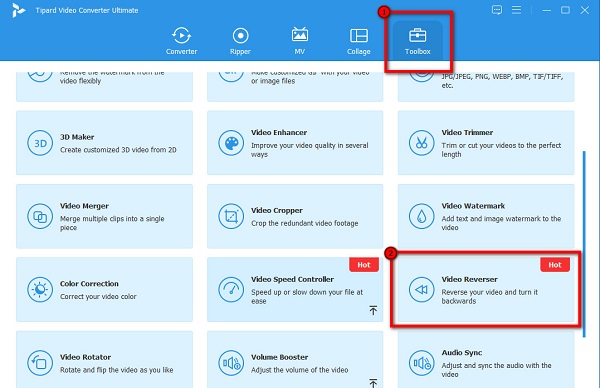
Step 2And then, navigate to the Toolbox panel above the software's interface. And then, you will see the set of editing features you can use. Select the Video Reverser feature from the list of tools.
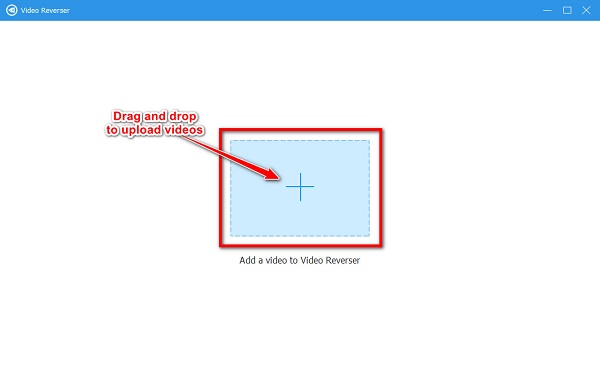
Step 3And to upload a video, click the plus sign icon or drag and drop your file from your computer files to the plus sign box.
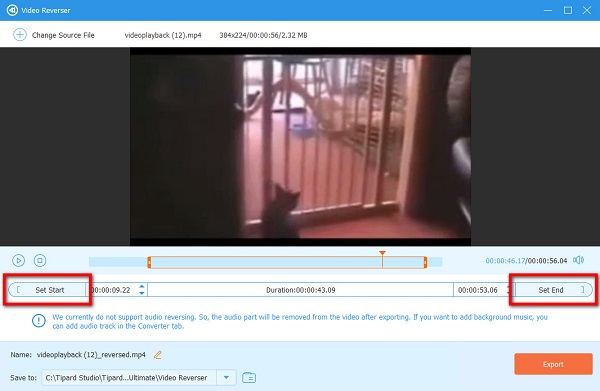
Step 4After uploading the video, Tipard Video Converter Ultimate will automatically reverse your video. But if you want to reverse a certain part of your video, click the Set Start or Set End button.
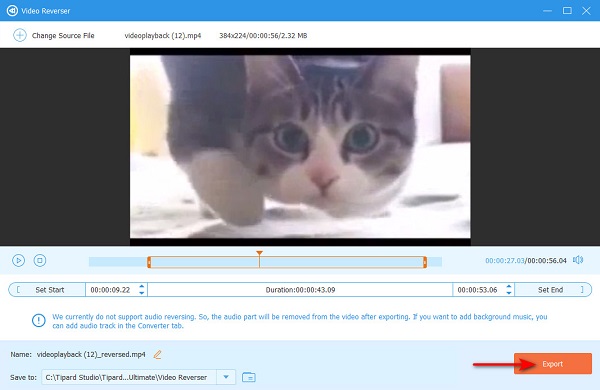
Step 5 You can now watch the Preview of your output before saving it. Click Export to save your video on your computer files.
Further Reading:
Complete Review About How to Use Ezgif to Reverse Videos
Learn How to Use FFmpeg to Reverse Videos [Simple Steps]
Part 3. FAQs about How to Use Shotcut to Reverse Videos
Does Shotcut support MOV files?
Yes. Shotcut is a video editing application that supports many video formats, including MOV, MKV, MP4, and other standard video file formats.
Can you flip videos using Shotcut?
Shotcut has various editing tools that you can use to edit or enhance videos. One of its known features is the video flipper.
How much does Shotcut cost?
Shotcut is a free, open-source, and cross-platform video editor. Therefore, you do not need to worry about the cost of the application.
Conclusion
Indeed, you can use Ezgif to reverse videos. And if you are searching for the best online video reverser, Ezgif might be the best option for you. But if you prefer a video reverser that contains many advanced editing features, download Tipard Video Converter Ultimate now.