DVD Cloner for Mac
About | Privacy Policy | Terms of Use | Support | Contact Us
Copyright © 2026 Tipard Studio. All Rights Reserved.

Windows

Rip your favorite Blu-ray/DVD movies or videos to popular formats

Powerful software to play Blu-ray/DVD videos and audio

Create Blu-ray disc/folder/ISO file with your own video

Backup/Copy your favorite Blu-ray to disc/folder/iso files
Mac

Rip your favorite Blu-ray/DVD movies or videos to popular formats on Mac

Powerful software to play Blu-ray and popular video formats on Mac
Windows

Rip DVD to any popular video format quickly of full quality

Create DVD from videos and burn video to DVD/Blu-ray freely

Copy DVD to DVD disc/folder/ISO files in a 1:1 ratio
Mac

Rip DVD to any popular video format quickly of full quality on Mac

Burn or author a DVD from videos with subtitles and chapters on Mac

Copy DVD to DVD disc/folder/ISO files in a 1:1 ratio on Mac
Windows

Rip DVD, convert 4K video, edit, and upscale videos to 5K/8K

Repair broken videos with high accuracy and support many formats

Convert any video to MP3, MP4, MOV, WAV, and other 350 formats

Upscale resolution, optimize brightness and remove video noise

The easiest tool to capture screen, game, audio, etc. with high quality

Convert any 2D video to 3D video and convert 3D to 2D video

Convert 4K video to 4K/1080P and common videos

Convert TS video to various popular video/audio formats
Mac

Rip DVD, convert 4K video, edit, and upscale videos to 5K/8K on Mac

Repair broken videos with high accuracy and support many formats on Mac

Convert any video to MP3, MP4, MOV, WAV, and other 350 formats on Mac

Upscale resolution, optimize brightness and remove video noise on Mac

The easiest tool to capture screen, game, audio, etc. with high quality on Mac

Convert any 2D video to 3D video and convert 3D to 2D video on Mac

Convert 4K video to 4K/1080P and common videos on Mac

Convert TS video to various popular video/audio formats on Mac
Desktop

Rip and convert DVDs to MP3 and support other audio formats

Reset Windows Admin and Standard user account password in seconds

Accurately Convert any PDF file to Word with OCR

Convert PDF to Word, Excel, HTML and Image with OCR
Online

Easily remove watermarks from many image file formats free online

Points:0
Redeem
User Guide
With Tipard DVD Cloner for Mac, you can create perfect backups to preserve and share DVDs on your Mac. Choose from 3 copying modes to clone your DVD to disc, folder, or ISO with only a few simple clicks.
Download and install Tipard DVD Cloner on Mac, then launch the program.
Step 1 Launch Tipard DVD Cloner on your Mac. Click Help and select Register from the dropdown.
Step 2 Type the email address you used to purchase the product, click Send, and enter the verification code sent to your email. Then click Log in. An account will be created automatically if you haven't registered.
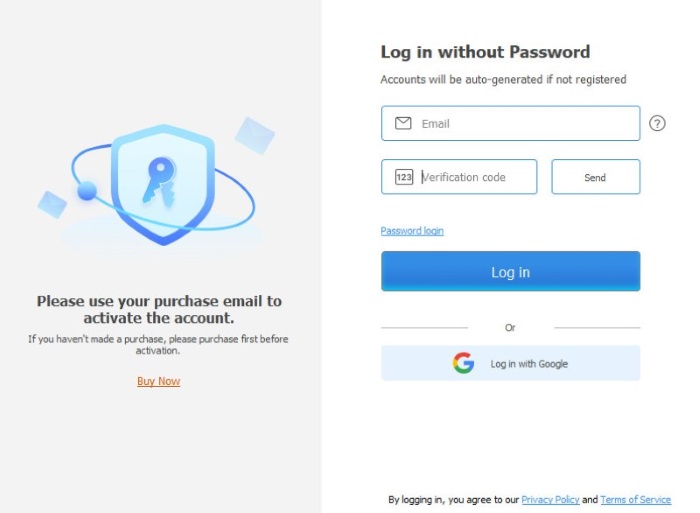
Also, you can choose Password login to log in to an existing Tipard account, or Log in with Google.
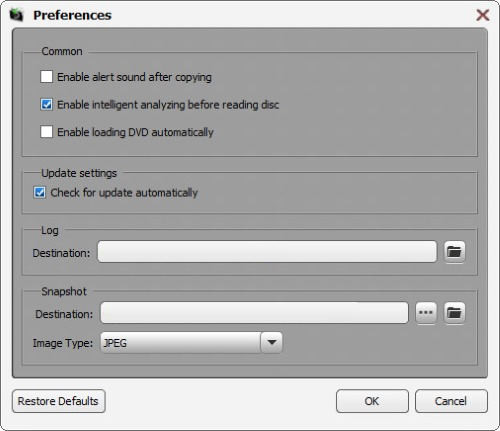
Step 1 Click the software icon and find Preferences from the dropdown.
Step 2 After you open the Preferences window, you may change common settings, update settings, and save settings.
Step 1 Click Help and then select Check Update from the dropdown.
Step 2 Tipard DVD Cloner begins checking. Once it detects an update, it informs you so you can download and install it immediately. When its version is already up to date, you will see a notification saying: "Tipard DVD Cloner is up to date".
Step 3 Click OK to finish the process.
To activate the auto-update of Tipard DVD Cloner, open Preferences and tick on Check for update automatically. You'll get a message every time an update is available.
Step 1 If you want to clone from a physical source disc, insert it into the computer before you start. Otherwise, simply launch Tipard DVD Cloner.
Step 2 Click the Source box to select the source from a disc (if any), a DVD folder, or an ISO.
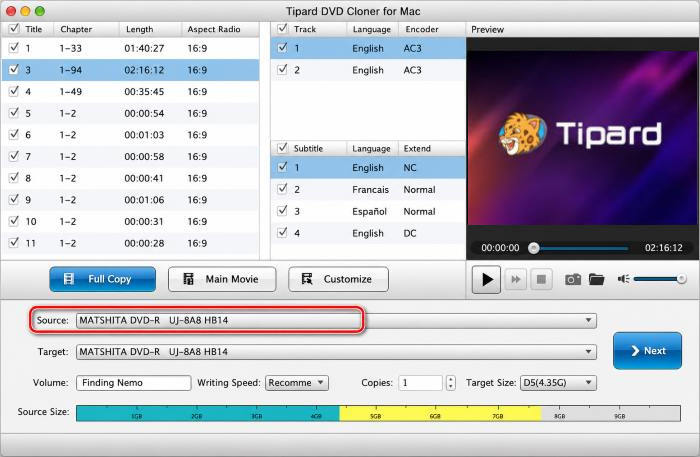
Step 3 Then set an output type by clicking the Target box. You can choose from a DVD folder, an ISO, or another DVD disc. To copy to another disc, you need to insert a blank disc in advance.
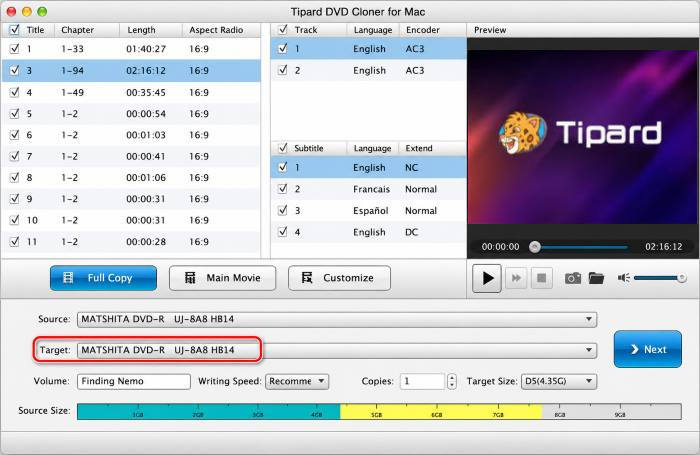
Step 4 Now you can choose the copy mode as you like. There are 3 copy modes to choose from: Full Copy, Main Movie, and Customize.
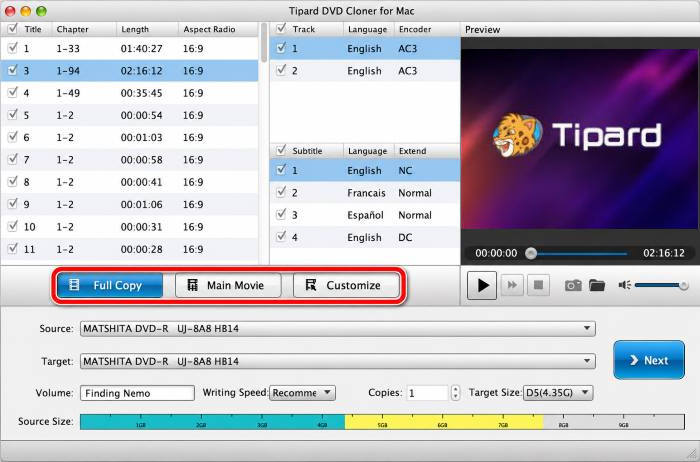
Step 5 After selecting the copy mode, adjust Volume, Target Size, and other settings if needed.
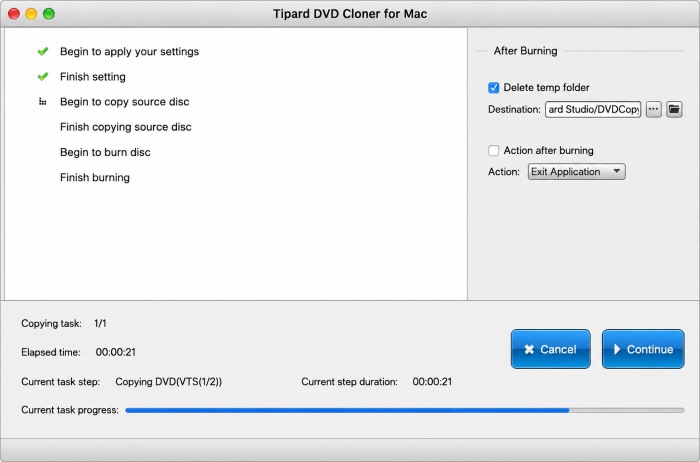
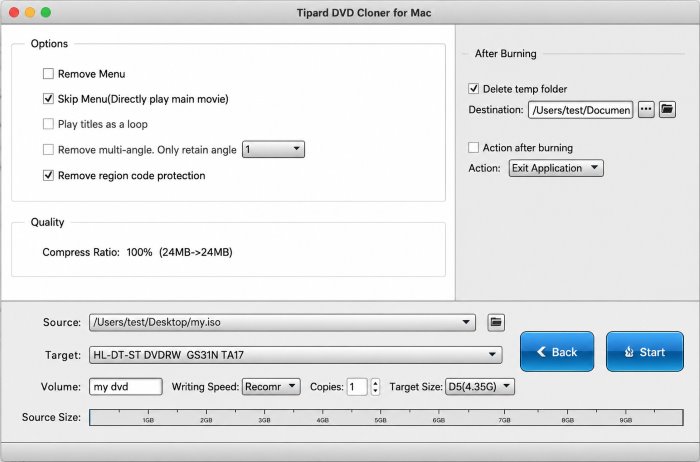
Step 6 Click Next to proceed to the next step, where you can see and change the details of the output DVD file and set after-burning actions. You can skip or remove the menu to play the main movie directly. You can even remove the region code protection if needed. After you finish setting, click Start to begin the cloning.
Step 7 Wait till the cloning is over, which won't take long. Once the task is done, you can directly watch your new DVD on the computer.