Blu-ray Creator
About | Privacy Policy | Terms of Use | Support | Contact Us
Copyright © 2026 Tipard Studio. All Rights Reserved.

Windows

Rip your favorite Blu-ray/DVD movies or videos to popular formats

Powerful software to play Blu-ray/DVD videos and audio

Create Blu-ray disc/folder/ISO file with your own video

Backup/Copy your favorite Blu-ray to disc/folder/iso files
Mac

Rip your favorite Blu-ray/DVD movies or videos to popular formats on Mac

Powerful software to play Blu-ray and popular video formats on Mac
Windows

Rip DVD to any popular video format quickly of full quality

Create DVD from videos and burn video to DVD/Blu-ray freely

Copy DVD to DVD disc/folder/ISO files in a 1:1 ratio
Mac

Rip DVD to any popular video format quickly of full quality on Mac

Burn or author a DVD from videos with subtitles and chapters on Mac

Copy DVD to DVD disc/folder/ISO files in a 1:1 ratio on Mac
Windows

Rip DVD, convert 4K video, edit, and upscale videos to 5K/8K

Repair broken videos with high accuracy and support many formats

Convert any video to MP3, MP4, MOV, WAV, and other 350 formats

Upscale resolution, optimize brightness and remove video noise

The easiest tool to capture screen, game, audio, etc. with high quality

Convert any 2D video to 3D video and convert 3D to 2D video

Convert 4K video to 4K/1080P and common videos

Convert TS video to various popular video/audio formats
Mac

Rip DVD, convert 4K video, edit, and upscale videos to 5K/8K on Mac

Repair broken videos with high accuracy and support many formats on Mac

Convert any video to MP3, MP4, MOV, WAV, and other 350 formats on Mac

Upscale resolution, optimize brightness and remove video noise on Mac

The easiest tool to capture screen, game, audio, etc. with high quality on Mac

Convert any 2D video to 3D video and convert 3D to 2D video on Mac

Convert 4K video to 4K/1080P and common videos on Mac

Convert TS video to various popular video/audio formats on Mac
Desktop

Rip and convert DVDs to MP3 and support other audio formats

Reset Windows Admin and Standard user account password in seconds

Accurately Convert any PDF file to Word with OCR

Convert PDF to Word, Excel, HTML and Image with OCR
Online

Easily remove watermarks from many image file formats free online

Points:0
Redeem
User Guide
A Blu-ray disc is great for saving and sharing high-quality videos. Use Tipard Blu-ray Creator to burn your precious video to a Blu-ray disc, or convert it to a Blu-ray folder, following the simple steps below.
Step 1 Launch Tipard Blu-ray Creator and click Log in at the top-right.
Step 2 Type your email address, click Send, and enter the verification code sent to your email. Then click Log in. If you haven't registered for Tipard, an account will be created automatically.
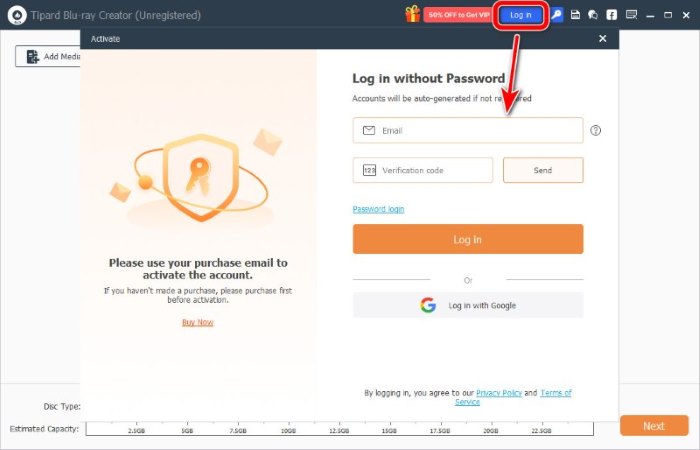
You can also choose Password login if you already have an account, or Log in with Google.
Step 1 Click Menu in the top-right corner and select Check Update.
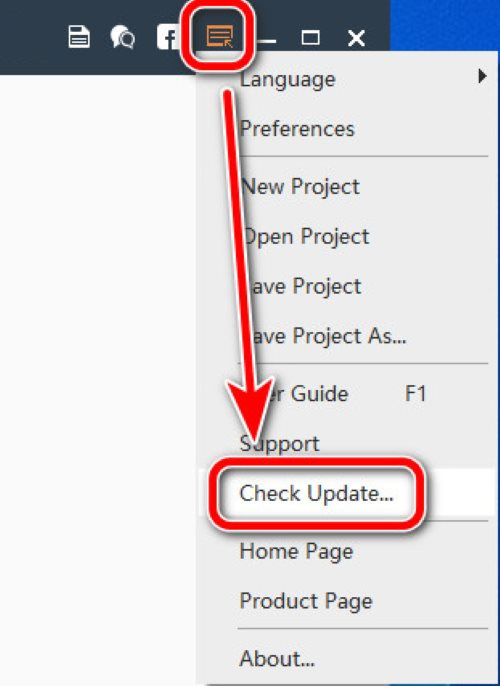
Step 2 Tipard Blu-ray Creator then starts checking. If there’s an update, you can download and install it immediately. As it makes sure your software is up to date, you get to see this window:
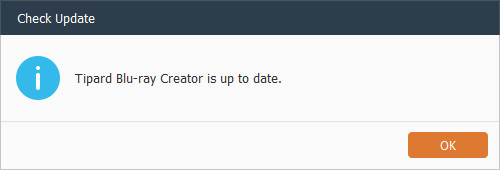
Step 3 Click OK to continue.
The Preferences window lets you adjust settings in advance.
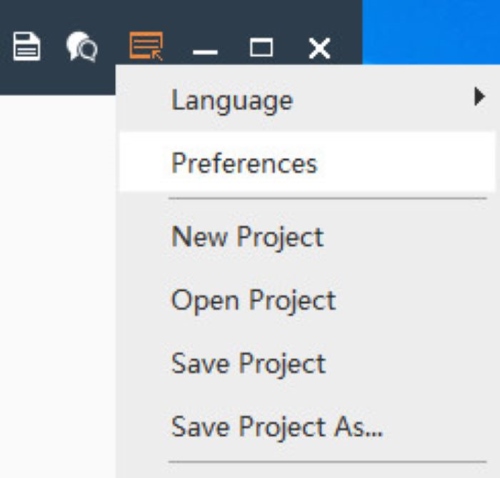
Step 1 Click Menu and select Preferences to open it.
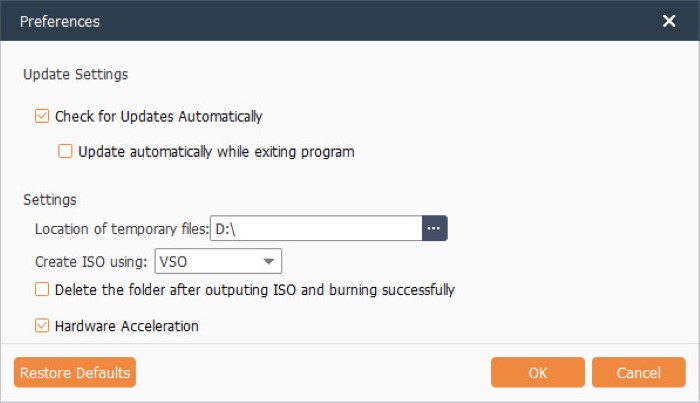
Step 2 Now you can adjust update settings and output settings. To return to default settings, click Restore Defaults at the bottom left. When you've finished with your adjustments, click OK to apply changes.
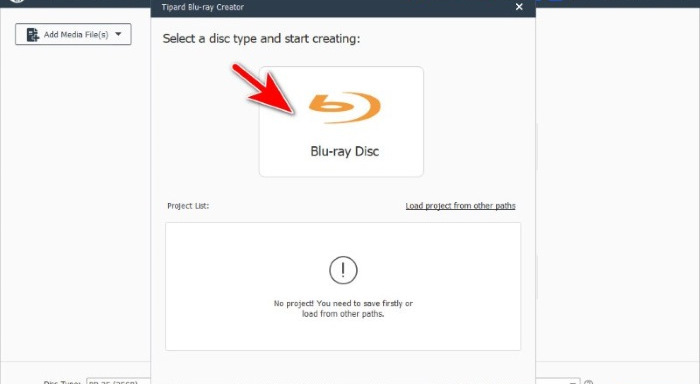
Step 1 Launch the software and choose the type of disc you want to create, which is Blu-ray.
Step 2 Click Add Media File(s), and select the video file you want to burn to Blu-ray disc.
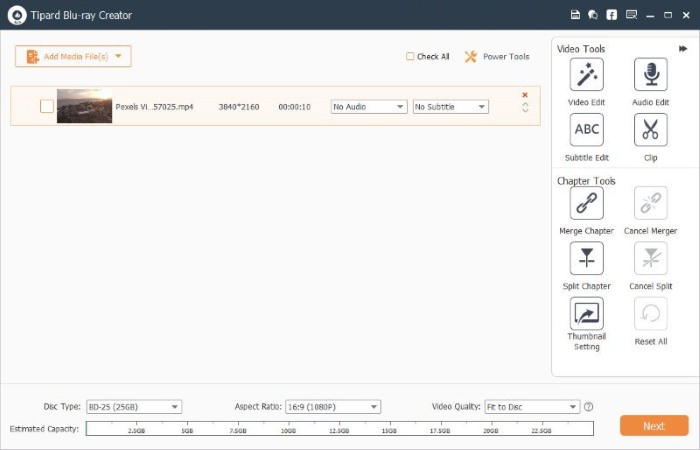
Step 3 Select the video file, then on the right side, in the Video Tools bar, click Audio Edit or Subtitle Edit to open the Edit Audio/Subtitle window. Here you can insert an external audio track or subtitle, and adjust its settings.

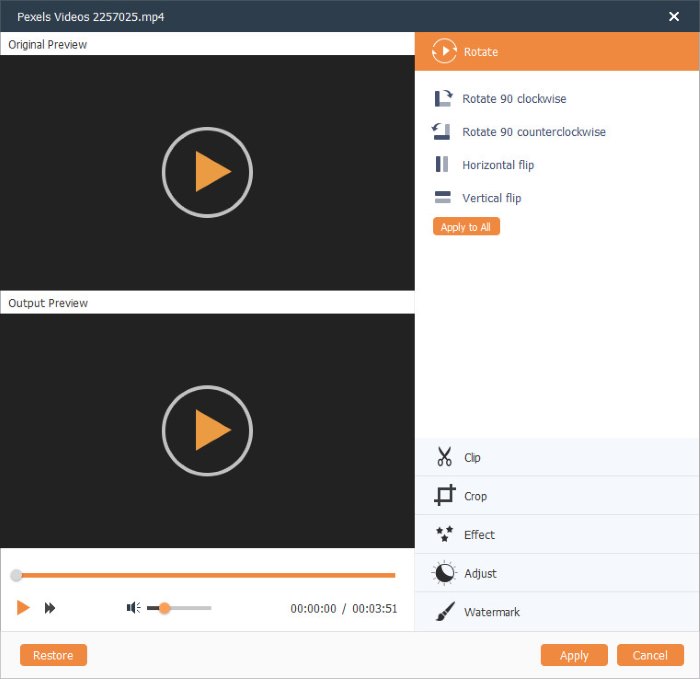
Step 4 To edit the video, click Video Edit in the Video Tools. You are offered Clip, Crop, Effect, Adjust, and Watermark features to enhance the video as you prefer.
Step 5 Click Disc Type to choose the output type from the dropdown menu. The Estimated Capacity will tell you if your file size is within the capacity of the disc type you choose.
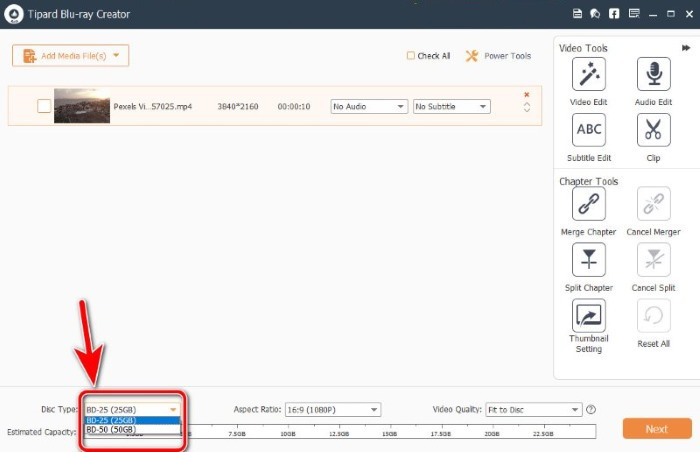
Step 6 Adjust Aspect Ratio and Video Quality before clicking Next.
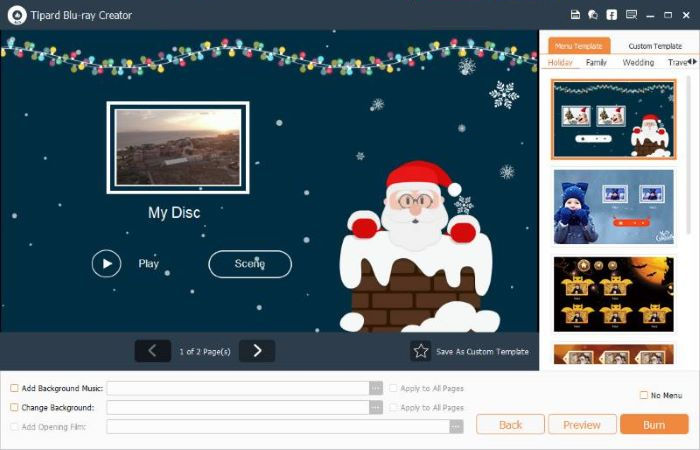
Step 7 Then you can edit the Blu-ray menu by applying a template, adding background music, changing the background, and adding an opening film. When everything's ready, click Burn to move on to the next step.
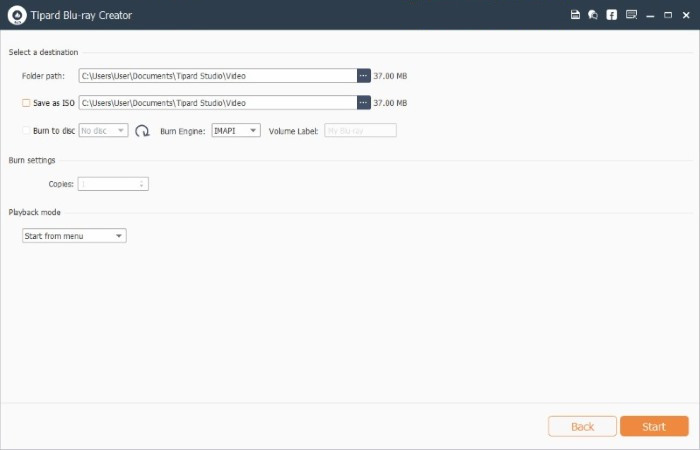
Step 8 Adjust the save location and settings before clicking Start to begin creating the disc.
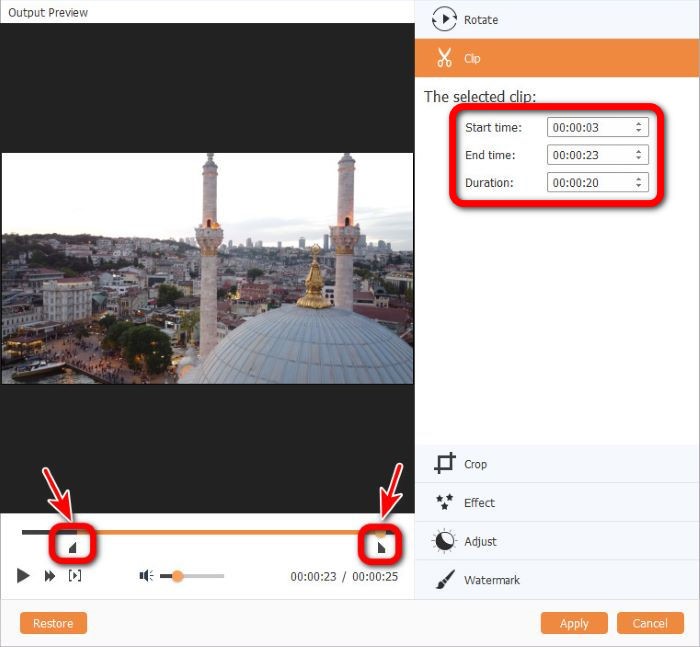
Step 1 Select the video and click Clip in the Video Tools.
Step 2 Drag the sliders at the start and the end, to adjust the video length. You can also adjust the Start, End or Duration time to cut the segment.
Step 3 Click Apply.
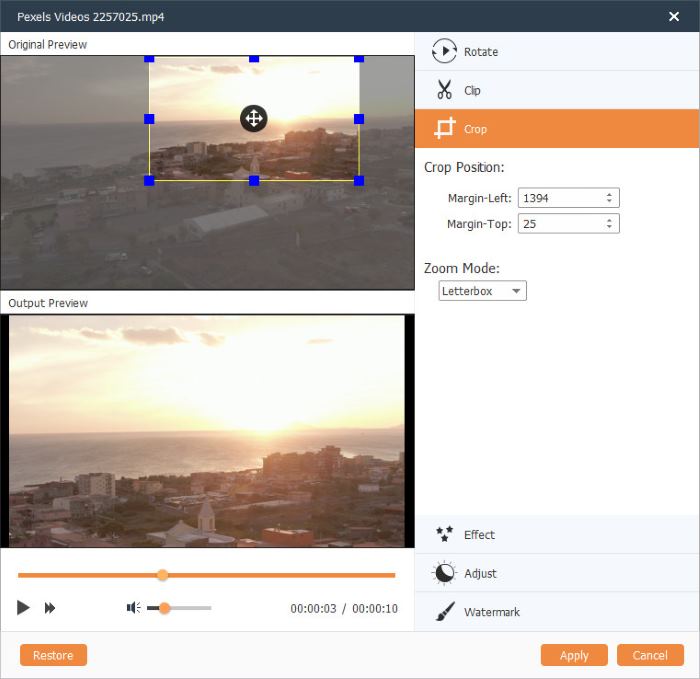
Step 1 Select the video, click Video Edit, and then choose Crop.
Step 2 In the Crop tab, you can adjust the Crop area size, change the position of Crop, and set the Zoom mode from Letterbox, Pan & Scan or Full.
Step 3 When you're done, click Apply.
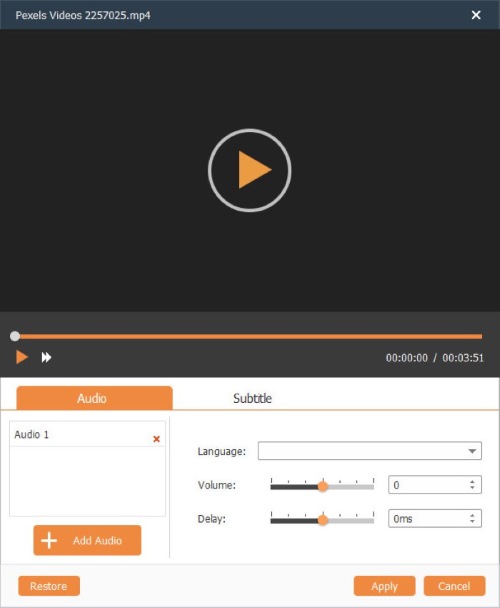
Step 1 Select your video and click Audio Edit in the Video Tools to adjust the audio track.
Step 2 Click Add Audio to add an audio track from your local storage. Then you can change the Volume and Delay.
Step 3 Click Apply.
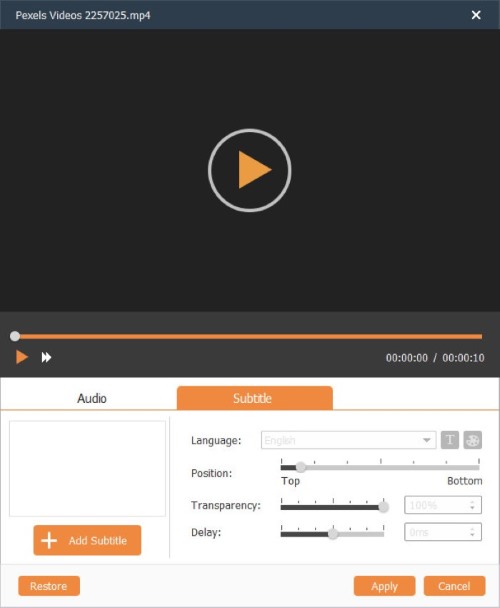
Step 1 Select your video and click Subtitle Edit in the Video Tools.
Step 2 Click the Add Subtitle button to insert your subtitle file. Then adjust the subtitle's Language, Position, Transparency, and Delay.
Step 3 Click Apply.
Step 1 Select the video and click Video Edit in the Video Tools.
Step 2 In the Watermark tab, you can choose an image or text as a watermark, then adjust the watermark area and the watermark transparency.
Step 3 Click Apply to add the watermark to the video you're working on. You can also click Apply to All to add this watermark to all the video files in the list.
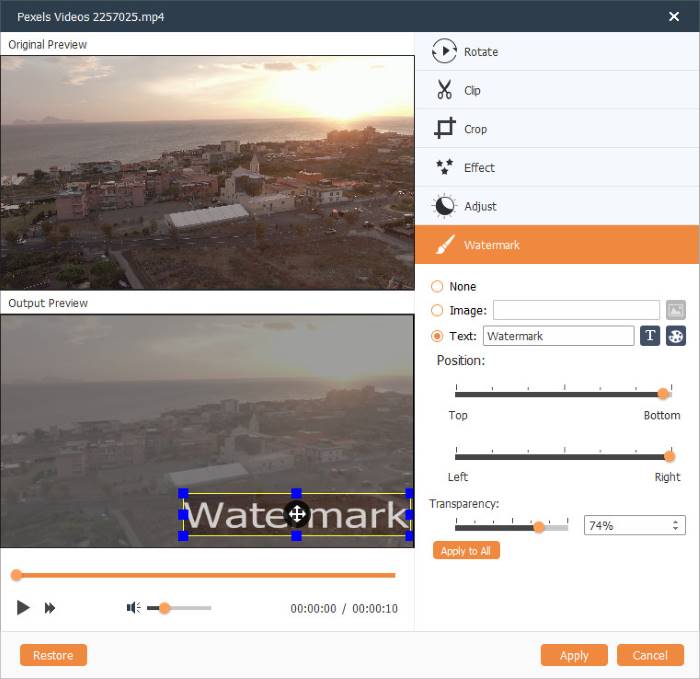
Step 1 Select the video and click Video Edit.
Step 2 In the Effect tab, choose an effect you like and adjust its details.
Step 3 When you finish, click Apply.
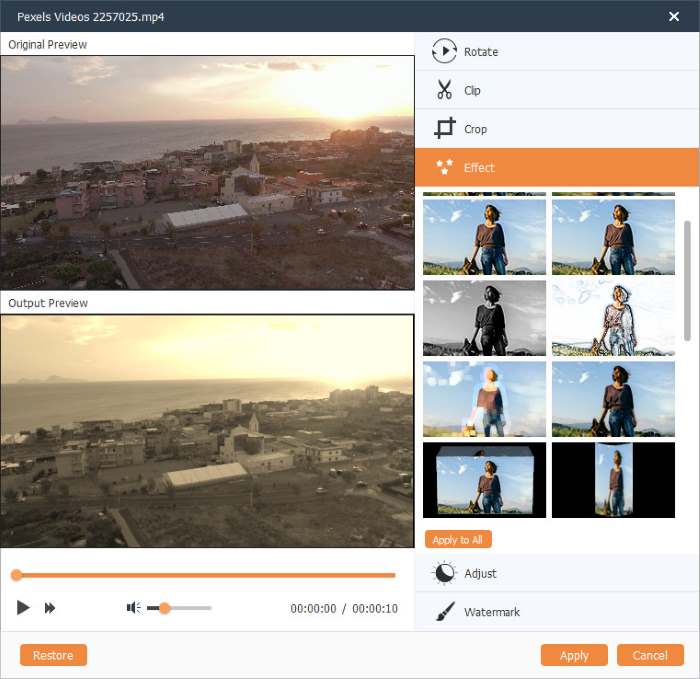
Step 1 Select the video and click Video Edit.
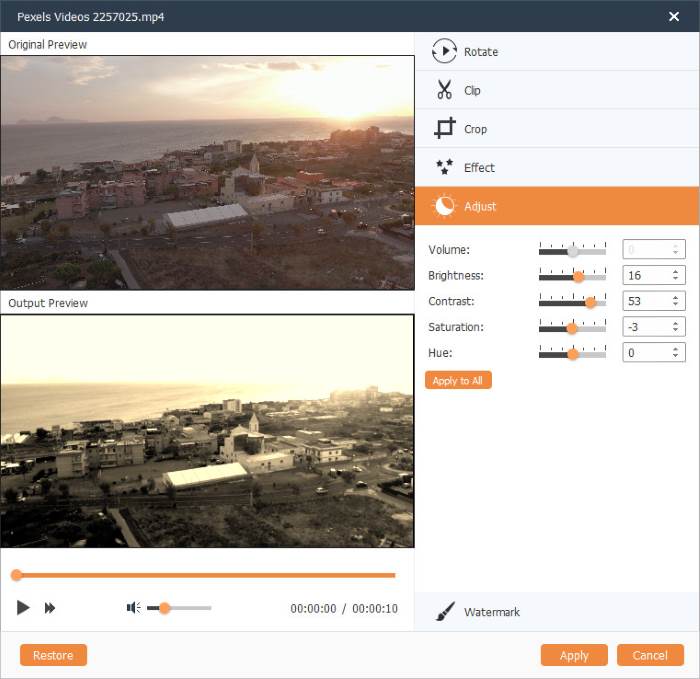
Step 2 Click Adjust. There, you can customize the volume, brightness, contrast, saturation, and hue by dragging the sliders or changing the figures.
Step 3 Click Apply. You can also click Apply to All to apply the adjustments to all the video files added to the list.