
Want to shorten your video for uploading? There are plenty of online and offline video trimmers out there, but not all of them are safe or reliable. Usually, they may affect the video quality. Fortunately, there's a free and powerful tool you can use on your computer - FFmpeg. FFmpeg can trim your videos without re-encoding, which means your videos will keep the original video quality. In this guide, we'll introduce FFmpeg and show you how to use FFmpeg to trim videos quickly and efficiently. Read on to learn more.

Part 1. How to Trim Videos Using FFmpeg
FFmpeg offers several ways to trim videos, mainly by specifying the start time, end time, or duration. The most common and efficient method is to use the -ss (start time) option together with -to (end time) or -t (duration), often combined with -c copy to trim without re-encoding.
Method 1. Trim Video by Duration with FFmpeg
Here is the command that you can use to cut your video by duration in FFmpeg. Remember to hit the Enter key to trim your videos with FFmpeg.
ffmpeg -i input.mp4 -ss 00:05:20 -t 00:10:00 -c:v copy -c:a copy output1.mp4
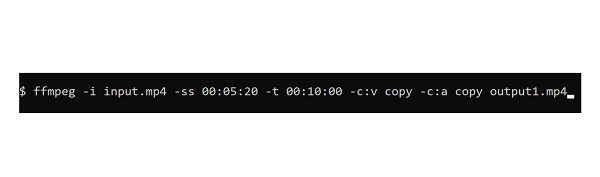
The commands above will take the input video, the .mp4 file. It will then cut 10 minutes from your video starting from 00:05:20. Then, your output will be from 00:05:20 - 00:15:20.
The -ss command represents the video's starting point, and the -t represents the duration from the starting point. Additionally, the -c:v copy -c:a copy commands are used to copy the original audio and video without re-encoding. That's how you can trim a video by duration with FFmpeg.
Method 2. Trim Video with FFmpeg at a Specific Time
You can use the command below if you want to cut your videos at the exact time. Still, don't forget to hit the Enter key after inputting the command.
ffmpeg -iinput.mp4 -ss 0o:05:10 -to 00:15:30 -c:v copy -c:a copy output2.mp4
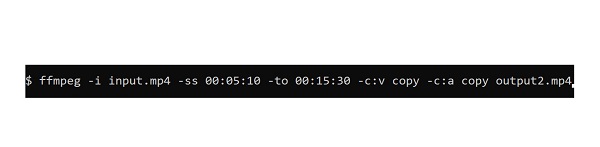
As you can see from the commands above, it uses -to to indicate the exact time you want to cut from your video. The trimmed video will start from 00:05:10 - 00:15:30, which results in a 10 to 20 seconds video. Note that the command will be an error when you specify a -to smaller than the -ss. It will also be an error if you put -ss before -i, -to because -i and -to indicate the duration of your video. That's how easily you can trim a video with FFmpeg at a specific time.
Method 3. Cut the End of a Video with FFmpeg
To cut the end of your video with FFmpeg, you can use the other seeking command, -sseof, which cuts the last N seconds from your clip. Use the commands below to cut the end of your video.
ffmpeg -sseof -600 -i input.mp4 -c copy output5.mp4 or ffmpeg -sseof -00:10:00 -i input.mp4 -c copy output6.mp4
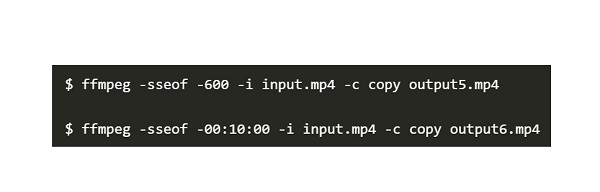
By following the commands above, you can cut the last 10 minutes of a video with FFmpeg. 600 means 600 seconds, which is also 10 minutes. When using the seek command, you may encounter that the output files may not have the exact time and length you expect. The reason is that most of the video formats do not allow the seek command. That's how to cut the endo of a video with FFmpeg.
Method 4. Cut video with Re-Encoding
If you remove the -c copy option when trimming your video, FFmpeg will automatically re-encode the video or audio. For example, it may change the video codec from h.265 to h.265. In that case, FFmpeg may resize your video. While re-encoding takes longer than simple trimming, it gives you more flexibility and precision. In the commands below, we’ll re-encode the video using the -accurate_seek flag to achieve a more exact output length. This is ideal when you need frame-level accuracy in your trimmed clips.
These are the different methods you can use to split videos with FFmpeg. By exploring the options above, you now have several ways to trim, cut, or split your videos effectively. However, one drawback of FFmpeg is that it can be difficult to operate, especially for beginners, as it’s not the most user-friendly tool. If you prefer a simpler solution, check out the next section.
Part 2. Better Way to Trim Videos than Using FFmpeg
FFmpeg is an excellent tool for cutting videos. However, as mentioned above, it doesn't have a GUI and requires different types of commands to trim videos. If you want to save time, you can use a more convenient and powerful alternative.
Tipard Video Converter Ultimate is among the best top-notch applications if you want to trim your videos. And does not just trim videos; it also has tons of advanced editing features you can use. Additionally, you can trim your video with its video trimmer feature by just moving the start and end points in the Timeline. You can also use this software if you want to split your videos. What's even more impressive about Tipard Video Converter Ultimate is that it has a batch trimming process where you can cut two or more videos simultaneously. Furthermore, it supports all video and audio formats and is available on all platforms. Therefore, this software is the answer if you are searching for another way to use FFmpeg to clip videos.
How to use Tipard Video Converter Ultimate to trim videos:
Step 1 First, download the program by clicking the Download button below. After downloading, run the Tipard Video Converter Ultimate on your desktop.
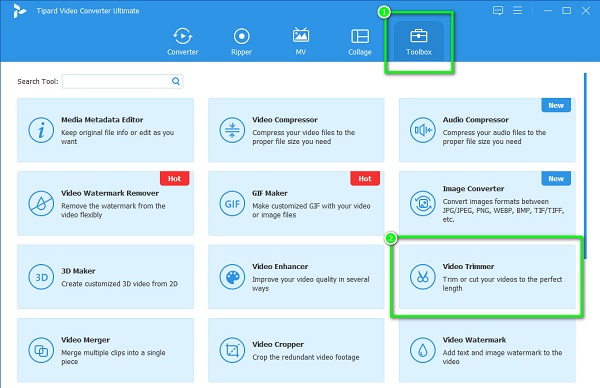
Step 2Go to the More Tools panel. And then, select the Video Trimmer feature.
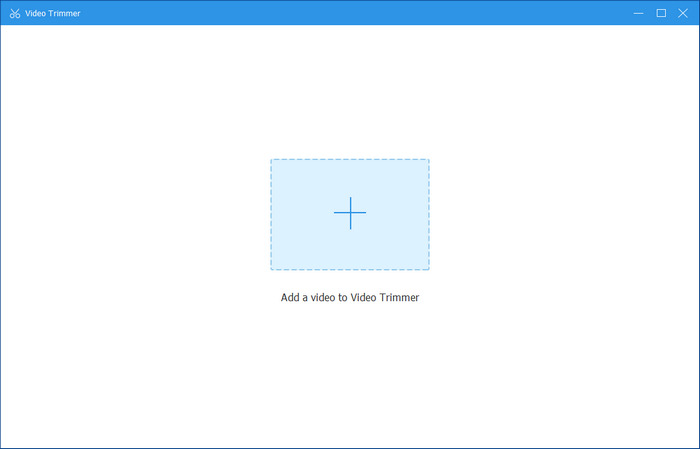
Step 3 And then, click the Add button to import the video you want to trim. You can also use the drag-and-drop method. Locate your file from your folders, then drag and drop it to the program.
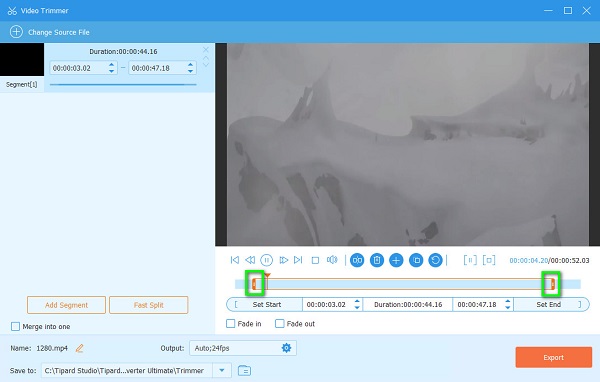
Step 4 Next, you will see the preview and the timeline of your video. On the Timeline, move the left handlebar to indicate the start of the video you want to trim. Move the right handlebar to indicate the desired end point of your video.
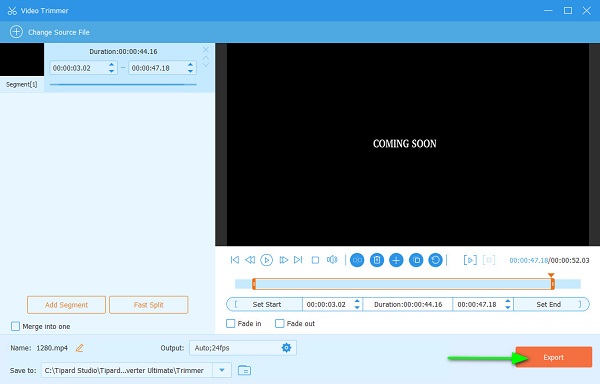
Step 5Finally, click the Export button at the bottom right corner of the interface to save your output from this video cutter. With this FFmpeg alternative, it will be very easy to trim your videos.
Part 3. Things Users Should Know About Using FFmpeg to Cut Videos
Here are the important tips you must know when using FFmpeg to cut video by frame.
- Placing -ss before the input makes trimming faster, while placing it after results in more accurate cuts. For even greater precision—especially when re-encoding - you can use the -accurate_seek option.
- If you use -ss with c:v copy, the bitstream of your video might be choppy, not playable, or out of sync with its audio stream.
- Combining -ss with -c copy will result in a half-second chop at the start of your video.
- You can still trim videos using FFmpeg if your video has other streams, such as subtitles and other metadata.
Part 4. FAQs about Using FFmpeg to Trim Vide
What is -ss in FFmpeg?
The -ss commands specify the starting time of your video. When you put -ss on your command, it will indicate the starting time of your video
Does VLC use FFmpeg?
No. VLC uses its own muxers and demuxers. The libavcodec library from FFmpeg provides many codecs of VLC, but it does not use FFmpeg.
Is FFmpeg safe to use?
Not really. There are security risks that you must consider when you use FFmpeg. For example, if you allow arbitrary formats, you may encounter security risks.
Conclusion
This article offers 4 ways on how to use FFmpeg to trim videos. Using FFmpeg to trim videos is challenging, but it sure is worth it. But if you want to use a more intuitive application, download Tipard Video Converter Ultimate now.
More Reading


About the Author
