Tutorial: How to Split Videos in Premiere Pro
When you shoot a video on your camera, it may not be what you expect. You need to edit your video footage or need to remove some unnecessary moments. And that's where video splitting or video trimming tools are necessary. When you edit a video, you are constructing or splitting your video into parts to save the best moments. But if you are wondering, how can you split a video? Then we have the solution for you. Adobe Premiere Pro is an application that you can use to split your videos. In addition, it is one of the most known video editing software that many professionals use. Continue to read this guidepost to learn how to split videos in Premiere Pro.

Part 1. 2 Ways on How to Split Videos in Premiere Pro
Adobe Premiere Pro is a useful application for video editing. It is probably the most popular video editing application nowadays. Asides from splitting or trimming your videos, Premiere Pro also can help you rotate, merge, crop, or flip your videos with its modern user interface. Moreover, you can use Premiere Pro to add text or titles, music libraries, overlay images, and even add filters. Adobe Premiere Pro is full of features that can help you with outstanding outputs. You can also import and export any videos in any format in this application. Furthermore, it is downloadable on all media platforms, like Windows, Mac, and Linux. However, you cannot use Adobe Premiere Pro for free. It costs US$20.99 per month for individuals and US$35.99 per month per team license. Despite that, Premiere Pro is worth using and will help you split your videos professionally. And there are two ways you can split videos in Adobe Premiere Pro; continually read this part to learn these ways.
Using the Razor Tool
Step 1 Import your video into the Adobe Premiere Pro app by pressing Cmd + I or CTRL + I on your keyboard. Another way to import your video is by going to File, then the Import option.
Step 2 Then, right-click your video and select New Sequence From Clip. And then, you will see your video as one single block.
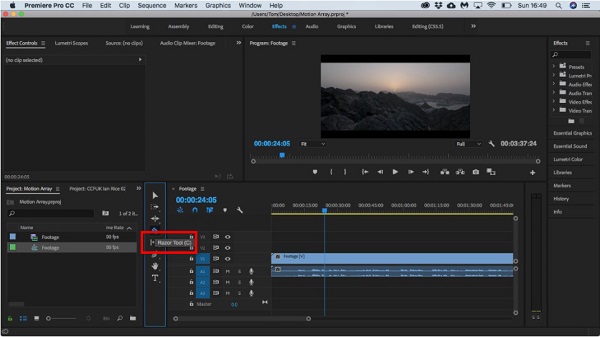
Step 3 Now, we will split your clip. Click the Razor tool from the options besides your panel.
Step 4 Select the part of your video where you want to split your video. You will see a vertical line where you select the part of your video which indicates the separation on your video.
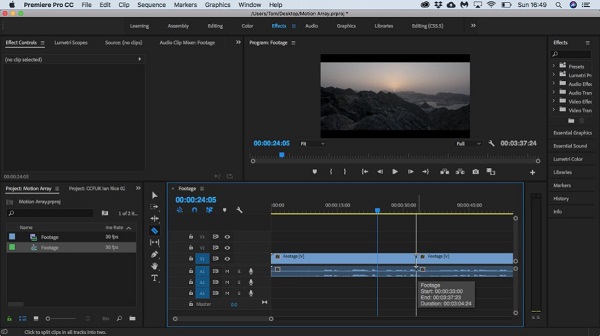
Step 5 Now, you have separated videos from your original video, which can be played separately.
And if you are searching for how to cut videos in Premiere Pro, you can use this method and then remove the other part you do not like from your clip.
Using the Current-Time Indicator
There is also another method you can split your videos on Adobe Premiere Pro. Using the Current-Time Indicator option, you can also split your video.
Step 1 Import your media file to the Premiere Pro interface, then hold and drag your video to the Timeline.
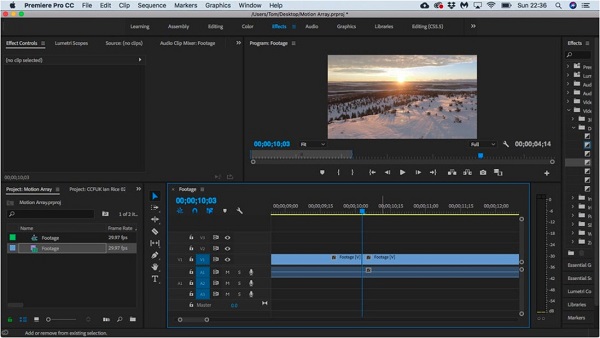
Step 2 Then on the Timeline, move the Current-Time Indicator to the part of the clip where you want to split your video. Always make sure that the layer of the video you are trying to split is highlighted on the left side of your Timeline.
Step 3 Next, press the Cmd + K or CTRL + K on your keyboard to split your video.
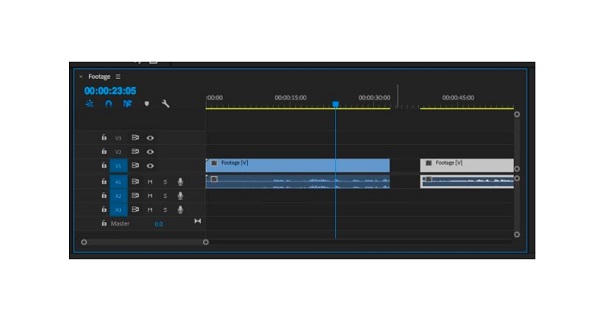
Note: Below your video, you will also see the audio channel. If highlighted, the audio will also split if you split your video.
After splitting your video, you can add effects, change the color, change the speed to create speed ramps, and remove any sections you do not want. You can also use this process if searching for how to trim video on Premiere Pro. What you will do is delete the other part that you do not want and export only the necessary part. Click here to get easy ways to compress videos in Premiere.
Part 2. Best Alternative to Premiere Pro
Adobe Premiere Pro is indeed a fantastic video editing software. It has many editing features you can use to edit your videos. However, Adobe Premiere Pro is not a beginner-friendly tool. You need to familiarize the functions first before you can easily navigate them. And if you think it is hard for you to use this application to split your video, we will present an alternative tool. Read this part thoroughly to learn the best alternative for Adobe Premiere Pro.
Tipard Video Converter Ultimate is the most prominent alternative for Adobe Premiere Pro to split, trim, or cut your video. This fantastic offline application has an easy-to-use interface making it a beginner-friendly tool. Additionally, you can split your video faster using the Fast Split feature, where you can split your videos by average in just one click. You can also manually split your video on the Timeline if you are splitting your video into two. Moreover, it has many advanced editing features that you can use, including a video trimmer, video watermark remover, video merger, GIF maker, and more from the Toolbox. You can also import any video formats, like MP4, MOV, MKV, AVI FLV, VOB, M4V, WMV, and 500+ more. And if you want to preview your video before exporting or saving it, Tipard Video Converter Ultimate allows you to do it. It is also available on all cross-media platforms, such as Windows, Mac, and Linux. So, if you want to use this application to split your videos more easily, follow the instructions below.
How to split a video using Tipard Video Converter Ultimate:
Step 1 First, download the Tipard Video Converter Ultimate on your desktop by clicking the Download button below for Windows or Mac. And then, install the app and run it on your device.
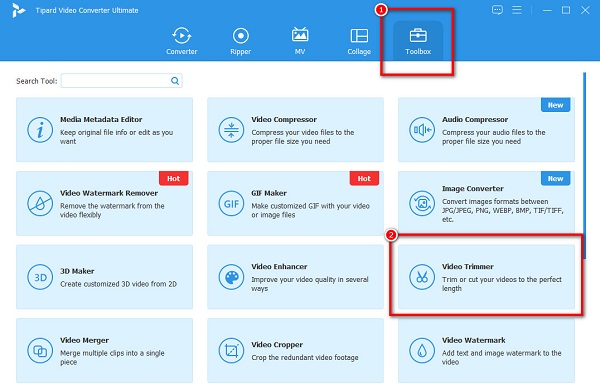
Step 2 Then on the main user interface, go to the Toolbox panel and select the Video Trimmer option.
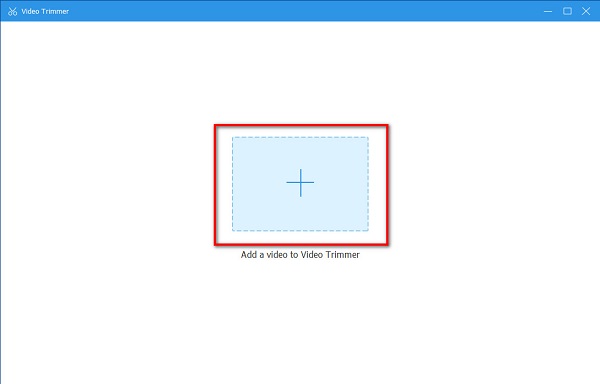
Step 3 Next, hit the plus (+) sign button on the interface to upload the video you want to split. You can also do the drag and drop process, where you will drag and drop your file to the plus sign box.
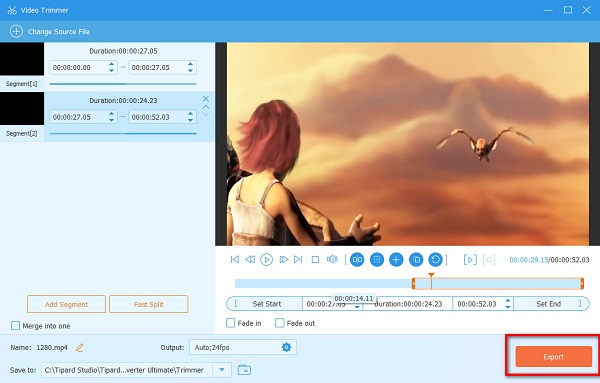
Step 4 And then, we will start the splitting process. To split your video, you will see your video's Timeline and preview. Below the preview, you will see the Split icon (a line between two boxes). While playing your clip, move the time indicator to where you want to split your video, then click the Split icon to split the video.
Step 5 After splitting your video, click the Export icon to save your video. You will see on your computer files that the saved videos are two.
Part 3. FAQs about How to Split A Video in Premiere
Can I split videos in Final Cut Pro?
Yes. Final Cut Pro has a feature where you can split or trim your videos. At the same time your video is playing, press Command-B while your project plays back.
Does splitting your video affect its quality?
Supposedly, the quality of your video must not be affected when splitting videos. So, if the quality of your video is ruined, you need to change the application you are using.
Can I split videos online?
Certainly! There are many video-splitting applications online that you can freely use. Just make sure that the online application you are using is safe to use.
Conclusion
At last, we are at the end of our journey! Now that you're done reading this post, it is clear how to split videos in Premiere Pro. Although splitting your videos using Premiere Pro takes much practice, it is still worth using. The problem is you still need to purchase the app before accessing it. So, we recommend using the best alternative application for splitting videos: Tipard Video Converter UItimate. Download it now and experience the best features it offers!