Simple Steps on How to Reverse a Video in Sony Vegas
Sony Vegas or Vegas Pro is a video editing software package that most professionals use for creating video content. This video editing application has all the tools you need to edit your videos. Moreover, it is available on any Windows device and is easy to download. You can also use Sony Vegas to reverse your videos. Indeed! Many people love reversing their videos, and luckily, with this app, you can reverse your video professionally and in high quality. Therefore, if you want to learn how to reverse a video in Sony Vegas, finish reading this post until the end.
Part 1. How to Reverse a Video File in Sony Vegas
Vegas Pro is among the fully-featured video editing programs. It is a common choice for professionals for an advanced video editor. This video editing program has built-in effects and can produce high-quality videos you can share on other platforms. In addition, Sony Vegas has many advanced editing tools that you can access to enhance your videos, such as scene detection, add amazing transitions, add special filters and effects, and Multicam editing. It has most of the features that you need in a professional application. You can also use its storyboard and timeline synchronization to edit your video well. Plus, it supports the most common video and audio formats that Windows devices support.
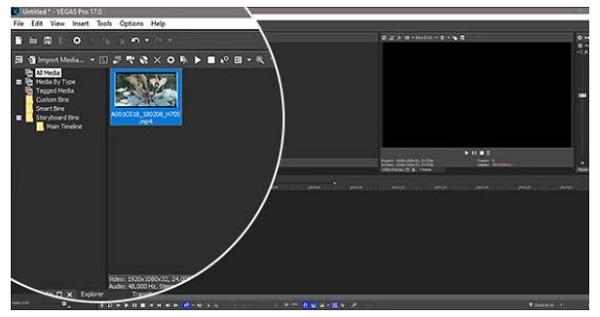
Step 1Before anything else, download the Vegas Pro or Sony Vegas on your device. Once the app is downloaded and installed, launch the application. Then, on the main user interface, go to the File menu and select Import > Media. And then, the Import Media window will open.
Step 2And then, go to the folder where your video is located, then select the video clip you want to reverse. Click Open, and then your video will appear in the Project Media window.
Step 3Next, add your video to the timeline by dragging your video file from the Project window to the Timeline.
Step 4Select the video event and the audio event. Right-click the video event and select the Choose Reverse option. A tiny arrow icon will appear on the video event's left side, indicating that the video event is reversed.
When you reverse a video event, a subclip will appear in the Project Media window. The new clip file name will be the same as the original clip, but a -subclip X (reversed) will be added. Whereas X is the number of the subclip. You can add the new subclip to the timeline.
Step 5And finally, double-click the event to make a loop region. And to save your output, click the Render As button in the toolbar. When the Render As window appears, choose your preferred video format from the Format list. Choose the template that you want for your video from the Template list.
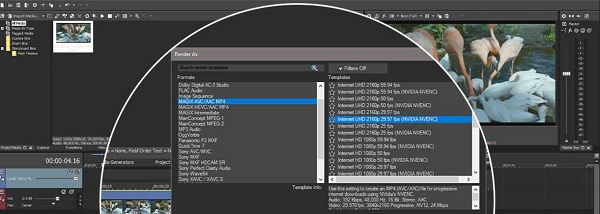
Step 6Select Browse, then go to the file location where you want to save your reversed video. Click Save; you will be returned to the Render As window. Hit the Render button, then Vegas Pro will render your video, and you now have the permanent copy of your reversed output.
Pros and Cons of Using Sony Vegas
Pros:
- • Produces high-quality videos while focusing on your story.
- • It contains adjustment tracks.
- • It supports high-quality videos.
- • It contains many advanced editing features.
- • It has customized workflows and shortcuts.
- • It supports the most standard video and audio file formats.
Cons:
- • It is only available on Windows devices.
- • It is not free to use.
- • The navigation is challenging.
- • Not a beginner-friendly application.
Quite a process, right? Despite the long process of reversing videos in Sony Vegas, you will have a great reversed output in the end. But if you prefer a simpler way to reverse videos, read the following part.
Part 2. Alternative Way to Using Sony Vegas to Reverse Videos
Many novice video editors are searching for other video reverser tools that are easy to use. Others are looking for an alternative because Sony Vegas is quite pricey for them. Therefore, in this part, we will show you the best alternative for Sony Vegas.
Tipard Video Converter Ultimate is the best alternative for Sony Vegas. Professionals also use this video editing software because of the features it offers. It has a feature where you can entirely reverse your videos or select parts from your video. Moreover, it supports over 500+ video file formats, such as MP4, AVI, MPEG, MKV, FLV, VOB, WMV, M4V, WebM, etc. It also has many advanced editing features that you can use to edit your videos, including a video converter, video merger, video trimmer, GIF maker, 3D maker, and more from the Toolbox. Beginners also love using this application because it has an easy-to-use interface.
Furthermore, it can reverse your videos without compromising their quality. Also, you don't need to be anxious about the device you will use with this application because it is downloadable on all operating systems, like Windows, macOS, and Linux. Plus, you can upload high-quality videos in this application. So, if you are interested in using Tipard Video Converter Ultimate to reverse your videos, follow the steps below.
Step 1First, download Tipard Video Converter Ultimate by clicking the Download button below. Follow the installation process, then open the app.
Step 2And on the main user interface, navigate the Toolbox and select the Video Reverser feature.
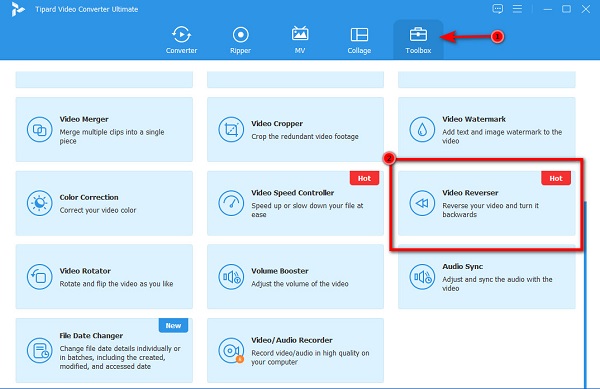
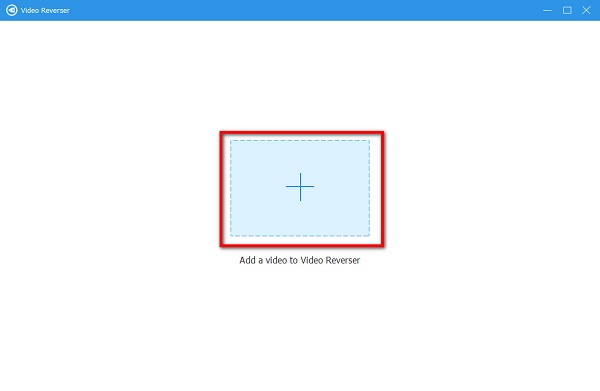
Step 3Next, to upload the video you want to reverse, click the plus sign icon or drag-drop the video file from your computer folders to the plus sign box.
Step 4Once your video file is uploaded, Tipard Video Converter Ultimate will reverse your video entirely. But if you want to select a part to reverse, move the slider from the video timeline, and click the Set Start and the Set End button.
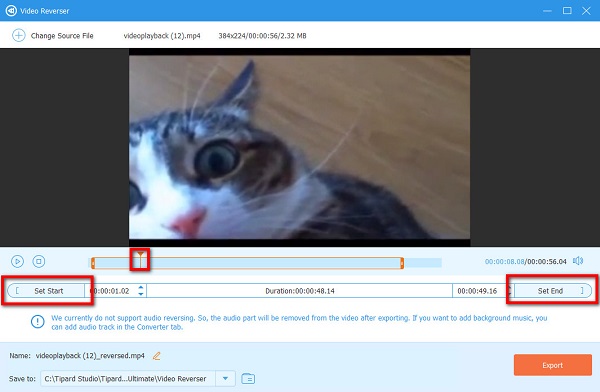
Step 5Lastly, click Export at the lower right corner of the interface to save your reversed video to your computer folders.
And that's it! Those are the simple steps on how to reverse videos using Tipard Video Converter Ultimate.
Part 3. FAQs about How to Use Sony Vegas to Reverse Videos
Is Sony Vegas available on Mac?
- Unfortunately, Sony Vegas is not available on Mac and other operating systems. It is only available on Windows computers.
How much does Vegas Pro 365 cost?
- The Vegas Pro 365 consists of all the features that Vegas Pro offers. The Vegas Pro pricing is $16.67 per month for 12 months. And for 3 months, it's $19.99 per month.
Does Vegas Pro place a watermark?
- Vegas Pro is a professional video editing application for editing videos. However, the free version of the application places a watermark on your outputs.
Conclusion
All the steps that you need about how to reverse a video in Sony Vegas are written in this article. The problem that many users encounter is that the interface is quite complex. So, if you are among the users who want to use an easy-to-use video reverser, download Tipard Video Converter Ultimate now.