
Reducing video file size is a significant skill, especially for Mac users, partly because of the exclusive design. Due to the excellent lens and display resolution, Mac users are more likely to have lots of high-quality videos in their memory. The good news is that Mac has built-in tools for compressing videos. Moreover, there are third-party tools to help you produce the desired effects easily. Anyway, this guide shares four ways to compress a video on your Mac computer or laptop.

Part 1. Ultimate Way to Compress Videos on Mac
Is it possible to reduce video file size on a Mac without losing quality? The answer is yes, and all you need is Tipard Mac Video Converter Ultimate. It is able to compress Mac videos without downscaling resolution or converting format. Moreover, the intuitive interface makes it easy to navigate.

- Compress video files on Mac without losing quality.
- Preview the result before exporting videos.
- Support a wide range of video formats.
- Deliver smooth experiences and high speed.

How to Compress a Video on Your Mac
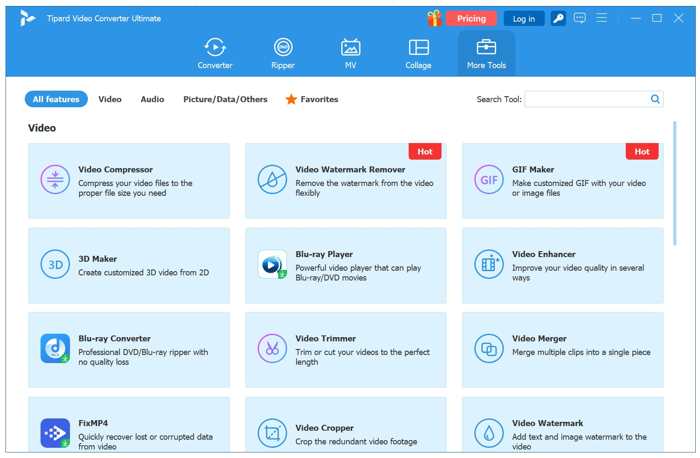
Step 1 Install video compressor
Start the best video compressor software once you install it on your Mac. It is compatible with macOS 10.12 or above. Plus, there is another version for PCs. Go to the More Tools tab on the top ribbon and choose the Video Compressor tool.
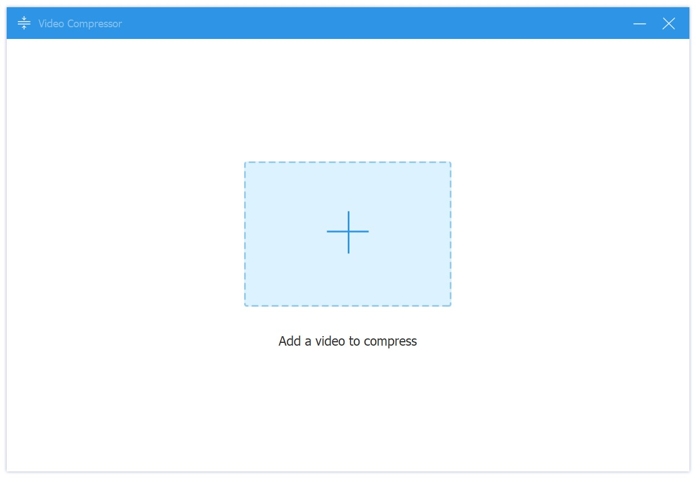
Step 2 Import a video
Click the big Add button in the main interface and select a large video file from your memory. It may take a while to load the video if it is too large.
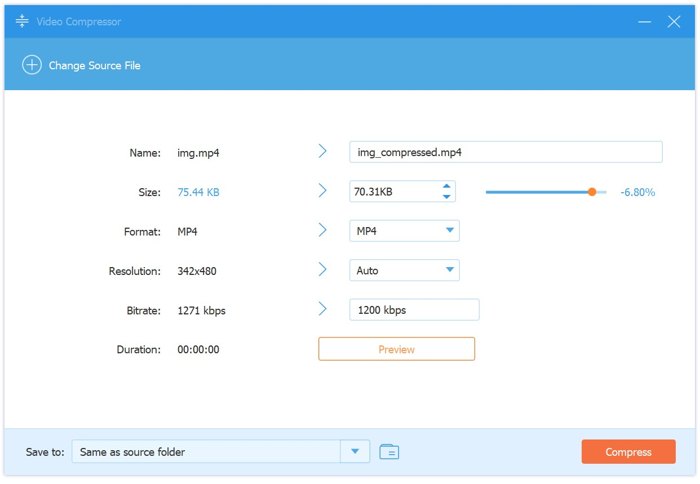
Step 3 Compress a video on Mac
Move the slide next to the Size option until you are satisfied with the file size. Adjust other options or keep them with their original values, depending on your needs. Finally, set an output folder by hitting the Folder button. After you are ready, click the Compress button to compress MOV or MP4 on Mac.
Part 2. How to Compress a Video on Mac via iMovie
iMovie is far more than a simple video editor built on macOS. It comes with a variety of useful features, including video compression. It can reduce video file size on Mac without compromising too much on quality.
Step 1 Open the iMovie app from your Applications folder. If you cannot find it on your Mac, download it from the Mac App Store for free.
Step 2 Follow onscreen instructions to create a new project or open an existing project.
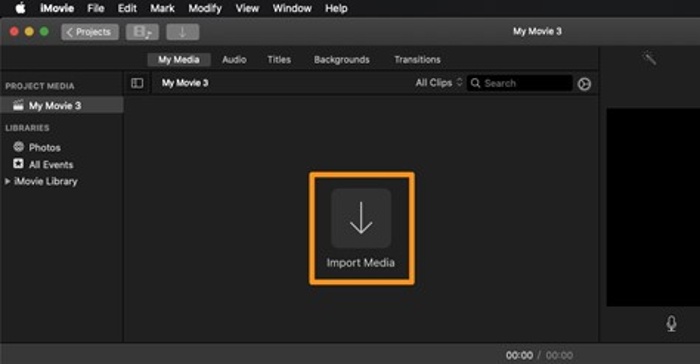
Step 3 Click the Import Media button to import a large video or find the large video in Finder and drag and drop it onto iMovie.
Step 4 Put the video on the timeline and select it.
Step 5 Find and click the Settings option on iMovie’s toolbar.
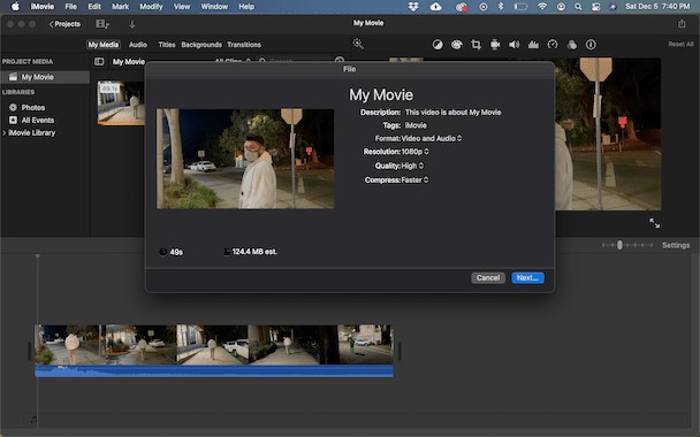
Step 6 Choose Share from the dropdown menu and choose File in the sharing options.
Step 7 Downscale the video quality from the Quality option.
Step 8 At last, click the Next button and hit Save.
Part 3. How to Compress a Video on Mac in QuickTime
Depending on which version of QuickTime you are using, the workflow for compressing a video on a Mac is different. Remember that both QuickTime Player and QuickTime Player Pro can compress a Mac video by decreasing the video quality.
Compress a Video on Mac in QuickTime
Step 1 Open QuickTime Player from your Dock or Applications folder.
Step 2 Go to the File menu and choose Open File to load a large video.
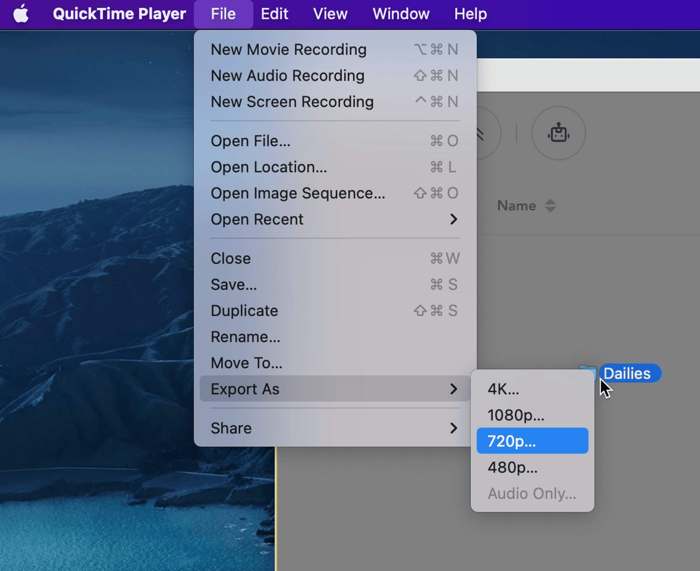
Step 3 After the video completely loads, click the File menu again.
Step 4 Choose Export As and pick a downscaled resolution. If the current resolution of the video is 4K, for example, choose 1080p.
Step 5 Fill out the form and export the video.
Compress a Video on Mac in QuickTime Pro
Step 1 Also, go to the File menu in your QuickTime Pro and choose Open File.
Step 2 Find and import a large video file from your memory.
Step 3 Navigate to the File menu and choose Export to proceed.
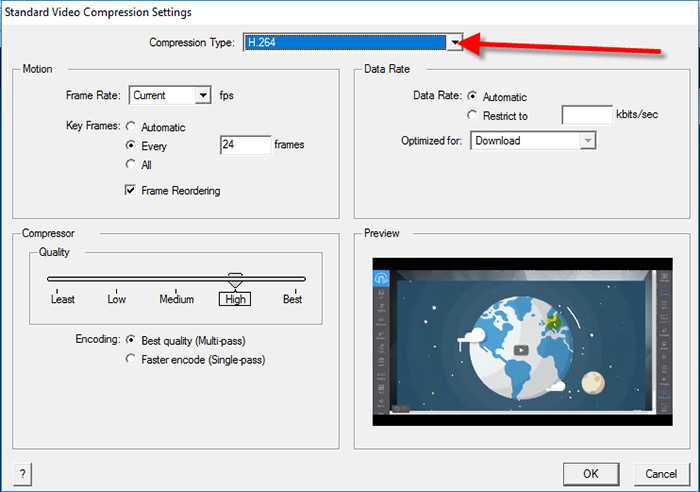
Step 4 Click the Option button at the bottom of the Export window.
Step 5 Pull down the Compression Type option and select a compression method, like H264 or HEVC.
Step 6 Adjust the Quality and select Best quality for Encoding under the Compressor section.
Step 7 Furthermore, you can adjust the Frame Rate in the Motion section and reduce the bit rate in the Data Rate section.
Step 8 Check the result in the Preview panel and click the OK button to return to the Export window.
Step 9 Select an output folder, leave a file name, and click Save to compress a video on Mac.
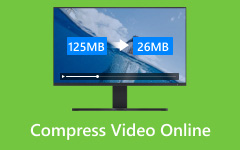
Part 4. How to Compress Video File Size on Mac Online
An online video compressor is another option to reduce video file size on a Mac. It doesn’t require you to install any software in your memory. The downside is quality loss. Moreover, this method requires a stable internet connection. To protect your privacy, you’d better use a reputable tool.
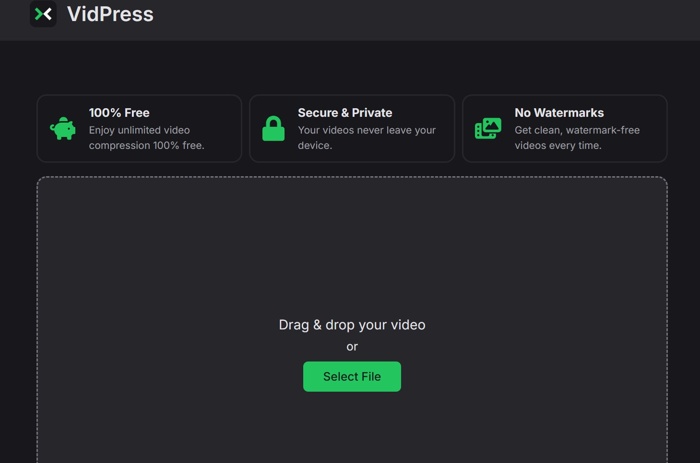
Step 1 Go to an online video compressor in your browser.
Step 2 Click the Select File or similar option to upload your large video.
Tip: Most web video compressors provide a free version with a maximum size. VidPress, for example, allows you to upload 2GB videos once.
Step 3 Customize the options and wait for the online tool to process your video.
Step 4 When it is done, click the Download button to save the compressed video to your Mac.
Conclusion
Now, you should learn at least four ways to compress a video file on your Mac computer or laptop. iMovie and QuickTime are preinstalled on your machine. They can compress videos by decreasing quality. A web-based video compressor is a portable option to shrink your video file size. Tipard Mac Video Converter Ultimate is the ultimate solution if you care about the output quality. Other questions? Please feel free to write them down below this post, and we will reply to them quickly.
More Reading

About the Author
