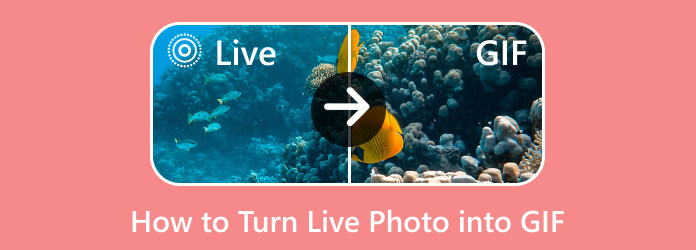
Easy-to-Understand Approaches to Convert Live Photo to GIF
Do you want to create a GIF file from your Live photos? Well, you are lucky because that is the topic we will discuss in this guidepost. If you want to learn the easiest method to turn your Live Photos into GIFs, it would be helpful to read the article. You will learn various methods using iPhones and Computers. So, without anything else, let’s discover the most straightforward procedure to convert a live photo to GIF.
Part 1. How to Turn Live Photo into GIF on Computer
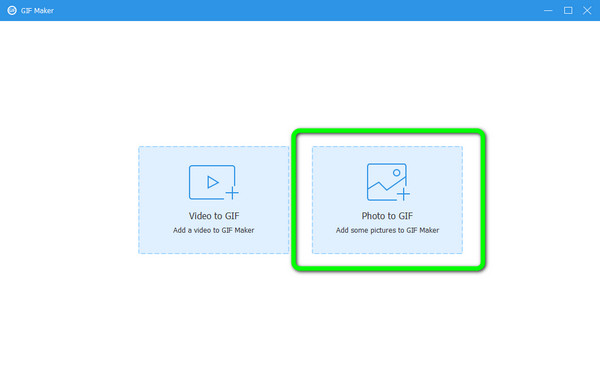
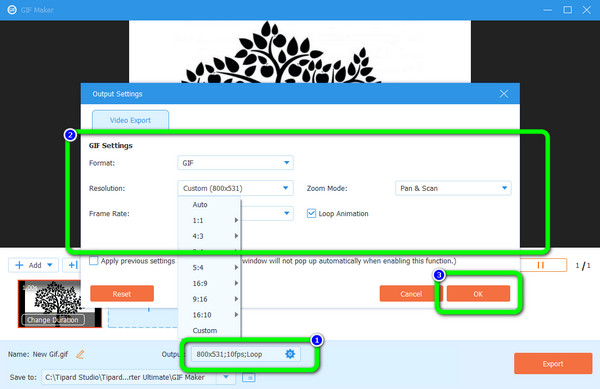
Generating a GIF from a photo is easy if you use an exceptional tool. If that is the case, one of the ultimate offline software you can utilize is Tipard Video Converter Ultimate. This GIF Maker has an understandable layout wherein you can create a GIF file in just a few clicks. Aside from that, if you proceed to the Output Setting, there are more things you can do. You can modify the resolution, frame rate, and zoom mode. In addition to that, you need the Loop Animation option to make the Live Photo a GIF. Aside from that, you can also experience the tool’s smooth exporting process. This way, after turning the Live Photo into GIF, you can proceed to the Export option to finally save your converted file to your device.
If you want to make live photos into GIFs using Tipard Video Converter Ultimate, check the easy process below.
Step 1The first step is to download Tipard Video Converter Ultimate by hitting the Download button. Afterward, proceed to the installation process.
Step 2When the installation process is done, run the offline program. After that, When the tool's main interface already appears, navigate to the Toolbox option. Then, you will see more functions under the Toolbox. The next step is to select the GIF Maker function.

Step 3Another option will show up on your computer screen. Since you are converting the photo to GIF, select the Photo to GIF option. After that, your computer folder will appear. Choose the image you want to convert, and click OK.
Step 4After adding the photo, you can make some changes. Go to the Output Settings and click the Loop Animation option. You can also change the frame rate, resolution, and even reverse the GIF. Then, click the OK button.
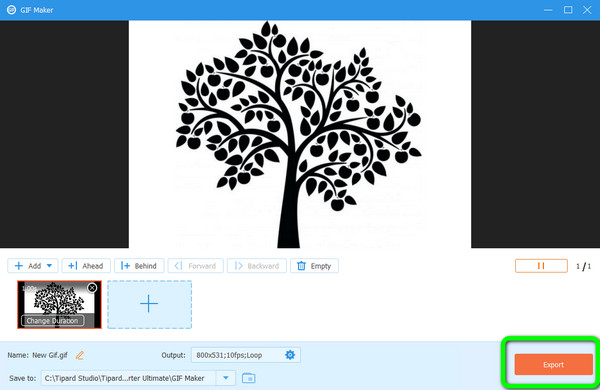
Step 5If you are satisfied with your final output, save it on your computer. To do that, click the Export button in the bottom-right corner of the interface. Then, wait a moment for the export process. When done, You can open your final file from the assigned output file location.
That is all about turning Live Photo into GIF on Computer. After you get your GIFs, you can reduce their size with a GIF compressor so that you can send them at a faster speed on social media.
Part 2. How to Convert Live Photo to GIF on iPhone
Want to know how to convert a Live Photo to GIF? Live Photos have bigger space than a normal image. Also, there are times when you want to post it, and it will only look like a still image. If so, it is necessary to convert the Live Photo into GIF. If so, see the methods below to turn the Live Photo into GIF on iPhone.
How to Turn Live Photos into GIF with Built-in Tools
The Photos application can convert your Live Photos into GIFs if you are unaware. This way, you don’t need to look for a downloadable application. Also, the Photos app offers two possible options to make your Live Photos. See the steps below.
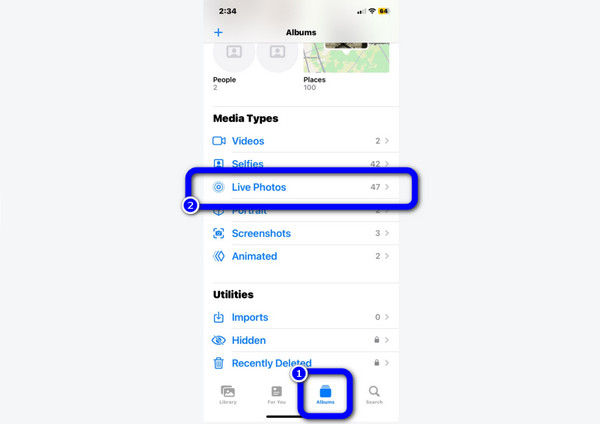
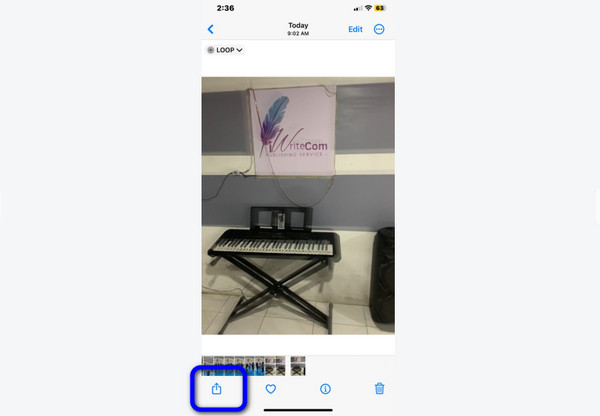
Step 1Open your iPhone and launch the Photos application. Then, navigate to the Albums section and select the Live Photos option. After that, choose the photo you want to turn into a GIF.
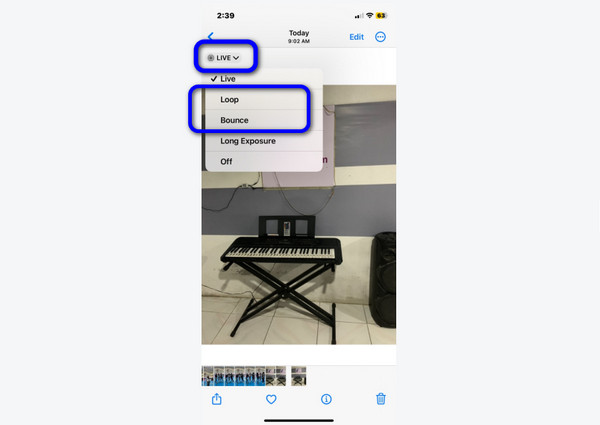
Step 2Then after you select the photo, press the Live option on the upper left part of the phone screen. Then, there will be numerous options. There are two ways you can make a GIF file. All you need is to press the Loop or Bounce option. After tapping, you will see that the photo will become a GIF.
Step 3Lastly, when you are done creating the Live Photo to GIF, press the Share option. Then, you can share the final file wherever you want.
How to Turn Live Photos into GIFs with Shortcuts
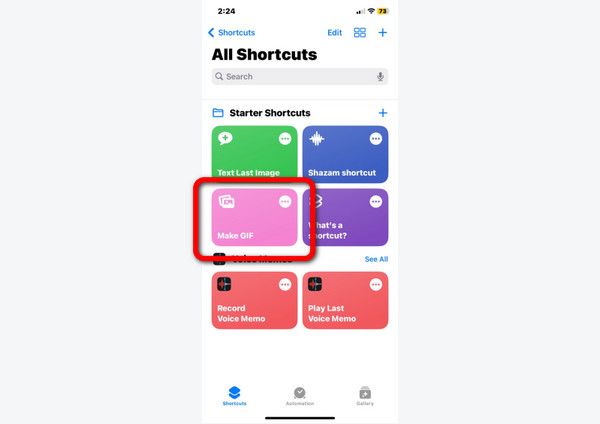
Another built-in app to use for turning Live photos into GIFs is Shortcuts. See the steps below for an idea about changing the Live photos into GIFs using this pre-built app.
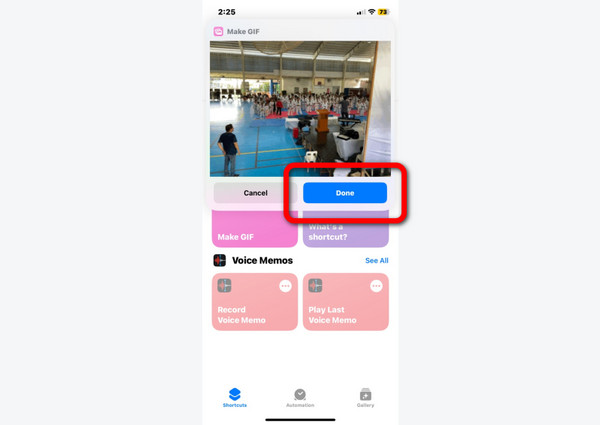
Step 1Launch the Shortcuts app and click the Make GIF option. After that, open the Live Photo from the album.
Step 2Then, after choosing the Photo, it will appear on the screen in a GIF file. To save the GIF, press the Done button.
How to Make Live Photo into GIF Using GIPHY
Let's use a downloadable application after learning the method using a built-in tool. One of the downloadable apps you can use to make the Live Photo a GIF is using GIPHY. This GIF maker lets you easily make a GIF file from a Live photo. It is because the app lets you convert files in just a few clicks. Follow the method below to save Live Photos to GIFs.
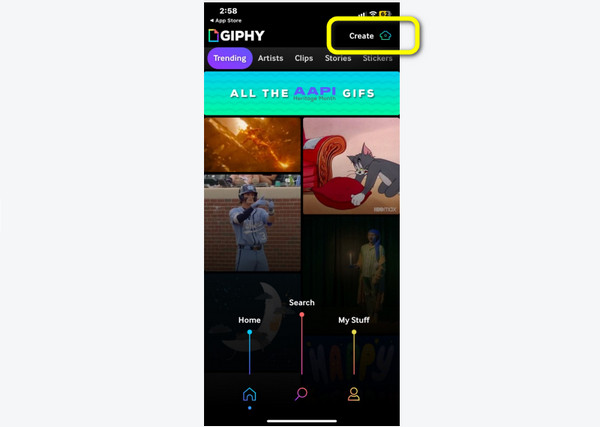
Step 1Go to the App Store and download GIPHY. Afterward, launch the application and press the Create option. Then, add the Live Photo to begin the conversion process.
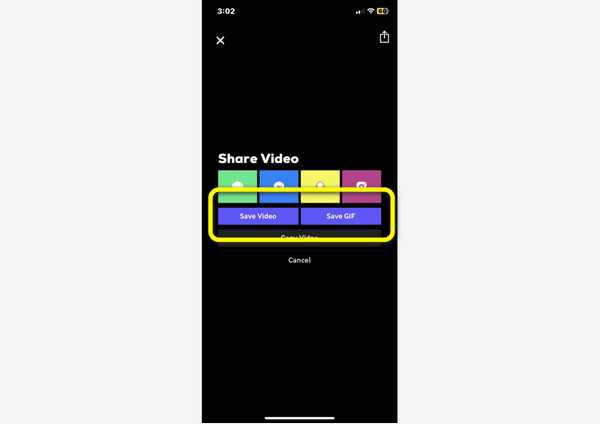
Step 2After you add the Live Photos, you can edit them using the simple editing tools below. After that, you can click the Next button.
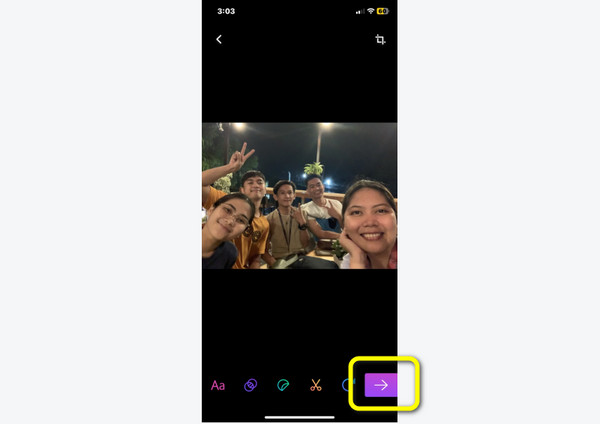
Step 3Then, the next procedure is to press the Share GIF > Save GIF option. This way, you can perfectly convert Live photos into GIFs.
How to Create GIF from Live Photo Online
Let’s say you want to turn your Live Photos into GIFs using an online tool, then use Imgflip. It is an online tool that may help you convert Live Photos to GIFs easily and instantly. Also, it doesn’t require any installation process. However, Imgflip has disadvantages. During the conversion process, there are many ads showing up on the screen, making it annoying. Also, since it is an online tool, you must have an internet connection. See the method below for the conversion process.
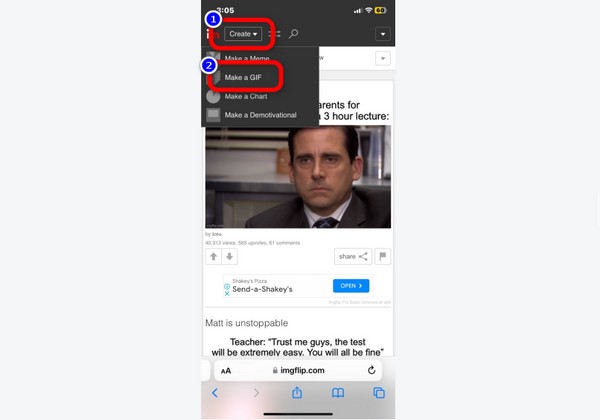
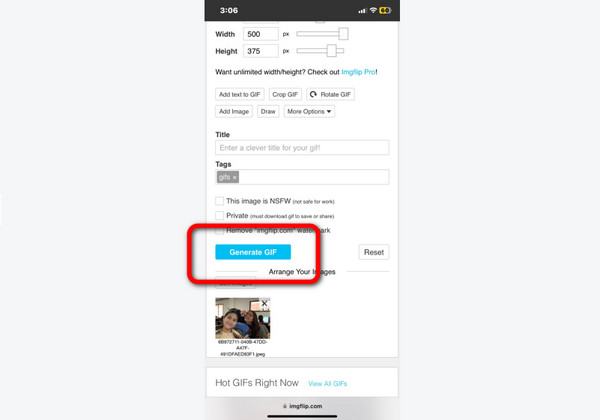
Step 1Go to the main website of Imgflip. Then, click the Create option and select the Make A GIF button.
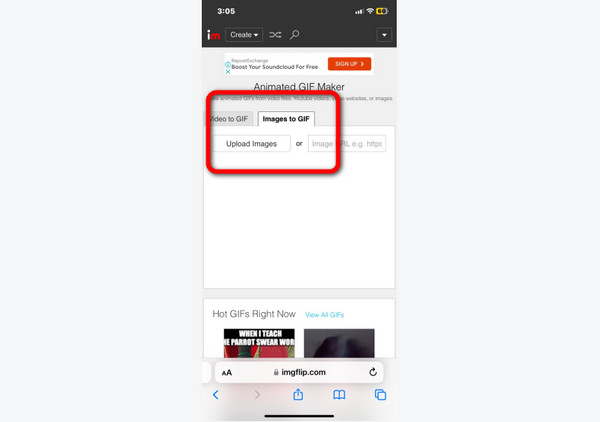
Step 2Afterward, go to the Image to GIF option and click the Upload Images button to add the Live Photo. Then, wait for the uploading process.
Step 3For the final step, click the Generate GIF button. This way, the conversion process will begin. Then, after a few seconds, click the Download button to save your GIF file.
Part 3. FAQs about How to Turn Live Photos into GIF
How to save Live Photos as still photos?
All you need is to navigate to Live Photos. Then, select the Photo you want to save as a still image. After that, you will see the Live option on the upper part of the photo. Click it and select the Turn Off option. This way, you can have the still image from the Live Photo.
What is the difference between Live Photos and GIFs?
The GIF is a short video consisting of various formats other than MP4. Live Photos are three-second videos that contain 1.5 seconds before clicking the shutter and 1.5 seconds after. Also, Live Photos take more storage space than GIFs.
What are the benefits of converting Live Photos to GIFs?
Since Live Photos are not shareable, turning them into a video or GIF is better. This way, if you want to share the file and edit them, you can do so.
Conclusion
There are lots of reasons why you need to convert Live Photos to GIFs. That’s why the article discussed various methods to turn Live Photos into GIFs using an iPhone. In addition, if you want to create GIFs from the photos using a computer, use Tipard Video Converter Ultimate. It is an offline tool accessible on both Mac and Windows Operating Systems.