
Removing background noise from video is essential for producing clear, professional-quality recordings. Whether you are creating content for social media, presentations, or personal projects, unwanted sounds can distract viewers and reduce audio clarity. This guide explores effective methods to eliminate noise on computers, online platforms, and mobile devices, using both free tools and professional software for optimal results.

Part 1. Understanding Background Noise
First, it is necessary to contextualize what background noise is and its origins before removing or minimizing background noise in your recordings. Understanding what background noise is and its origins helps you in making the right modifications to your surroundings, equipment, and methods to record your recordings.
1. What Background Noise Is
Humming, voices, and other distractions are examples of background noise. Background noise is the sound of anything unwanted, and these are injuries that are unprofessional recordings or blurry recordings.
2. Common Sources of Background Noise
- Environmental sounds: traffic, wind, pets, people talking
- Electronic interference: computer fans, air conditioners, refrigerators
- Handling noise: keyboard clicks, tapping, mic movement
3. Factors That Increase Noise Pickup
- Quality of microphones: if it is of a lower quality, it will capture background noise and produce a hissing sound
- The acoustics of the room: hard surfaces will create echoes and reverb
- Distance to the mic: speaking too far from the mic is bad because it will have to raise its volume, and that will raise the unwanted sound level
Part 2. Remove Background Noise on a Computer
1. Tipard Video Converter Ultimate (AI-Powered)
As an AI-based media tool, Tipard Video Converter Ultimate enhances videos by eliminating background noise, seamlessly altering videos as well as maintaining quality during conversion, and offering 60x GPU-accelerated conversion speeds with additional editing tools that fix audio issues, adjust volume, and repair video/audio delays.
- Automatically reduces video grain and improves both visual and audio clarity.
- Boosts or balances audio levels while minimizing low-level background noise.
- Fixes audio delay issues that may appear when repairing noisy audio.
- Lets you mute noisy parts, cut unwanted sections, and apply filters for cleaner results.
- Handles noise removal and conversion up to 60× faster, even with large 4K/8K files.

Step 1 Download and Set up the Tool
Download Tipard Video Converter Ultimate from the product page, choose the installer for either Mac or Windows, and complete the setup before running the application.
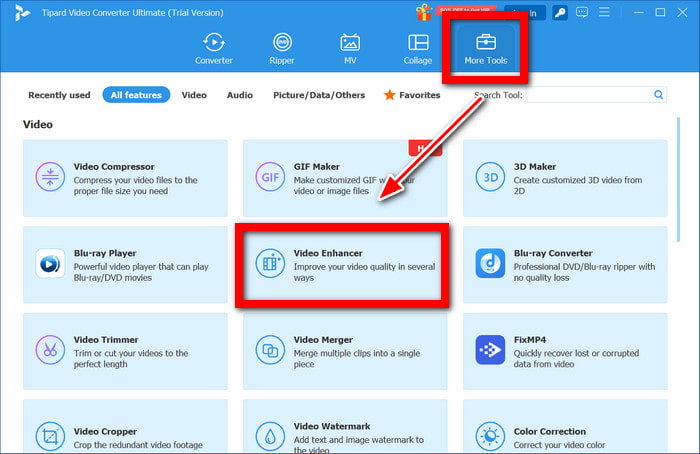
Step 2 Access Video Enhancer from More Tools
On the home page, go to the More Tools section and click Video Enhancer. A new screen will appear.
Step 3 Upload the Noisy Video File
Click the Add button in the new window to upload the video you want to enhance.

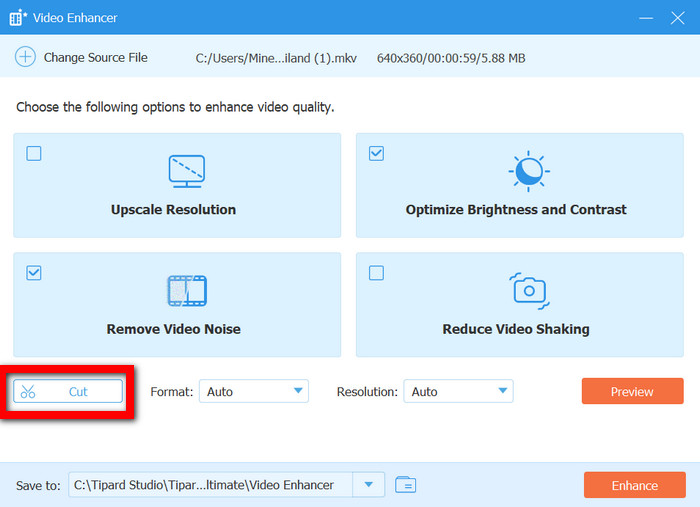
Step 4 Select the Video Noise Removal Option
Check Remove Video Noise to enable its noise reduction feature.

Step 5 Edit and Preview the Video
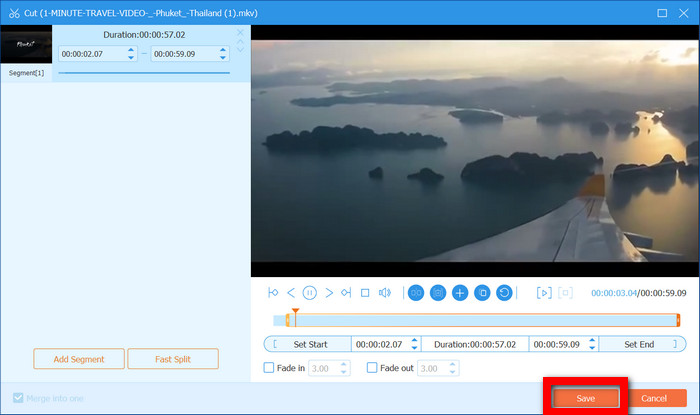
If you would like to trim parts, click the Cut button. Before finalizing, you can view the preview screen to check the output.
Step 6 Keep Your Changes
Click Save so you can keep all the changes. The application will now prepare the video for the changes to be made.
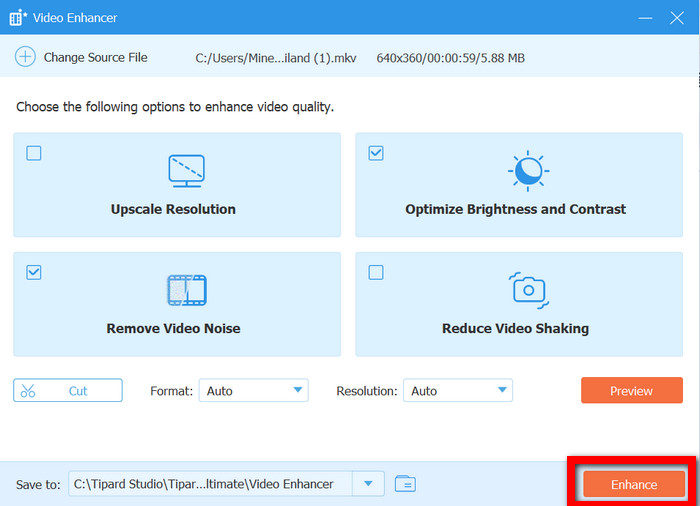
Step 7 Improve and Export the Video
Select the Enhance button to begin the noise removal process.
2. Adobe Premiere Pro
Adobe Premiere Pro is a professional program that allows for precise noise editing using specialized tools such as DeNoise, Parametric EQ, and Adaptive Noise Reduction.
Step 1 Start Premiere Pro, create a new project, and add media to Premiere Pro by importing your video into the timeline.
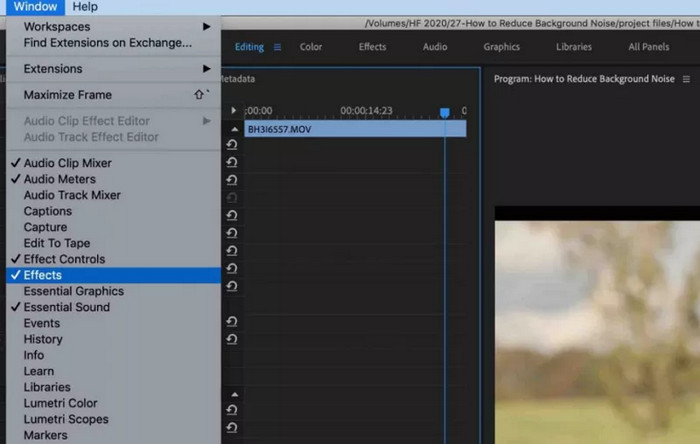
Step 2 Click across your screen from the top to Window > Workspaces > Audio. This allows for all your sound editing tools to be displayed.
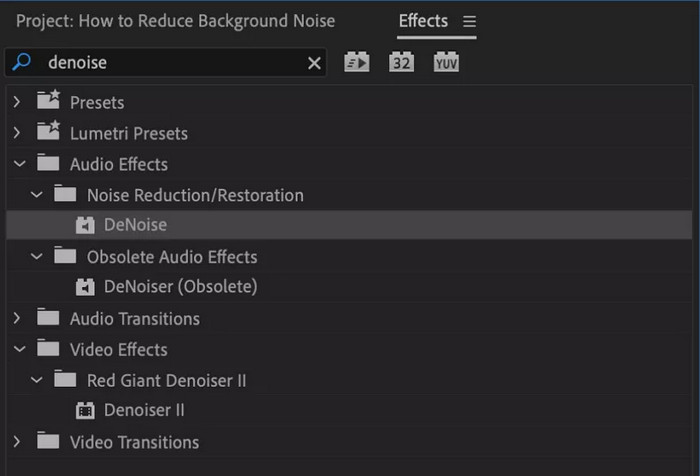
Step 3 Find DeNoise in the Effects panel on the left side and drag it toward the audio portion of the timeline.
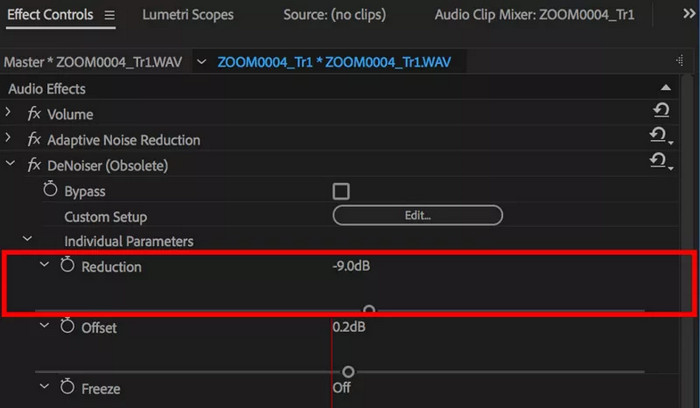
Step 4 Locate the Effect Controls section and slide the Reduction slider to see how much the noise reduction takes effect.
Step 5 Search for Adaptive Noise Reduction, then apply it for more precise real-time filtering. You can fine-tune settings like:
- Noise Reduction Level
- Signal-to-Noise Optimization
- Attack/Release Times
Step 6 To export your audio video, click File > Export > Media and select a format of your choosing in the resulting pop-up before clicking Export to save your noise-reduced video.
Part 3. Remove Background Noise for Free
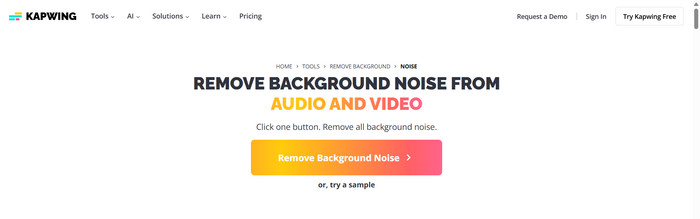
1. Kapwing Noise Reducer (Free Online)
Kapwing is a great online website that removes all kinds of noise from audio, such as static, hums, and background chatter, using AI. You can also use Kapwing to convert video, making it perfect for quick edits without an install.
Step 1 Use a web browser to go to the Noise Reducer and upload your audio or video file.
Step 2 Turn on the Clean Audio feature.
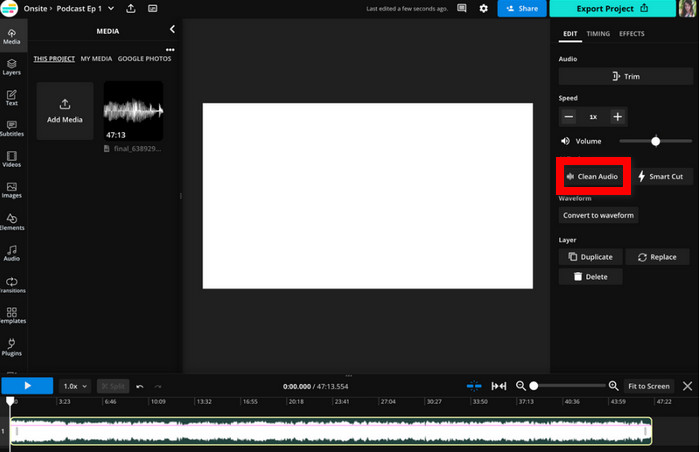
Step 3 Adjusting the noise-reduction strength is needed.
Step 4 You can preview the cleaned result in the player.
Step 5 Click Export, and your enhanced audio or video will start downloading.
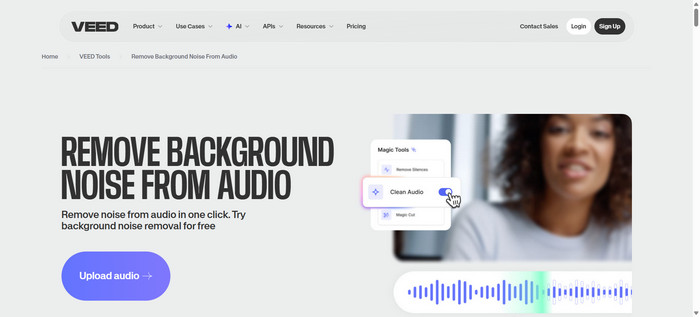
2. VEED.io Background Noise Remover (Free Online)
Veed.io is beginner-friendly and works on mobile browsers. It is also free and cleans noise backgrounds quickly and has no advanced features.
Step 1 Open the Clean Audio / Noise Remover tool on Veed.io and upload your audio or video file.
Step 2 On Effects, locate the Noise and adjust the slider to 0.
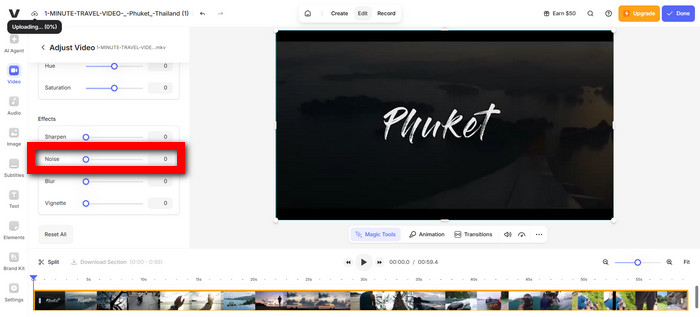
Step 3 Once the media has been processed, preview the media to check if the removed noise has any audio clarity.
Step 4 Click the Export button to download the file to your device.
Part 4. Remove Background Noise on Your Phone
1. ByeNoise
ByeNoise is entirely free and offers users the chance to record videos or audios while tweaking some options to get pro-level sound quality, while removing the excess noise to make the sound or video clearer. This is ideal for recording music and podcasts or other general recordings.

Step 1 On your Android phone, download the app from the Google Play Store. If you are on an iPhone, you can download it from the App Store.
Step 2 Start the app and let it use your microphone.
Step 3 Press the button to start recording.
Step 4 Play an instrument or sing, or just talk. The app will work to remove excess noise automatically.
Step 5 Press the Stop button whenever you are done recording.
2. Noise Reducer (iPhone)
Noise Reducer is an option that allows the user to take existing recordings on their phone and quickly remove background noise for video or audio recordings.
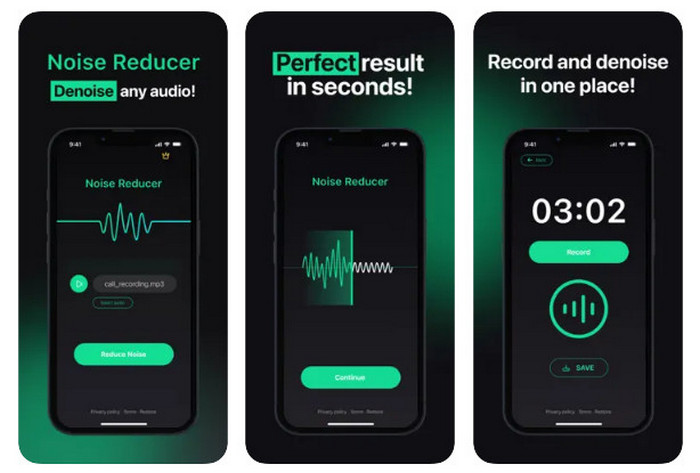
Step 1 On your iPhone, go to the App Store and download Noise Reducer.
Step 2 From this app, open it with the correct permissions.
Step 3 Out of your storage, select the audio or video file that you want to work on.
Step 4 Turn on the options for Noise Reduction or the Denoise button.
Step 5 Make sure you listen to it before finalizing the export, to ensure that the output is satisfactory.
Conclusion
Background video noise removal is key to achieving crisp, professional audio in any recording. By using the right tools, whether AI-powered software, online platforms, or mobile apps, you can easily eliminate unwanted sounds, enhance clarity, and ensure your videos are polished and audience-ready.
More Reading


About the Author
