
Ever struggled with a video where the sound does not match the picture? It can be really frustrating. Learning how to sync audio and video is important for anyone making videos. Whether it is a fun memory, a vlog, or an important presentation, mismatched sound can ruin it.
In this guide, we will show simple ways, on desktop, online tool, and mobile app, to get your audio and video perfectly aligned every time.
Part 1. Why Is Audio Out of Sync with Video
So, why do you think the audio is out of sync with the video?
Audio goes out of sync with video when the sound and picture are not recorded or processed at the same speed. It can happen during recording if the camera and microphone are not matched. It can also occur when editing, converting, or compressing video files. Even playing a video on slow devices can cause a delay. Small timing differences make the audio lag behind or rush ahead of the video.
Part 2. Quick Fixes to Sync Audio and Video
There are quick methods to synchronize sound and video if your audio is a little off. The audio can be shifted forward or backward to match the video in players such as VLC. Sometimes, minor lags in online streaming can be fixed by simply refreshing the page. These techniques are quick and simple, but they only function while you are watching. Editing tools are required for syncing to be permanent.
Part 3. 4 Ways to Sync Audio and Video Permanently
1. Tipard Video Converter Ultimate
No more experiencing annoying audio delay or lip sync problems once you use Tipard Video Converter Ultimate to sync audio and video. It gives you clear and simple controls to adjust the delay by seconds. You can preview changes in real time before saving. It also supports full hardware acceleration, so your corrected video is produced much faster. Plus, it supports many popular formats, which makes sharing and playing your final video easy.
Why We Select It
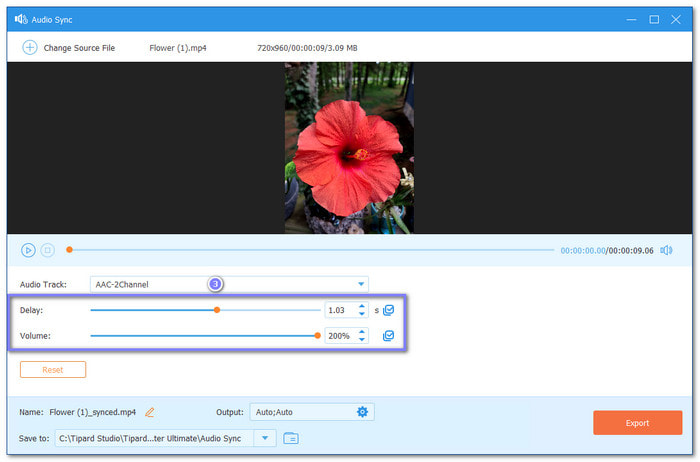
It gives you full control from start to finish. It has a built-in feature to sync audio and video permanently. You can adjust the delay from -10.00 to 10.00 seconds with precision. You can also boost the volume up to 200% if needed. Besides that, you can change the output format and resolution if you want better quality or a smaller file size.
Here is how to sync audio with video using Tipard Video Converter Ultimate:
Step 1Start by getting Tipard Video Converter Ultimate on your Windows or Mac computer. Then, install and launch it, and please wait until you see the main interface.
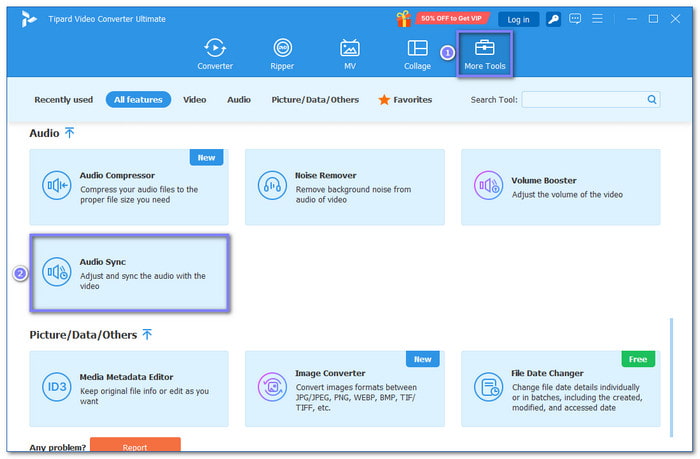
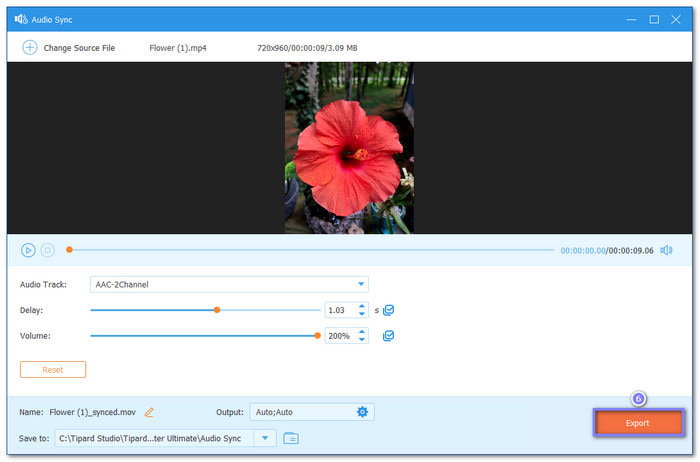
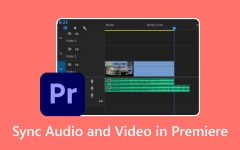
Step 2Click More Tools at the top menu. From the tool list, choose Audio Sync. Then, upload the video that has an audio delay. The video will appear in the preview display.
Step 3Now, you can fix the timing. Move the Delay slider to sync the sound with the video. Then, play the preview to check the result. Keep adjusting until the voice matches the lips. You can also change the volume if needed.
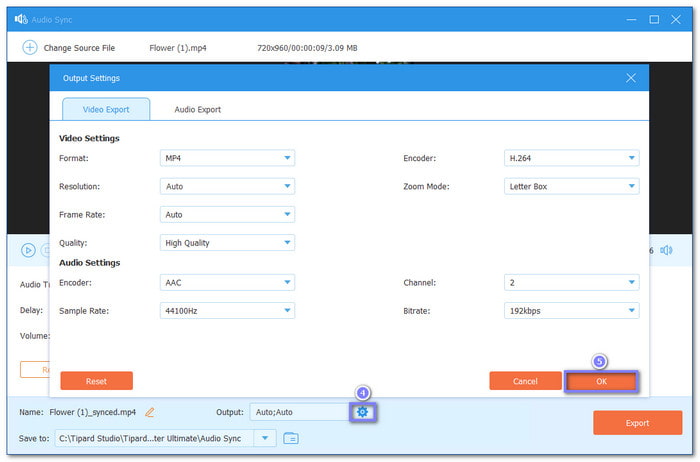
Step 4After that, click the Cogwheel button. It opens the output settings. Here, you can modify the format, resolution, frame rate, and other options. Choose what you prefer, then click the OK button to save the settings.
Step 5Once done, click the Export button. Tipard Video Converter Ultimate will process and save a new file. Your final video now plays smoothly with correct sound timing!
2. Final Cut Pro X
Final Cut Pro X is built for serious editing work. This sync audio and video software analyzes sound waveforms to match audio and video with great accuracy. Once synced, it creates a new combined clip that keeps both tracks locked together. It makes the synchronization permanent, both in your project and in the exported file.
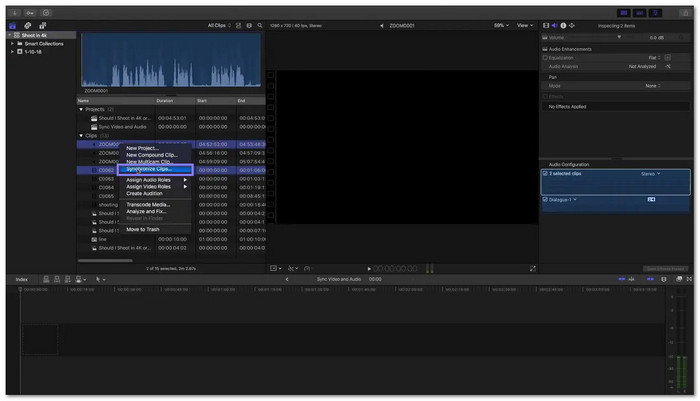
Step 1First, open your project browser. Click the video clip you want to use. Then, hold Command (Cmd) on your keyboard and click the audio clip. Both clips should now be highlighted.
Step 2Right-click one of the selected clips. Choose Synchronize Clips from the menu. You can also press Option + Command + G. Final Cut Pro X will analyze the audio waveforms and match them automatically.
Step 3After that, a new synchronized clip will appear in your browser. Play it back. Check if the lips match the sound. If needed, make small adjustments.
Step 4Once everything looks good, go to File > Share > Export File or press Command + E. Export the project. Now, your audio and video are permanently synced in the final file.
3. VEED.IO
If you want something simple and online, VEED.IO makes syncing sound and video easy. You upload your files, place them on the timeline, and align them by dragging to the right spot. After export, the synced audio and video stay merged in one file. You can also trim clips, remove background noise, and change speed. It works in your browser, so there is no program to install.
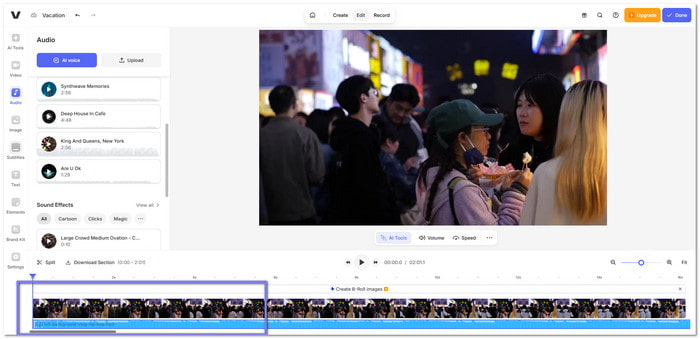
Step 1Go to the VEED.IO website and sign in. Click Upload. Then, add your video and audio files.
Step 2Once uploaded, your video files will appear in the editor. Drag the audio file under the video on the timeline. Move it left or right until it matches the video.
Step 3Now, play the video. Watch and listen closely. If needed, zoom in on the timeline. It helps you align the sound more accurately. You can trim or cut the audio if it is too long.
Step 4Preview the full video to double-check the sync. Once you are satisfied, click Export. Download the file. The synced audio and video are now merged permanently.
4. CapCut
It is advised to use CapCut for rapid and imaginative editing. It can detect music beats and place markers on the timeline. It helps you match video cuts with the rhythm of the song. Once you export the project, the audio and video remain synced permanently. It is simple to use and works well for social media content. You can also split clips, adjust timing, and apply smooth video transitions with ease.
Learn how to sync sound with video using CapCut below:
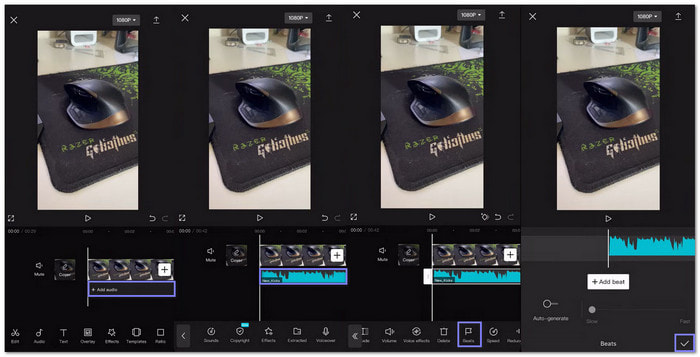
Step 1Get your phone, open CapCut, and import your video clips. Then, tap Audio and choose Sounds. Pick your music and add it to the timeline.
Step 2Tap on the audio track. Choose Beats. Then, turn on Auto-Generate Beats. CapCut will add beat markers on the timeline. These look like small yellow dots.
Step 3Now, zoom in on the timeline using two fingers. Move to each yellow beat marker. Tap the video clip and press Split at every beat. Delete the extra parts you do not need. It makes the video change exactly on the music beat.
Step 4Play the full project to check the timing. If it feels smooth, tap Export. Your video will now have permanently synced audio and video.
Part 4. Comparison of the Best Methods to Sync Audio and Video
When it comes to syncing audio and video permanently, there are several tools you can use. Each has its strengths, but some are easier and faster than others. Below is a comparison of the best methods, including Tipard Video Converter Ultimate, Final Cut Pro X, VEED.IO, and CapCut.
| Method | Ease of Use | Precision Control | Speed | Output Options | Best for |
|---|---|---|---|---|---|
| Tipard Video Converter Ultimate | Simple and beginner-friendly. | Adjust the delay from -10.00 to 10.00 seconds and boost the volume up to 200%. | Fast with full hardware acceleration. | Change format, resolution, frame rate, etc. | Users who want full control and a permanent sync quickly. |
| Final Cut Pro X | Professional, but complex for beginners | Syncs clips automatically using waveforms, and manual tweaks are possible. | Medium, depends on clip size. | High-quality export formats. | Professional editors who need advanced features. |
| VEED.IO | Easy drag-and-drop online. | Align audio manually on the timeline. | Medium, depending on internet speed. | Limited formats for free users. | Quick online edits without installing software. |
| CapCut | Simple interface with creative features. | Syncs video with music beats using markers. | Fast for short clips. | Limited format options. | Social media creators and short video edits. |
Conclusion
If you ever experience sound and video out of sync, you do not have to worry anymore. There are easy solutions to fix it, like using Tipard Video Converter Ultimate. It lets you have full control over the delay, boost volume, and change output settings. No more frustration, just clear sound and video together.
More Reading

About the Author
