
To edit audio effectively, you do not need to be a professional; you just need the right skills and tools. Whether refining podcasts, music clips, or voiceovers, knowing how to trim, fade, adjust volume, and remove background noise makes every recording sound polished. This guide walks you through essential techniques, compares top audio editing software, and provides step-by-step workflows. By following these tips, you can edit audio confidently and efficiently, producing clear, balanced, and professional results that engage listeners and elevate the quality of every project.

Part 1. Basic Audio Editing Skills Everyone Should Know
Editing audio is simple and easy. To get refined audio, you just have to learn a few skills like cleaning recordings, polishing transitions, and making audio sound professional to accomplish. Below, you will see the audio editing skills every beginner should learn.
1. Trimming/Cutting Audio: Remove unwanted beginnings, endings, and sections to get clean and clear recordings.
2. Fading In and Out: Add volume transitions so the audio does not have an abrupt start or end.
3. Level Volume: Make loud and quiet adjustments so the audio is consistent and clear.
4. Joining Audio Clips: Add and arrange audio clips on a timeline.
5. Clean Background Noise: Use editing tools to eliminate hums, static, and background sounds.
Part 2. Choosing Your Audio Editing Tool
1. Tipard Video Converter Ultimate
Tipard Video Converter Ultimate is a feature-rich media program for all users designed for fast, efficient conversion and modification of audio and video. GPU-accelerated performance with advanced editing tools makes it easy for novices to trim, enhance, convert, or extract audio.

- Converts video to audio file in a variety of formats: MP3, AAC, WAV, FLAC, OGG
- Clipping, merging, volume adjusting, and delay fixing editor.
- Tools to refine and booster the volume for synchronization.
- Video-to-audio batch conversion with 60× faster GPU acceleration.
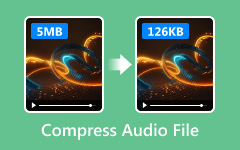
- Compress audio files or convert them into smaller formats without losing quality.

- Unmatched GPU-accelerated conversion speed.
- Over 500 supported audio and video stem files.
- Volume, audio, and metadata editing.
- User-friendly.
- Direct audio extraction from 4K/8K
- Completing all features requires purchasing a license.
2. AudioMass
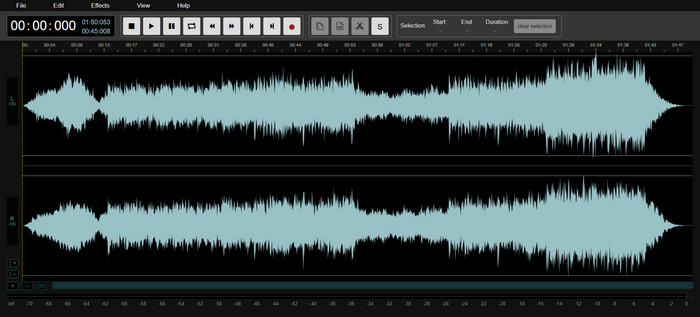
AudioMass is a browser-based online audio editor, which means there are no downloads or installations needed. This is very useful when you need to do hasty audio edits (like trim, add a few effects, or do something simple) and do not want to bother yourself with software installations.
- Nothing downloads at all - all browser-based.
- Very easy and painless to use.
- Can easily make cuts, fade, and reduce some noise.
- All core features to accomplish just about anything are free of cost.
- Must be able to connect to the internet.
- Not very many tools at all.
- Cannot do any extensive mixing or multi-tracking, though basic functions like volume boost are available.
3. Audacity
No other platform is so widely used to record, clean, and edit audio. Audacity is a free, open-source, multi-track audio editor, and it is extremely powerful and flexible, making it perfect for just about any use, including professional audio editing.
- It can be used at no cost to you and is open-source.
- You can edit several tracks at once.
- A very big library containing effects and other plugins for editing.
- Great for removing noise, leveling volume, and editing the visual representation of the audio.
- The interface is sort of ugly.
- The learning curve is kind of steep.
- No built-in workflows, such as cloud editing.
4. Clideo
Clideo is a very popular online editor focused on fast trims and other quick edits. Clideo is great if you do not want to bother with annoying dependencies and do not want to install any software, but rather get things done in a browser.
- No installation needed.
- Perfect for simple edits like quick trims and volume changes.
- Very straightforward interface.
- Cuts can be done very quickly.
- Can get limited if your internet connection is slow.
- Precision can be an issue.
- Some features on the free version will add a watermark to your video.
5. GarageBand
On Mac and iOS, GarageBand is a free and very beginner-friendly Digital Audio Workstation (DAW) suited for music-style editing. It does a great job of recording and layering tones for finished audio.
- No costs as it is free software for Mac and iOS.
- Good for music and podcast creation as well as layering multiple tracks.
- User-friendly.
- Modern and very good looking.
- Apple only (Mac and iOS devices only).
- For general audio editing, the focus is more on music, and it includes features like an audio merger for combining tracks.
- You can get the feeling that it is a little bloated for quick edits.
Part 3. Practical Editing Workflows
1. How to Edit a Podcast Episode
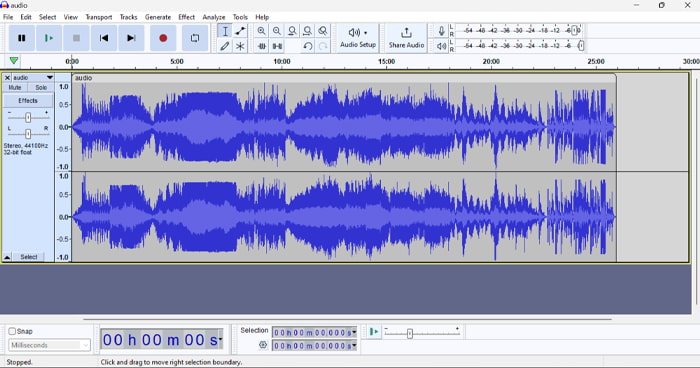
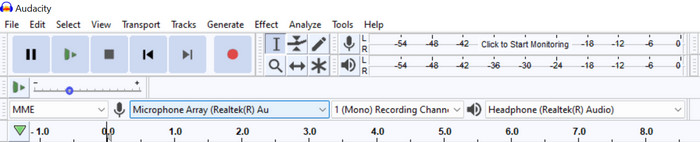
Audacity is audio editing software that has made features like export, split, save, trim, combine, adjust volume, merge, and more that are necessary to edit a podcast and more available to users and is free and open to everyone and has a relatively low learning curve.
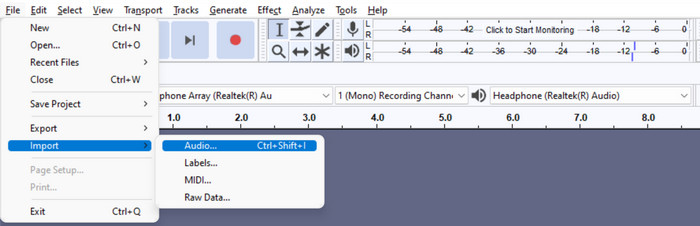
Step 1 Launch the program and use the red circle button to record your podcast, or, to use prerecorded podcasts, File > Import > Audio. Tutorial videos in MP3 or wav format can be posted first before beginning the editing process.
Step 2 Removing filler words, pauses, or silences can be achieved using the selection tool. The Cut tool gives more control in being able to edit a certain area in fine detail.
Step 3 To adjust volume, go to Effect > Amplify or Normalize for balancing the volume level of different speakers. Also, use the Compressor so that all muted or soft segments will be audibly present.
Step 4 Lastly, save your work and export the file using File > Export > Export as MP3 in the desired folder on your computer or device.
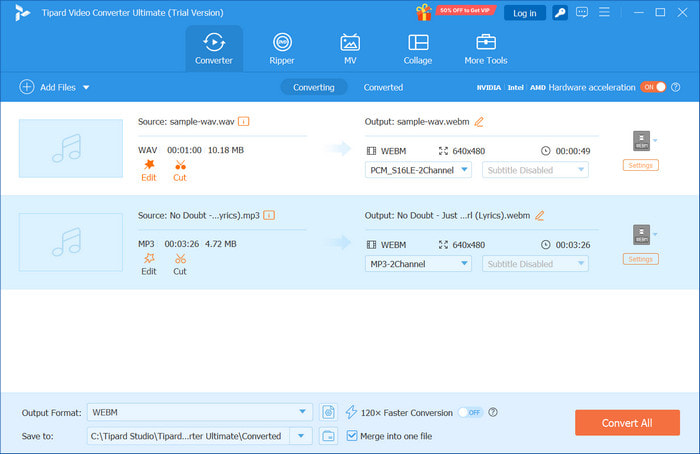
2. How to Edit an MP3 Song Clip
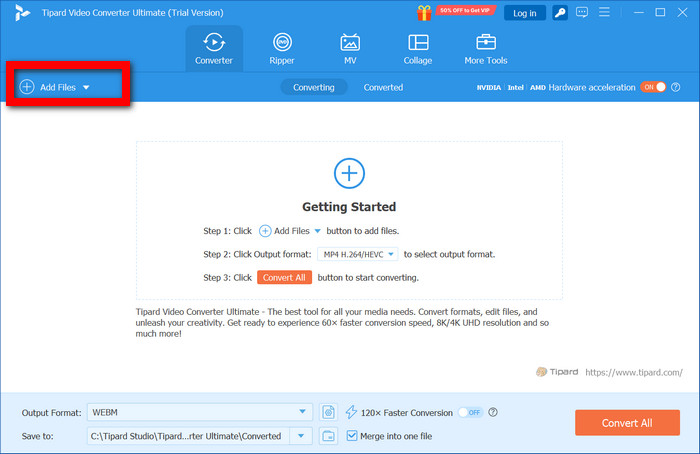
Tipard Video Converter Ultimate is also suitable for trimming music pieces, ringtones, and sample audio. Its audio editor is complemented by accurate trimming tools and several other features under the More Tools tab.
Step 1 Upload the MP3 File
Choose the Add Files button to upload the song to Tipard.
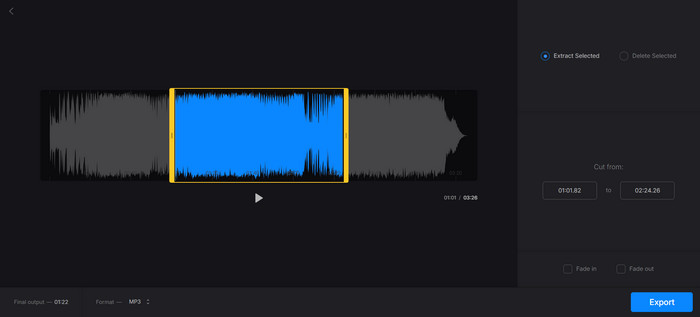
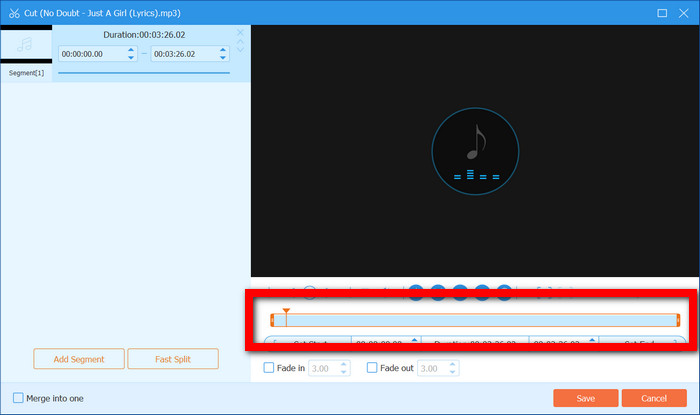
Step 2 Trim or Isolate the Specific Section
Select Cut, adjust the sliders to the selected portion, divide the section if necessary, and remove the other unwanted sections.
Step 3 Balance the Audio
Select Edit > Audio and adjust the slider under Volume to balance the audio.

Step 4 Apply More Tools Features (If Needed)
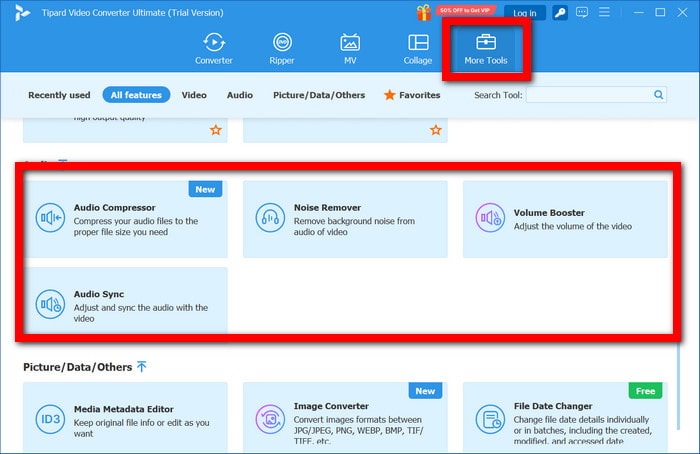
From the More Tools tab, you can:
- Noise Remover: Clean hiss or background noise
- Volume Booster: Increase quiet clips
- Audio Compressor: Reduce file size
- Audio Converter: Change format (MP3, AAC, FLAC, WAV, M4R)
Step 5 Save the Audio File Trimmed
Select the destination file format, and in the end, click Convert All to download the edited audio clip.

Conclusion
The answer to how to edit audio files properly is as simple as knowing how to edit audio files. Learning how to perform basic audio editing skills such as trimming, fading, volume adjustment, and noise removal can do wonders for improving the quality of a recording. With reliable software such as Tipard Video Converter Ultimate, Audacity, or AudioMass, you can efficiently accomplish this. Adhering to certain work patterns allows for finished audio files to be sent out in public with confidence, knowing the audio is not just balanced, but polished.
More Reading

About the Author
