
You just watched the video you recorded on your iPhone, and it is so shaky that it feels dizzying to watch. Small movements, walking, or hand jitters can make your footage look unstable and hard to enjoy.
In that case, you need to learn how to stabilize iPhone video. This guide will show you step by step how to capture steady videos during recording and how to fix shaky footage after recording, so your videos always look professional and easy to watch.

Part 1. How to Stabilize iPhone Video During Recording
When recording with an iPhone, shaky hands or quick movement can make the video look rough. Apple gives you built-in tools like Enhanced Stabilization, Motion Tracking, and Action Mode. You can also use simple tricks with your hands or outside support to make your shots steady. Let us go through each one!
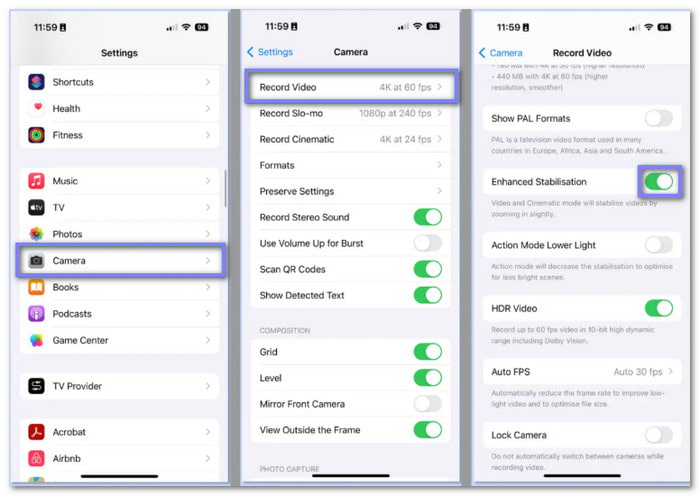
1. Enhanced Stabilization
It is a hidden video-only feature found on iPhone 14 and later. It works in both Video and Cinematic modes. The phone crops the edges or zooms in a little while filming to balance movement. It is usually on by default, but you can switch it on or off. Using this feature is the easiest way to learn how to stabilize video on an iPhone for smoother footage.
Step 1 Open Settings.
Step 2 Tap Camera.
Step 3 Tap Record Video.
Step 4 Toggle Enhanced Stabilization.
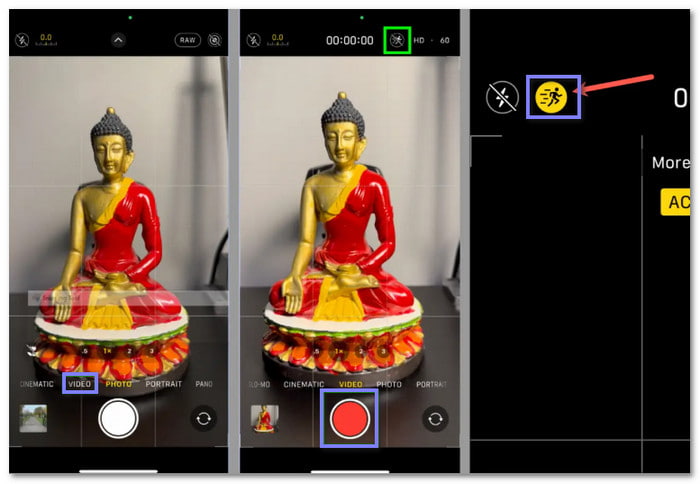
2. Action Mode
Action Mode is like carrying a mini gimbal inside your iPhone. It helps when you record while running or walking. It works in the Camera app on all iPhone 14 models. You can film up to 60 fps with Dolby Vision HDR for high quality. This feature is a simple way to learn how to stabilize shaky video on an iPhone while recording movement.
Step 1 Open the Camera app.
Step 2 Swipe to Video mode.
Step 3 Tap the Action Mode button (a running person). It turns yellow when active.
Step 4 Tap the Record button to start.
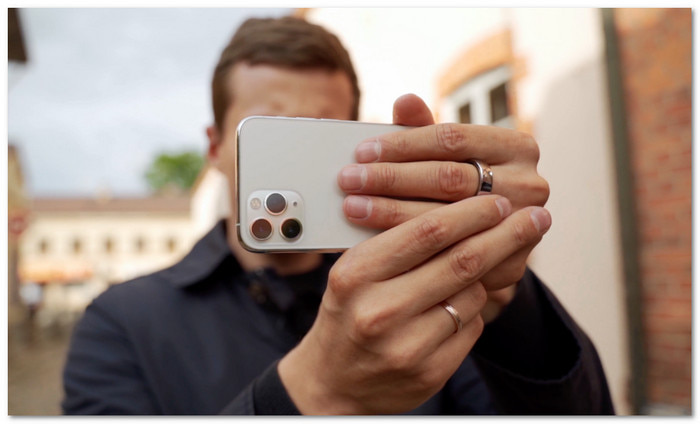
3. Handheld Techniques
Even without extra tools, the way you hold your phone matters a lot. Using proper iPhone video stabilizer handheld methods can make your shots much steadier.
• Use two hands: Hold the phone with both hands. Keep your elbows tucked in close.
• Keep it close: Treat the phone like part of your body. Keep it steady against yourself.
• Make slow moves: Walk or move slowly. Make each movement controlled, not random.
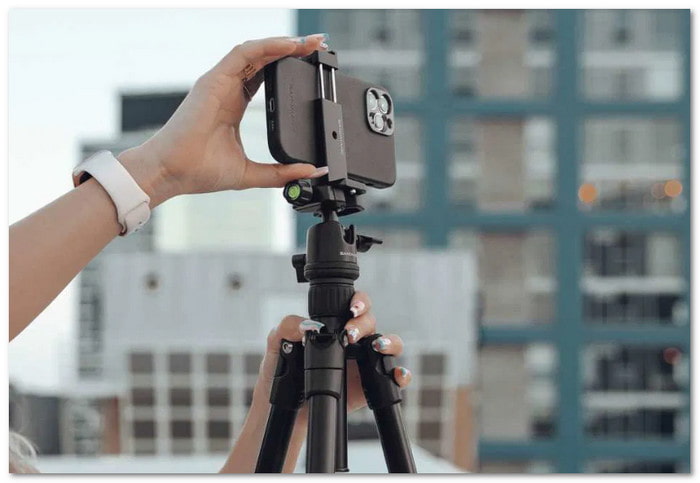
4. Using External Support
Sometimes, you need more than your hands. Support from objects or tools can make your video smooth.
• Find a stable surface: Rest your arms or phone against a wall, table, or rock. It works like a natural tripod.
• Use a tripod or gimbal: A tripod keeps the phone still when you do not move. A gimbal balances it when you do. Both give you steady, movie-like shots.
Part 2. How to Stabilize iPhone Video After Recording
Tipard Video Converter Ultimate comes with many tools, and one of the best is Video Enhancer, where you can find the Reduce Video Shaking option to stabilize iPhone video after recording.
With just one click, you can remove shakiness from any iPhone video, even long or large files. It also offers other features like upscaling resolution, removing video noise, and optimizing basic effects. Plus, it supports AI-driven techniques to give your videos a polished and professional look.
Step 1 Get Tipard Video Converter Ultimate on your Windows or Mac by hitting the Free Download button. After that, install the file and launch the program once the setup is finished.
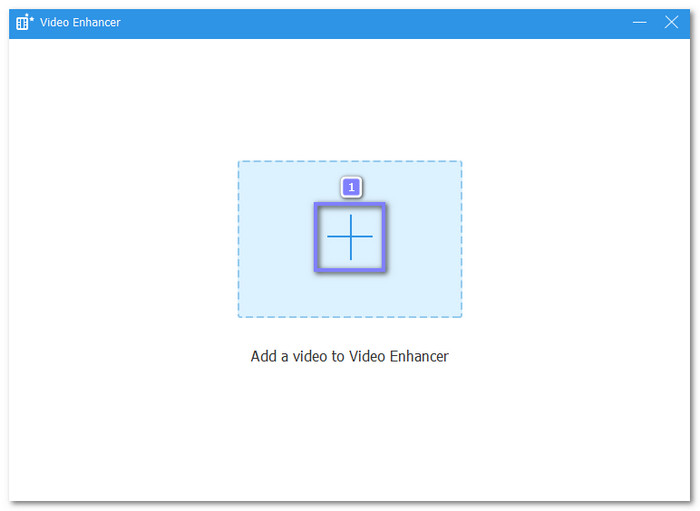
Step 2 Go to the More Tools tab in the program and look for the Video Enhancer, and click it to start.

Step 3 Press the Add button in the window to upload your iPhone video. It is the clip you want to stabilize.
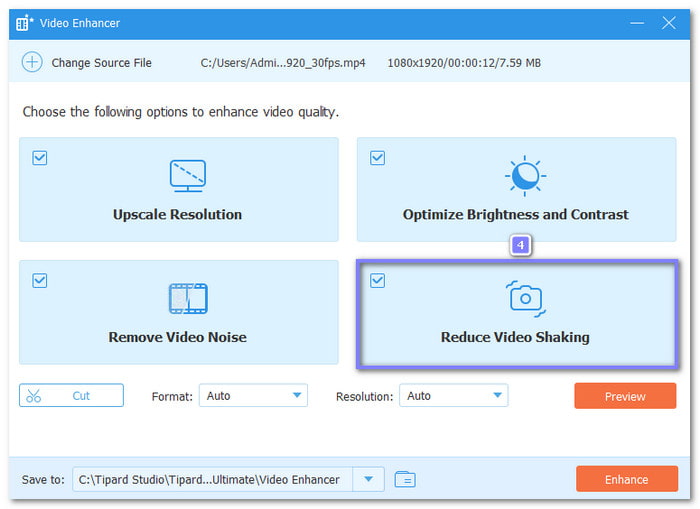
Step 4 Once your iPhone video is added, tick the box for Reduce Video Shakiness. It will automatically make your video smoother. You can also try other options like Upscale Resolution, Optimize Brightness and Contrast, or Remove Video Noise to make the video look more professional.
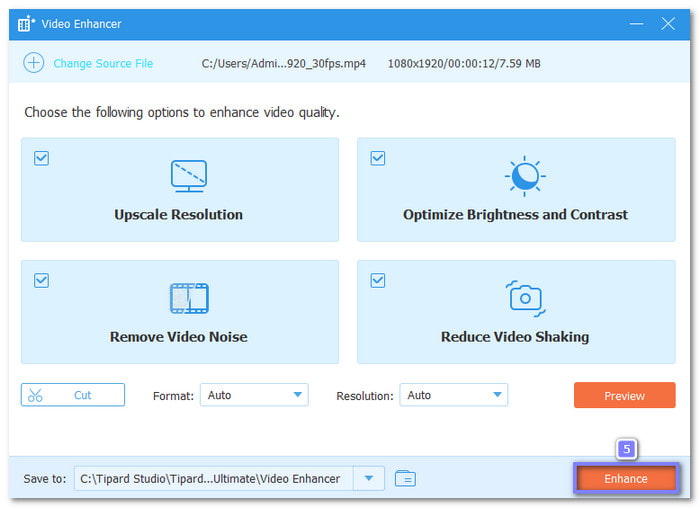
Step 5 Finally, click the Enhance button to process your video. Please wait for the program to finish, and then save your new, stable video to your computer.
Other things Tipard Video Converter Ultimate can help you with: Tipard Video Converter Ultimate is not only for iPhone video stabilization. You can also use it to fix GoPro shaky clips or even videos from other cameras. It can also upscale the resolution to make your footage sharper, remove noise for a cleaner look, and balance light and colors so your video looks bright and clear.
Part 3. Tips to Avoid or Reduce Video Shakiness on iPhone
Recording smooth video on your iPhone starts with good habits. By following a few simple tricks, you can cut down on shakiness and save time later.
Tip 1: Use a Tripod
A tripod may look simple, but it is one of the best tools to avoid shaky videos. It locks your iPhone in place and gives you steady shots for things like interviews, time-lapses, or static scenes. The only drawback is less mobility since you will be fixed to one spot. If you want smoother moving shots, a gimbal works better.
Tip 2: Activate Built-In Stabilization
iPhones come with built-in stabilization, and newer models like the iPhone 14 add Enhanced Stabilization. Make sure this is always turned on so your clips are smoother right from the start.
Tip 3: Avoid Zooming
Zooming in with your fingers may seem quick, but it lowers video quality and makes every shake worse. It can leave you with blurry, pixelated clips. Instead, move closer to your subject whenever possible. It looks cleaner and feels steadier.
Tip 4: Use the Two-Handed Grip
Holding your iPhone with both hands may sound basic, but it works. Keep your elbows tucked close to your body for extra support. This simple grip reduces small shakes and gives your video a smoother look.
Tip 5: Use a Stabilization Tool
If your video is already recorded and looks shaky, you can use tools to stabilize iPhone video, like Tipard Video Converter Ultimate or Video Deshaker. They can smooth out the motion, reduce jitters, and improve overall video quality in just a few clicks.
Overall, these tips are easy and can make a big difference to your video. Follow them, and you will notice your iPhone videos look much smoother without extra editing.
Conclusion
Shaky videos can be frustrating, but with the right techniques, you can capture smooth clips from the start. Now, you know how iPhone video stabilization works to avoid shakiness during recording using built-in tools, handheld techniques, and support like tripods or gimbals.
If some clips are still unsteady, you can fix them after recording with Tipard Video Converter Ultimate. It not only stabilizes videos but also lets you upscale resolution, remove video noise, and optimize brightness and contrast for a cleaner, professional look.
More Reading


About the Author
