
"How to rotate a video in Premiere?"
We are here to help you with that. Adobe Premiere Pro has a built-in way to rotate videos. It works great if your clip is upside down, sideways, or just needs a small fix. You can even rotate more than one clip if you want. And do not worry if Premiere feels a bit hard to use. As a bonus, we will also introduce an easier video rotator option you can use on Windows and Mac, just like Premiere.
Let us get started and walk you through everything you need to know!

Part 1. How to Rotate Video in Premiere Pro
Rotating a video in Premiere Pro lets you correct the direction or give your clip a new look. It is a visual change, not a full edit. The tool works by adjusting the angle of the frame, so the picture turns left, right, or upside down. The main focus here is on how to rotate a single clip using the built-in controls found in the editing panel.
Below are two different ways how to rotate video in Premiere Pro, so check them out.
1. Basic rotation
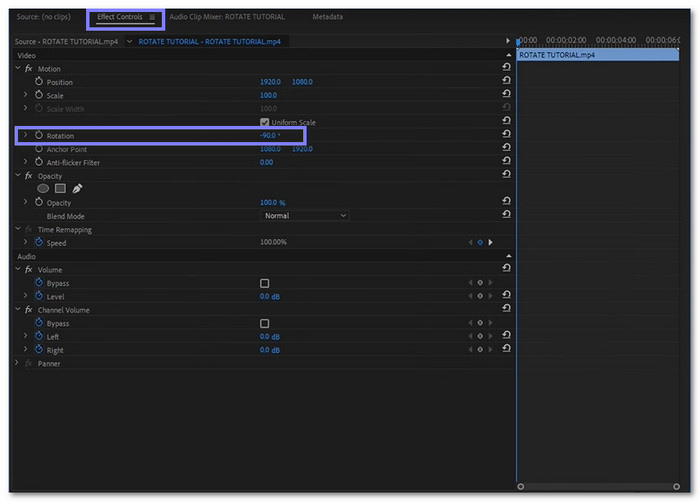
Basic rotation means turning your video by changing its angle from the effect controls panel. It uses the rotation setting under the motion tab. It works by fine-tuning the rotation value, which moves the whole frame in degrees.
Step 1 First, open your project in Premiere Pro, then drag the video into the timeline and click on it to make sure it is selected.
Step 2 Go to the Effect Controls panel at the upper left of the screen, and if you do not see it, click Window in the menu and then click Effect Controls to make it appear.
Step 3 Inside the Effect Controls, look for the Motion section and look for the Rotation option just below it.
Step 4 Click on the number beside Rotation and type a value like 90, 180, or -90, depending on how your video is tilted.
Step 5 Press Enter on your keyboard, and you will see the video rotate in the preview right away, so you know it worked.
2. Shortcuts
This method gives you a faster way to work in Premiere Pro without using the mouse too much. There is no direct key to rotate a video instantly, but you can speed up the process by jumping between clips, opening panels, or setting custom keys. These save time when you repeat the same action a lot, like when editing many clips with small angle changes.
Step 1 Pick the video in the timeline and press Shift + 5 to open the Effect Controls panel right away.
Step 2 Hit Tab until the Rotation box is highlighted and type your angle, like 90 or 180.
Step 3 Finally, press Enter to apply the change quickly.
Part 2. How to Rotate Multiple Clips in Premiere Pro
When you record several clips using a phone or camera turned the wrong way, every clip may look sideways. Fixing each one by itself takes too long and feels boring. Instead, Premiere Pro lets you rotate one clip and then copy that same angle to the rest. This way, all clips look right and match without repeating the work again and again.
Rely on the guide below to learn how to rotate a clip in Premiere Pro, not just one, but multiple:
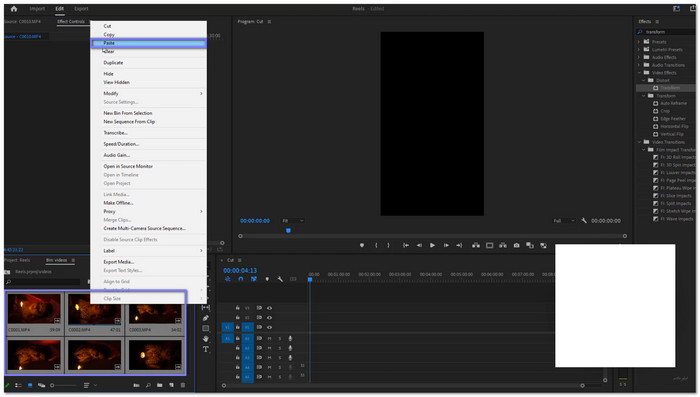
Step 1 Rotate one of your clips in the timeline using the Rotation setting in Effect Controls until it looks the way you want.
Step 2 Right-click the clip you just rotated and choose Copy from the menu that shows up.
Step 3 Hold down Shift and click on the other clips that need to be rotated so they all get selected together.
Step 4 Right-click on the group you selected and choose Paste from the menu.
Step 5 Check the box for Motion in the pop-up, then click OK, and now every selected clip will match the first one's rotation.
This method helps a lot when working with batch clips from phones or cameras that were flipped while filming. To stay organized, it is also smart to rename your Premiere Pro project so you can find it quickly later.
Part 3. Easier Alternative to Rotate Videos
It is given that Premiere Pro can rotate video, but we cannot deny the fact that it is not recommended for first-time users.
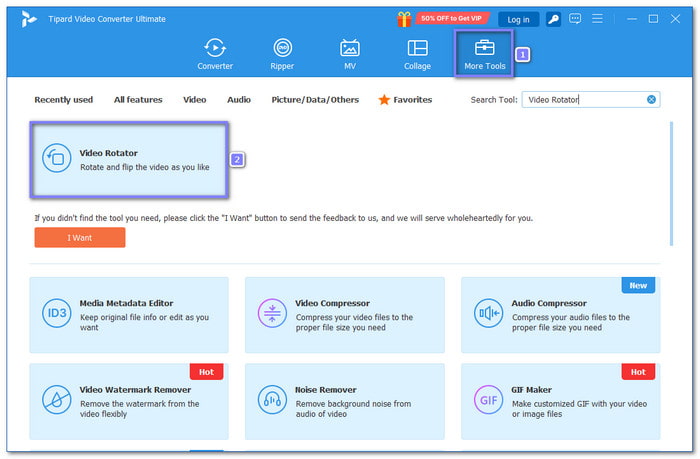
If you want an easier way to rotate your footage, Tipard Video Converter Ultimate is the program to use. It comes with a video rotator feature that enables you to rotate your video to the left or right in just a few clicks. You do not need editing skills to use it. Everything is clear, simple, and quick. It also keeps the video quality high. Whether you are using Windows or Mac, this program works great.
Step 1 Like any program, download and install Tipard Video Converter Ultimate on your Windows or Mac.
Step 2 Open the program, navigate to the More Tools section, and search or choose the Video Rotator from the list of options shown.
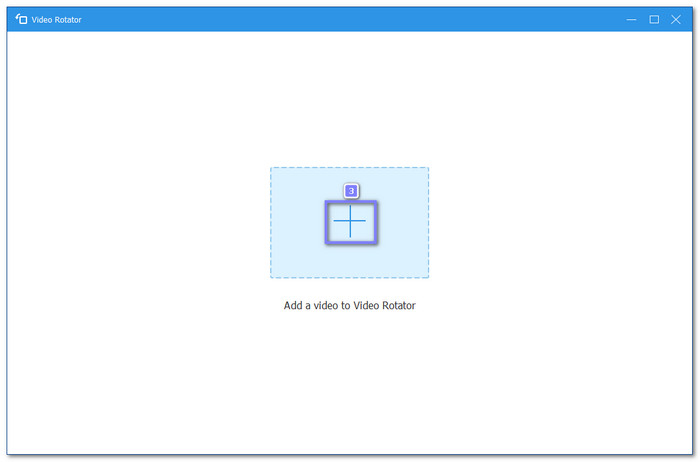
Step 3 Now that the Video Rotator is open, click the Add button in the center to upload the video that needs to be rotated. It will open your video files so you can choose the video you want.
Step 4 When the video loads, you will see a new window with a Rotation section. Click the first box to rotate the video to the left, or click the second box to rotate it to the right. You can see the changes right away in the preview screen above.
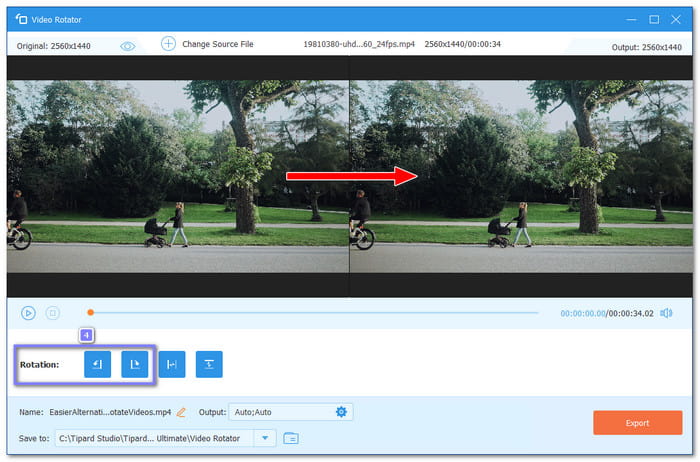
Step 5 Once you are satisfied with how the video looks, you can press the Export button to save the new version. If you want to change the format, resolution, or quality, just click the Gear button before exporting.
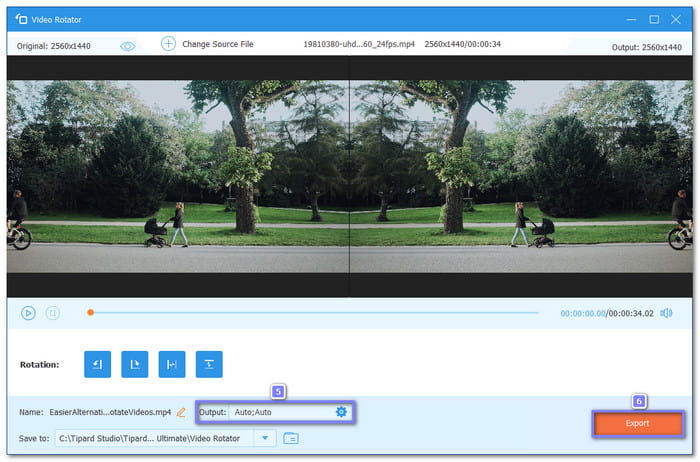
After exporting, your rotated video will be saved to your chosen folder. You can now upload, share, or watch it without worrying about the wrong angle. It is fast, smooth, and does not mess with your video quality. If you want to improve the quality even more, you can also use Tipard Video Converter Ultimate; it provides a video enhancer feature that enables you to do that easily.
Conclusion
Now that you have learned how to rotate a clip in Premiere Pro, our question now is, is it easy?
If so, we have an even easier way for you to rotate your videos, which is using Tipard Video Converter Ultimate. This program can help you turn your video left or right without needing advanced editing skills. You can also change the format, set the clarity, and export the video fast.
If you want things done quickly and right, Tipard Video Converter Ultimate is the better way. Now, rotate like a professional without the stress!
More Reading


About the Author
