
Good video quality matters because it keeps people watching. Blurry or shaky clips can turn them away fast. If that happens, your message will not come through.
In that case, you need to know why your video looks bad. Then, learn what you can do to fix and improve video quality, even if filming is already done.
Learn all that below!

Part 1. Why Is My Video Quality So Bad
Your video might look bad for many simple reasons. It can happen before or after you shoot. Below are the common reasons behind and easy ways to fix them.
1. Bad Camera or Poor Setup
If you record with a bad camera, it will never look good. Even if you fix it later, it will not be perfect. Always try to use the best gear you can when filming.
2. Saving in the Wrong Format
Some formats keep more quality and others shrink the file and lose details. Use MP4 (H.264 or H.265) for video with higher quality and a small size.
3. Trying to Make It Bigger
If your video is low-resolution, making it bigger will not add details; it can look blurry. Use smart video upscalers like AI tools to get better results.
4. Messy Text or Graphics
Nice text, logos, and images make your video feel cleaner and more professional, but do not overdo it; keep it simple and sharp.
5. Too Long or Too Short
Too long? People get bored. Too short? You might leave stuff out. Cut what is not needed and keep the best parts.
6. Overusing Effects
A few effects make it fun, but too many ruin it. Only use soft transitions to keep it smooth, not flashy.
7. Dark or Noisy Scenes
Dark video gets grainy. Use more light when filming. Later, noise-reduction tools can help clean it.
8. Weird Colors
Fix the colors if they look off, and then add style with grading. It helps your video feel warmer, cooler, or more lively.
9. Bad Sound
Bad sound ruins a great video. Remove hiss or hum. Add background music or effects to make it feel alive.
Part 2. How to Improve Video Quality Before or During Shooting
Bad video does not always mean bad camera. It is often about how you use it. Let us break this down below; each part below tells you what really helps and why it matters.
1. Lighting
Bad light makes videos look fuzzy or flat. Use soft light like a ring light or softbox. Three-point lighting (front, side, back) makes your subject pop and look real.
2. Camera Settings
Make sure your resolution is set to 1080p or higher to make the video quality better. For professional cameras, match shutter speed to frame rate. If your video is 30fps, use 1/60 shutter, which keeps motion smooth.
3. Framing
Where you place stuff in the shot matters; use the "rule of thirds." Put your subject on the left or right, not the center. It looks better and draws the eye.
4. Internet Speed
For live video, slow internet ruins quality. You need 25 Mbps or more. Use an
Ethernet cable if Wi-Fi is weak, or record locally with reliable tools, so quality stays high.
5. Edit for Pacing
Cut unwanted video parts, long gaps, or anything off-topic. It makes your video easier to watch.
6. Further Editing
Fix color, brightness, and sound. Do not make it too bright or too dark. Balance voices so no one sounds louder. Add effects if needed—but only a little.
7. Adjust File Types
Bigger file types = better quality. MP4, MOV, and AVI are great. For audio, use WAV if you want the best sound without losing anything.
Part 3. What If the Video is Already Done
If your video is already finished, but it still looks blurry, dark, or dull. Maybe it is shaky, the colors are off, or it just does not look clear at all. Worry not; you can still fix it.
Tipard Video Converter Ultimate gives you many ways to improve video quality, even after the video is done. You can change the video format to keep more details. You can also correct the color to fine-tune the look, like making colors pop or removing strange tints. Moreover, you can enhance the video by enabling various options. Meaning, you do not need to start over and over again.
Want to know how? We will present various ways for you to improve video quality!

- Remove video noise to fix grainy or fuzzy clips.
- Reduce or fix video shaking for smoother playback.
- Offers rotate and crop tools to remove black bars or extra parts.
- Adjust brightness, saturation, hue, and contrast to fix dull or off-color videos.
- Change the video file format to a higher-quality one like MP4 (H.265) or MKV.

1. Enhance Video
Tipard Video Converter Ultimate has a Video Enhancer, which is a video quality improver that clears blurry footage. It lets you fix bad lighting, remove shaking, cut noise, and adjust brightness and contrast. Just a few clicks, and your video looks clearer.
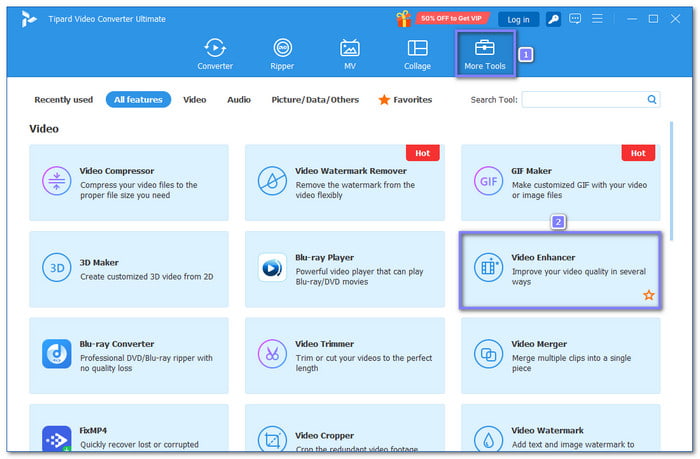
Step 1 Launch the program, go to More Tools, and then select Video Enhancer.
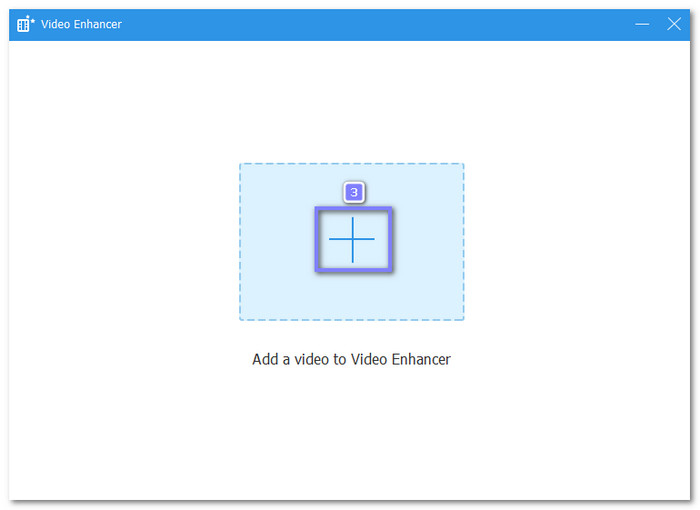
Step 2 Click the Add button and pick the video you want to make clearer.
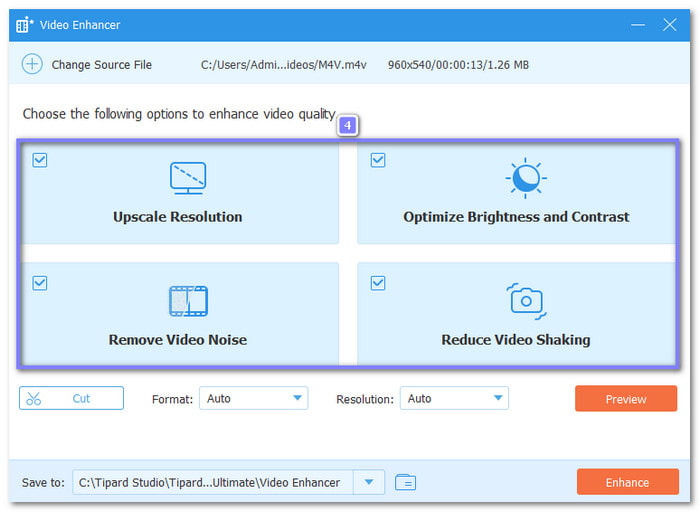
Step 3 To fully enhance your video, enable these:
- Upscale Resolution - It boosts video sharpness and helps low-quality videos look more high-definition.
- Reduce Video Shaking - It removes shaky movement and makes the video look steadier.
- Remove Video Noise - It cleans up grainy or fuzzy spots, especially in dark scenes.
- Optimize Brightness and Contrast - It fixes lighting and makes your video easier to see.
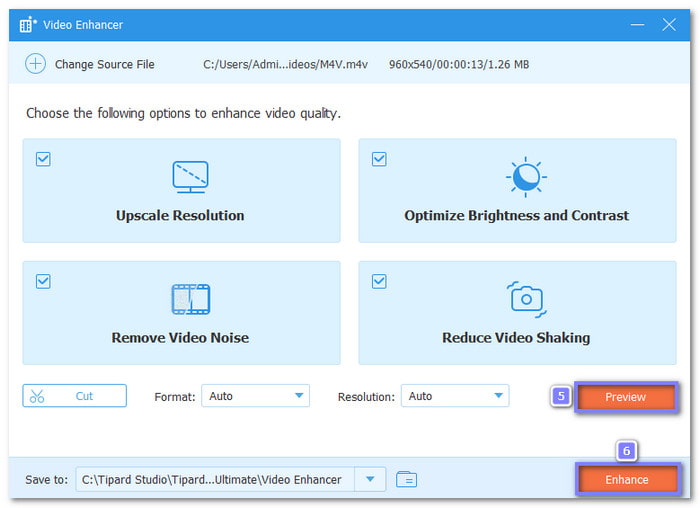
Step 4 Click Preview to check if your video looks clearer. You can go back and adjust if needed. If it looks good, press Enhance. Tipard Video Converter Ultimate will start fixing the video.
2. Change File Type
Some formats look better than others. Tipard Video Converter Ultimate lets you switch to MP4 (H.264 or H.265) for a video higher quality. You can also modify the resolution and bitrate to improve clarity.
Step 1 Head to the Converter tab and click the Add button to upload the video you want to improve.
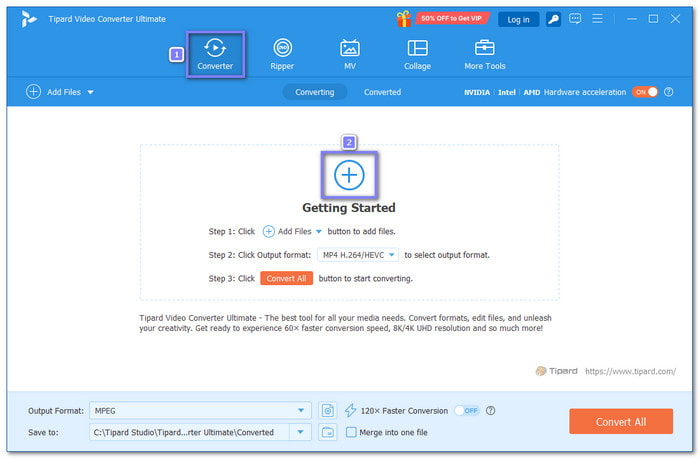
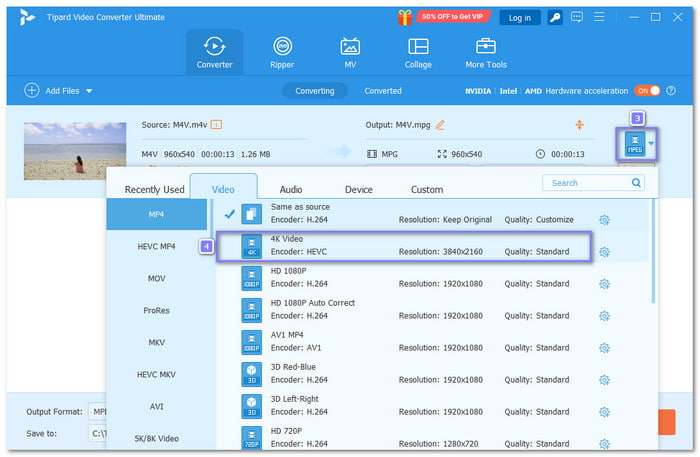
Step 2 Click the Format drop-down menu. Pick MP4 (H.264 or HEVC). These give great quality while keeping the file size low. You can also choose MOV or AVI if you want the video to stay sharp with less compression.
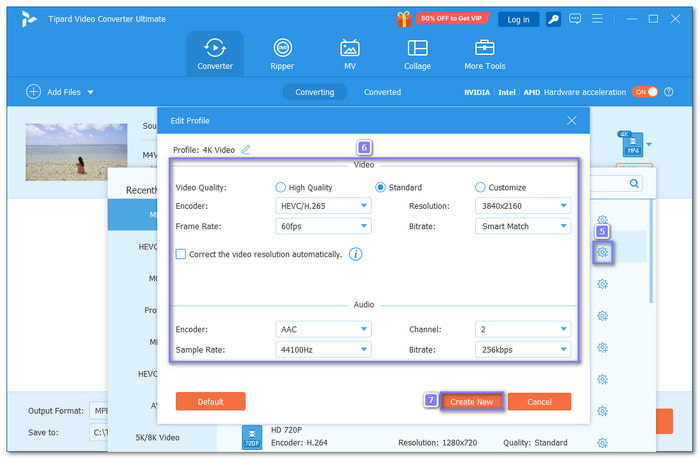
Step 3 Click the Custom Profile button to tweak settings like:
- Resolution - Higher resolution makes the video clearer.
- Frame Rate - Use 30fps or 60fps for smooth motion.
- Encoder - H.264 and H.265 give great quality with small file sizes.
- Bitrate - A Higher bitrate means better image clarity. Just do not set it too high to avoid lag.
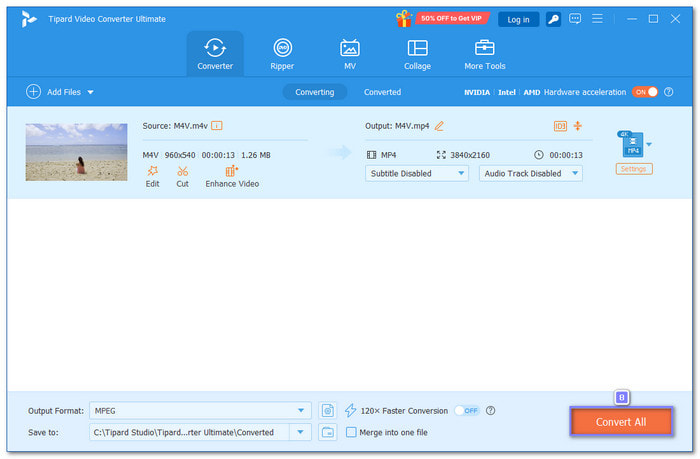
Step 4 When everything looks good, click Convert All. The program will turn your video into a different format with a clearer version.
3. Editing Tools
Got black bars or wrong angles? Use Tipard Video Converter Ultimate's rotate and crop tools. You can flip or trim your clips to fix how they look. Colors look off or too dark? Use the effects and filters. You can brighten scenes, boost contrast, or add style to make your video look clean and clear.
Step 1 Under the Converter tab, click the Edit button.
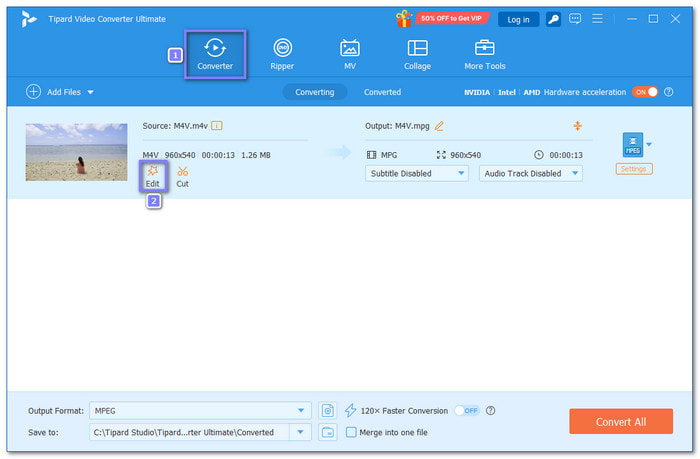
Step 2 You will see five tools: Rotate & Crop, Effect & Filter, Watermark, Audio, and Subtitle.
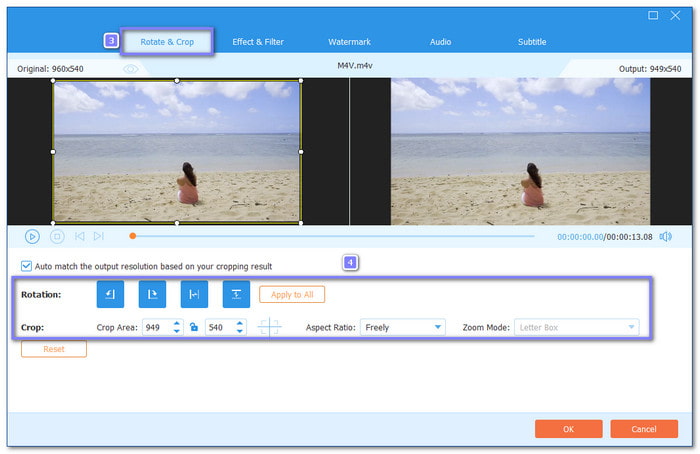
Step 3 To clean up your video:
- In Rotate & Crop, you can turn the video upright, cut out black bars, and keep only the parts you want.
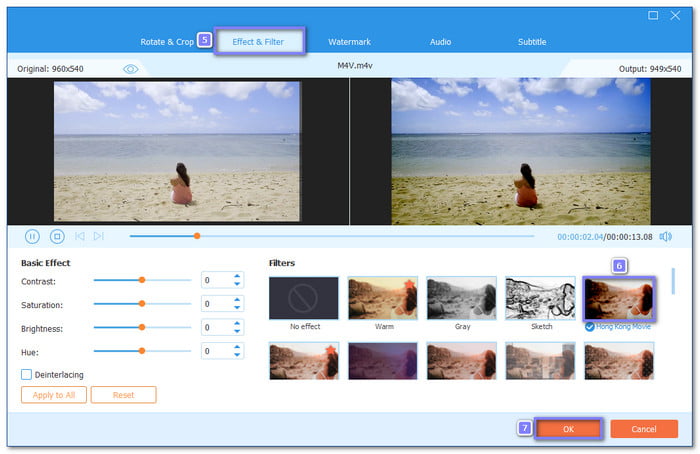
- In Effect & Filter, you can apply filters to make your video look better and more alive.
Step 4 When you are happy with the changes, click OK to save them.
4. Color Correction
If colors look dull, Tipard Video Converter Ultimate's color correction can fix that. You can brighten scenes, fix weird tones, and make colors look alive again to improve video clarity compared to before.
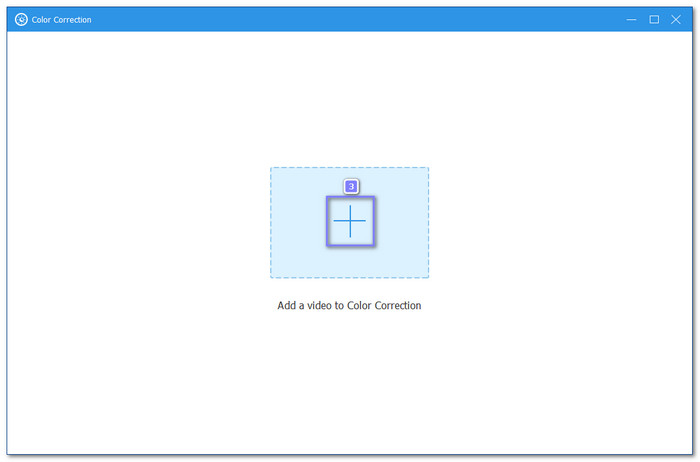
Step 1 Go to the More Tools tab and select Color Correction from the list.
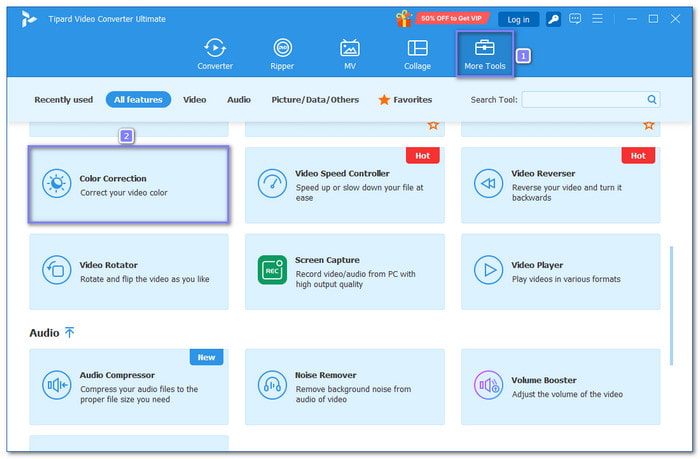
Step 2 Click the Add button and choose a video that looks dull or unclear.
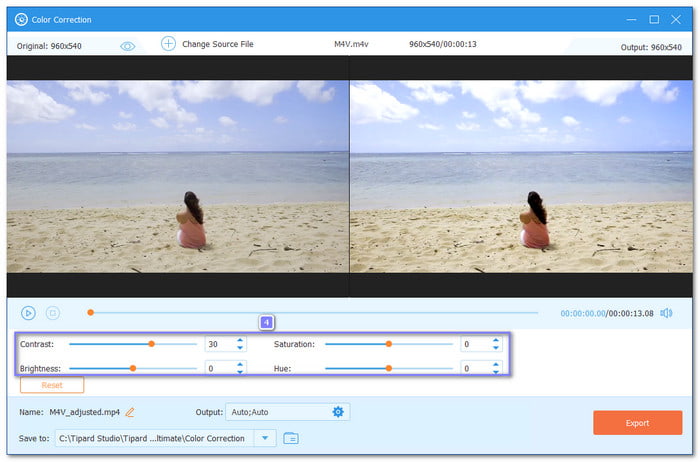
Step 3 Use the sliders for Brightness, Contrast, Saturation, and Hue. You can move each slider up to 100%. Do not overdo it; make small changes until the video looks clearer and cleaner.
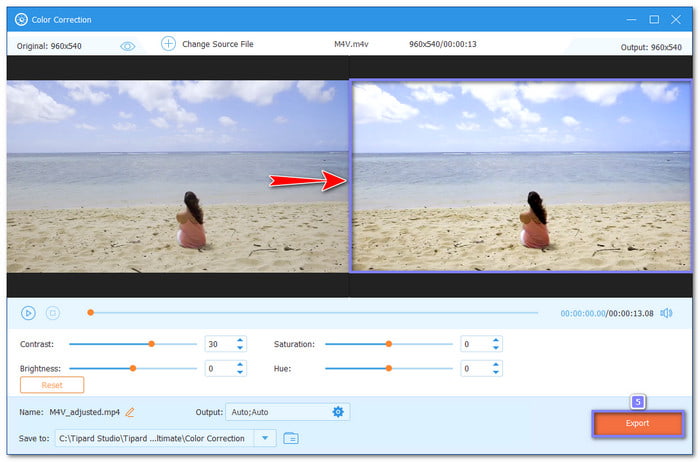
Step 4 Watch the preview. If it looks better and sharper, click the Export button to save your video.
Conclusion
You already know the reasons why your video looks bad, like poor lighting, shaky hands, or the wrong format. And you have learned the things to do before or during filming to avoid these issues.
But if the video is already done, do not worry, Tipard Video Converter Ultimate can still help to make the video quality better. You can fix the colors, crop black bars, reduce noise, change the format, or even make it clearer with just a few clicks. It offers an easy way to give your video a second chance and make it look much better!
More Reading


About the Author
