
Does your footage look dull and lifeless? With the right video color correction software for Windows and Mac, you can breathe new life into your visuals. Whether you want to fix poorly lit vacation footage or you need to make YouTube content that is overly orange or blue-balanced out visually, color correcting videos brings out the best in your footage. In this guide, we will go from beginner to pro, covering Mac support and advanced LUT and masking features, too.
Part 1. Understanding Video Color Correction
As part of the post-production workflow, video color correction involves raising or lowering the visual tones of your footage to make it look more natural, balanced, or artistically stylized. It helps remedy concerns like low light, unwanted color casts, or muted colors while enhancing the cinematic value. A video editing color adjustment feature of the software is essential for correcting technical imperfections, achieving a cinematic look, or applying color grading for that professional polish.
Key Elements of Video Color Correction
| Element | Purpose | Typical Adjustments | When to Use |
|---|---|---|---|
| Exposure | Controls the overall brightness of the video. | Increase or decrease brightness. | When the footage is too dark or too bright. |
| White Balance | Removes unnatural color temperature. | Adjust temperature and tint. | When a video looks too blue/orange due to the lighting. |
| Saturation | Enhances or reduces the intensity of colors. | Boost or lower color intensity. | When colors look washed out or overly vivid. |
| Contrast | Adjusts the difference between light & dark areas. | Make shadows darker or highlights brighter. | When the video lacks depth or looks flat. |
| Hue | Shifts the overall color tone across the spectrum. | Rotate colors through the color wheel. | For creative effects or correcting unnatural color shifts. |
| Highlights/Shadows | Fine-tunes the bright and dark parts of the image separately. | Brighten highlights or recover shadow detail. | When you need to bring back details in blown-out or dark areas. |
| Curves | Allows precise control over tonal ranges. | Adjust curve points manually. | For advanced contrast, tonal, or color balancing. |
| LUTs (Lookup Tables) | Applies predefined color grading styles or film looks. | Import LUTs (e.g., cinematic, vintage, etc.). | To stylize footage or maintain a consistent look. |
| Masking | Targets specific areas for localized color correction. | Use shape/color masks. | When only a portion of the frame needs correction. |
| Show MoreShow Less | |||
Part 2. How to Correct Video Color on Windows
Windows users can easily enhance video color using both beginner-friendly and advanced tools. Below are step-by-step methods using Tipard, Shotcut, and HitFilm Express.
1. Tipard Video Converter Ultimate
Tipard Video Converter Ultimate is not just a format converter. It is a robust video editor with a built-in toolkit for enhancing and correcting video color. Its intuitive interface is perfect for beginners, while its high-performance editing and conversion tools appeal to professionals who want speed without sacrificing quality.

- Adjust Brightness, Contrast, Saturation, and Hue with real-time preview
- Add Filters to creatively color grade your video
- Fix White Balance Issues to neutralize color temperature
- Remove Noise and Stabilize Video via enhancement tools
- Preview in Real Time and undo changes non-destructively

Step 1 Download and Install the Tool
Go to its official website and download the program for Windows. Visit the site, download the program for Windows, and after the download completes, install and start the application.
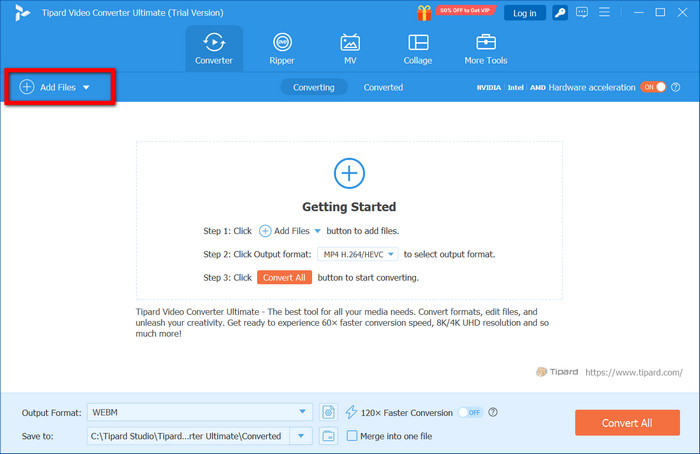
Step 2 Import Your Video
At the top-left part of the application window, there is an Add Files button that can be clicked to browse your computer to select the desired video.
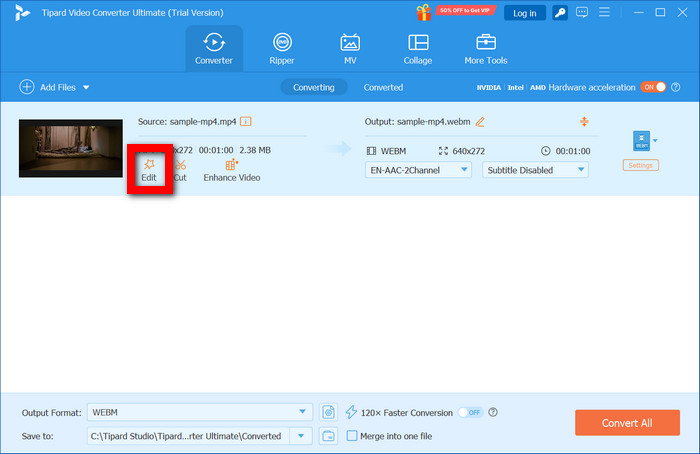
Step 3 Open the Editing Panel
To edit your video, click on the Edit button to access the editing features.
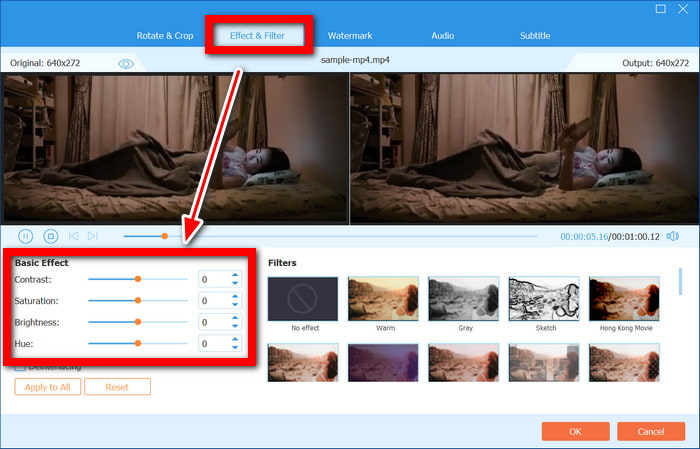
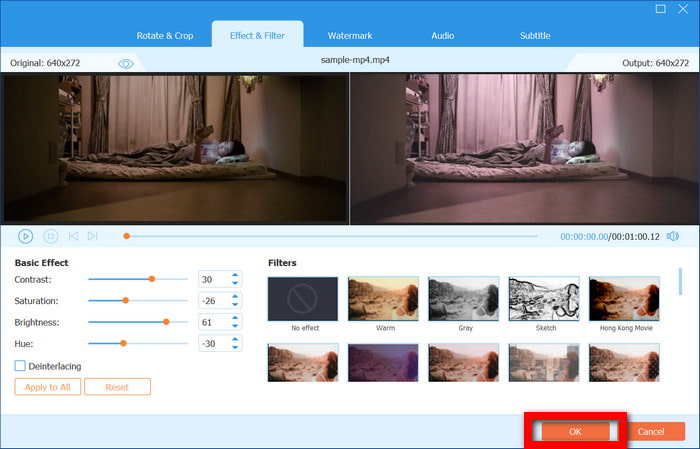
Step 4 Adjust Color Settings
Under the Effect & Filter section, you can change the brightness, contrast, hue, saturation levels and even add filters to improve the overall color tone.
Step 5 Preview and Confirm Changes
Click OK when you are fully satisfied with the preview of your changes.
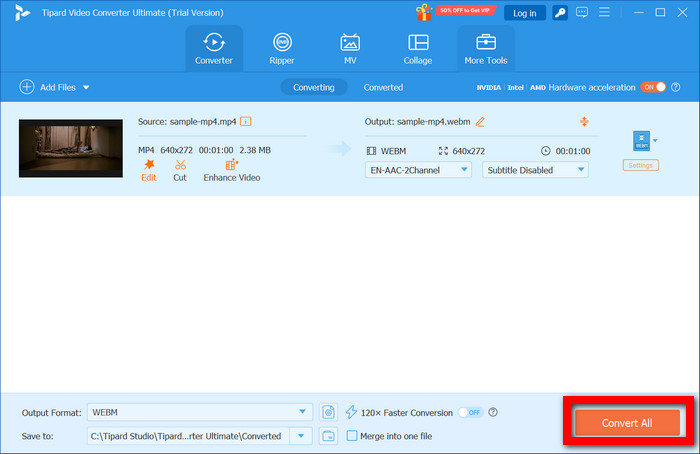
Step 6 Export the Corrected Video
Select the output format, set a destination folder, and click on Convert All to execute the export operation.
2. Shotcut
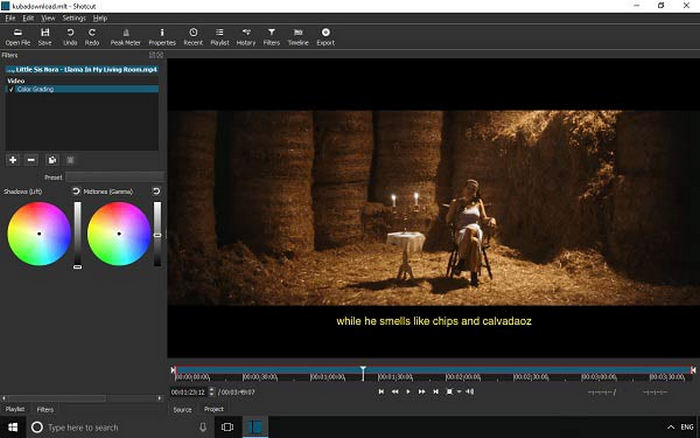
With Shotcut, you can perform basic color grading thanks to the scrubber and filters. For this reason, it is very popular among content creators because of its extensive support for different formats, its sophisticated tools, and the ability to reverse videos with Shotcut easily.
Step 1 Open Shotcut and pull in your video to the timeline.
Step 2 Navigate to the Filters section and click the Add button to create a new filter.
Step 3 Select Color Grading or Brightness/Contrast.
Step 4 Use image scopes for more precise adjustments alongside the sliders to refine the image further.
Step 5 Export your video at File > Export.
3. HitFilm Express
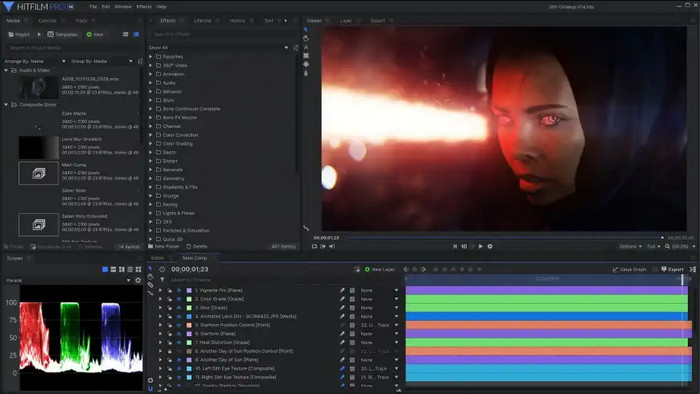
A color grading tool for filmmakers and YouTubers, HitFilm Express is a free video editor that combines editing and visual effects.
Step 1 After importing your video, drag it to the timeline in HitFilm Express.
Step 2 Click on the Controls panel and Effects.
Step 3 Look for tools like Curves, Hue & RGB Balance, and LUTs. Apply Color Correction.
Step 4 Modify the parameters and check the real-time preview.
Step 5 Use the Export tab to export your video.
Part 3. How to Correct Video Color on Mac
Creative and precise video color corrections can be performed with iMovie and DaVinci Resolve on Mac-powered computers using built-in or professional software.
1. iMovie
As part of macOS, iMovie is simple to use and provides vital color correction features, making it an ideal choice for beginners looking for an iMovie free download.
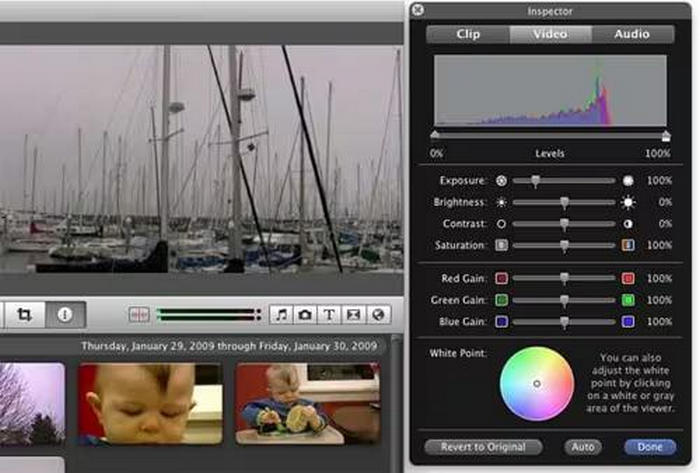
Step 1 In iMovie, open and import your footage.
Step 2 Place the video onto the timeline.
Step 3 Above the preview window, click the Color Correction button.
Step 4 Change exposure, brightness, contrast, and saturation with designated sliders.
Step 5 As before, click on the File menu, then on Share, and finally on File to export your edited video.
2. DaVinci Resolve
DaVinci Resolve provides an industry-grade video editor with unparalleled color grading capabilities. It has tools like color LUTs, color wheels, and curves.
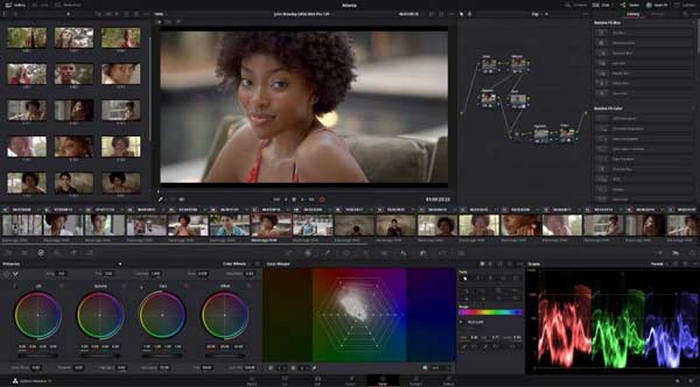
Step 1 DaVinci Resolve is opened, and a new project is created.
Step 2 Your video is imported and added to the timeline.
Step 3 Go to the workspace dedicated to Color.
Step 4 For primary correction, use Color Wheels, Curves and Qualifiers for more advanced grading.
Step 5 Your project can be exported from the Deliver tab.
Part 4. Professional Color Editing Techniques
In addition to standard edits, advanced techniques of color correction, such as Curves, LUTs, and Masking, allow for major cinematic quality and precision-targeted color enhancements to be added to your videos.
A. Initial Changes:
- Exposure: Adjust overly dark or bright sections of a clip to enable detail retrieval.
- White Balance: Eliminate the tint caused by poorly calibrated lighting (blue/cold or orange/warm).
- Saturation: Boost color intensity or desaturate for a more stylized appearance.
B. More Refined Tools:
- Curves: Fine-tune highlights, midtones, and shadows to a greater degree.
- Pre-set LUTs (Lookup Tables): Use LUTs to apply pre-set cinematic color grades for a consistent look throughout all the footage.
- Masking: Alter the color render for targeted regions of the video using shape or color masks.
Conclusion
Video color correction is a powerful step that transforms ordinary footage into visually striking content. Whether you are using beginner-friendly apps or advanced editing tools, the right adjustments can dramatically improve the quality of your video. Start experimenting with these methods to make your clips look more professional, polished, and visually consistent.
More Reading

About the Author
