Most people who edit videos face one common problem. That is noise in both video and audio. It can come from low light, cheap cameras, or noisy recording places. It cannot always be avoided, especially in real shoots. But luckily, there is a way to fix it.
In this guide, you will learn how to denoise in Premiere Pro, including video noise and background noise in audio. If Premiere Pro feels hard to use, there is also a simpler option waiting for you.

Part 1. How to Remove Video Noise in Premiere Pro
Video noise can make your clips look rough and unclear. It often shows as grain, artifacts, or unwanted texture. If you want to learn how to denoise video in Premiere Pro, you can fix these problems with the right tools. With simple adjustments in Premiere Pro, you can clean your footage and make it look smoother, which helps improve overall video clarity.
Step 1 Open your video clip in Premiere Pro.
Start by importing your video and placing it on the timeline. Click the clip so it is selected. It makes sure all changes apply to the right video.
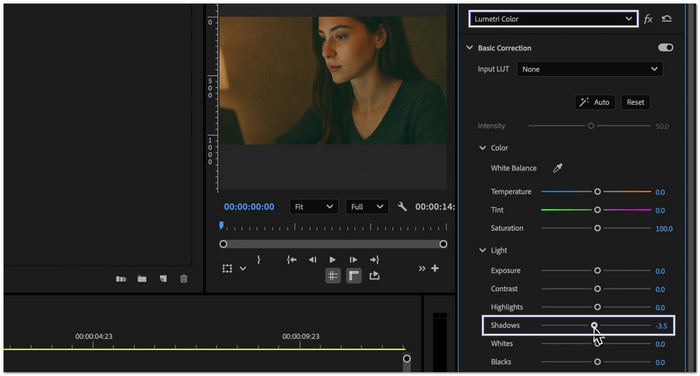
Step 2 Open the Lumetri Color panel.
Head to the top menu and click Window, then choose Lumetri Color. Inside Basic Correction, make small changes. Lower the Shadows a bit to reduce dark noise.
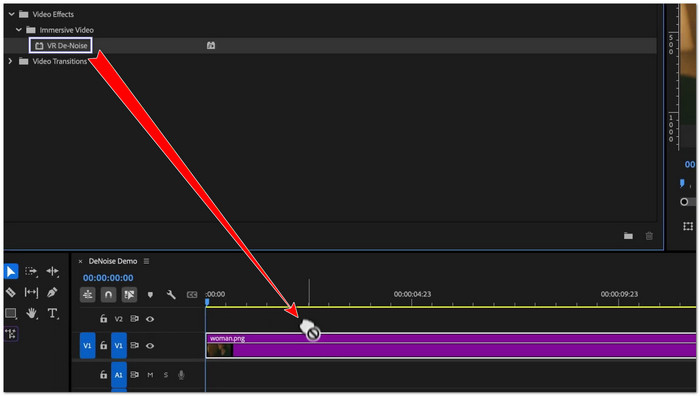
Step 3 Add the VR DeNoise effect.
Go to the Effects panel. Search for VR DeNoise. Drag it onto your video clip. The effect helps remove grain, artifacts, and random noise in the frame.
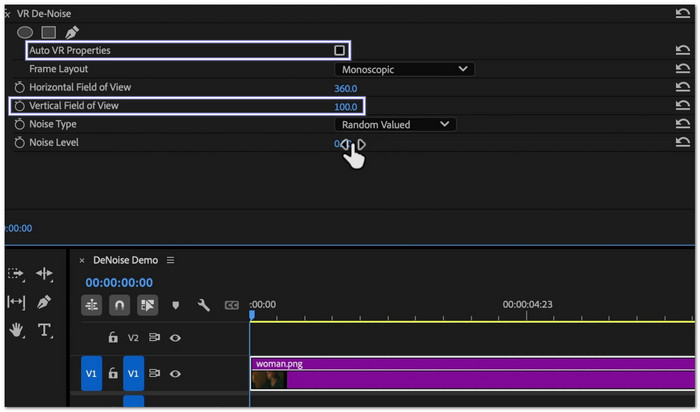
Step 4 Fix VR settings for a clean look.
Go to Effect Controls. Find the VR DeNoise settings. Uncheck Auto VR Properties. Then, set the Vertical Field of View to 100. It helps fix any strange edge distortion after applying the effect.
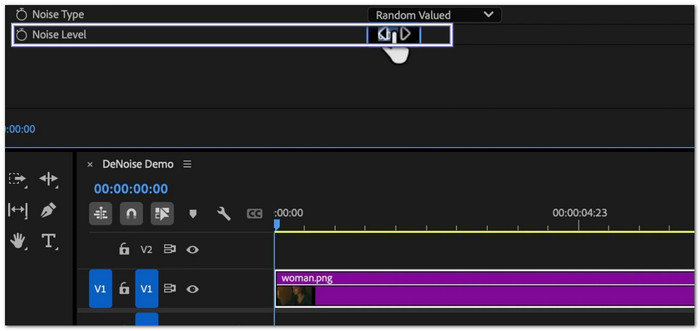
Step 5 Adjust the noise level slowly.
Find the Noise Level setting. Start at a low value. Slowly increase it a little by little. Stop when your video looks clean but still sharp. Do not push it too high, or the video may look soft.
That is how simple it is to denoise a video. Your video should now look smoother, cleaner, and less noisy without losing too much detail.
Part 2. How to Remove Background Noise from Audio in Premiere Pro
Background noise can make audio hard to hear. It can include hiss, hum, or room sound. With simple tools in Premiere Pro, you can clean the sound and improve voice clarity. This part is all about how to remove background noise from audio in Premiere Pro, making speech clearer and easier to understand.
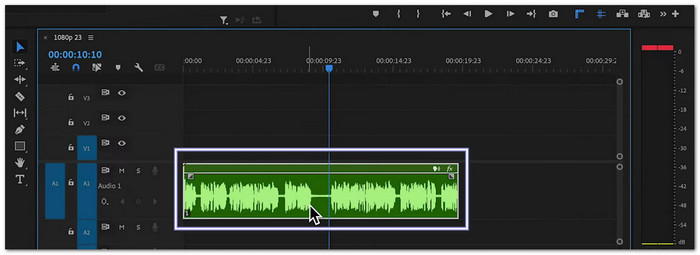
Step 1 Select your audio clip in the timeline.
Click your audio clip first, so it is active. It tells Premiere Pro what sound you want to fix. Make sure you choose the correct track so you do not edit the wrong audio.
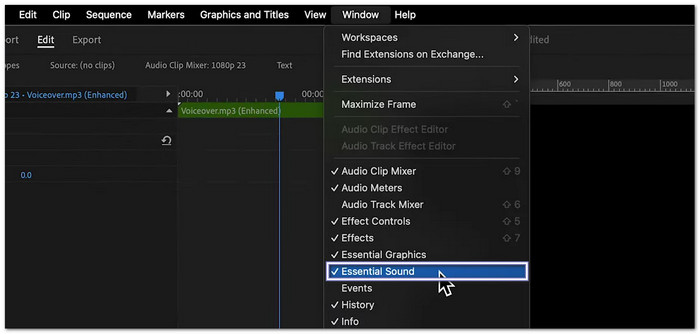
Step 2 Open the Essential Sound panel.
Head to the top menu and click Window. Then, choose Essential Sound. A new panel will appear. This tool helps you clean and improve audio simply.
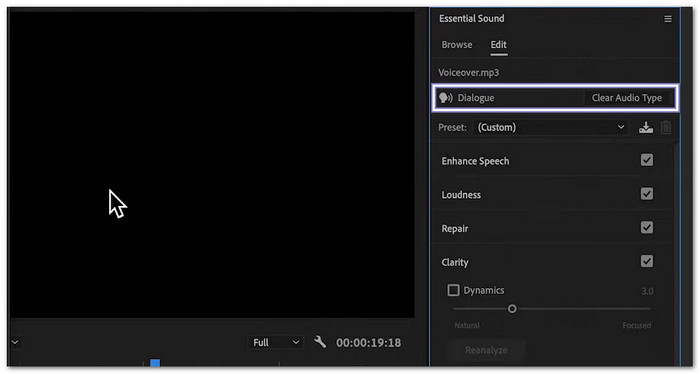
Step 3 Tag your audio type.
In the Essential Sound panel, choose the right type for your audio. For voice, click Dialogue. This step is important because it unlocks the right repair tools for speech sounds.
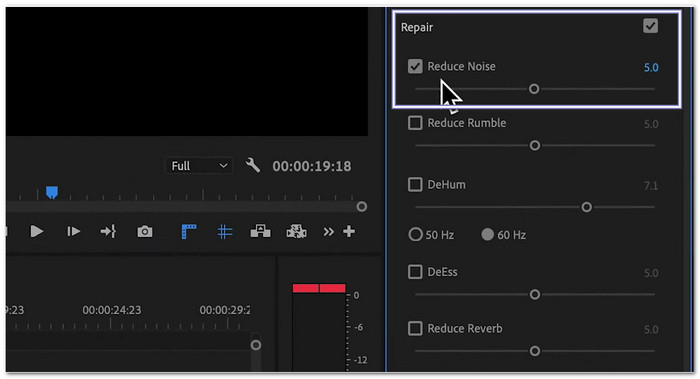
Step 4 Go to Repair and reduce noise.
Open the Repair section inside Essential Sound. Find Reduce Noise. Turn it on. Then, move the slider slowly. Start low first. Increase it little by little until the background noise becomes softer.
Aside from the noise reduction, you can also edit audio in Premiere Pro, like adjusting the volume, applying fade-in and fade-out effects, cutting, etc.
Part 3. Easier Premiere Alternative to Remove Video and Audio Noise
Noise reduction in Premiere Pro can feel hard for beginners. The tools are powerful but not easy to learn. Why not try a simpler option like Tipard Video Converter Ultimate?
It offers one-click removal of video and audio noise with AI for fast, clean results. It also gives AI video enhancement tools to improve clarity. Moreover, it supports MP4, MKV, MOV, AVI, and many other formats.
- Remove video noise, upscale resolution, and reduce video shaking.
- Preview feature to check video changes before saving.
- Apply to all options for batch editing multiple files at the same time.
- Built-in editing tools like cut, merge, crop, and add a watermark.
- Change output format to MP4, MKV, MOV, AVI, and other file types.

You have learned how the Premiere video denoiser works; now it is time to try a simpler way using Tipard Video Converter Ultimate:
Step 1 Download and install the software
Go to the official Tipard website and download Tipard Video Converter Ultimate. Click Free Download. After it finishes, open the file and install it. Follow the simple setup steps until it is ready to use.
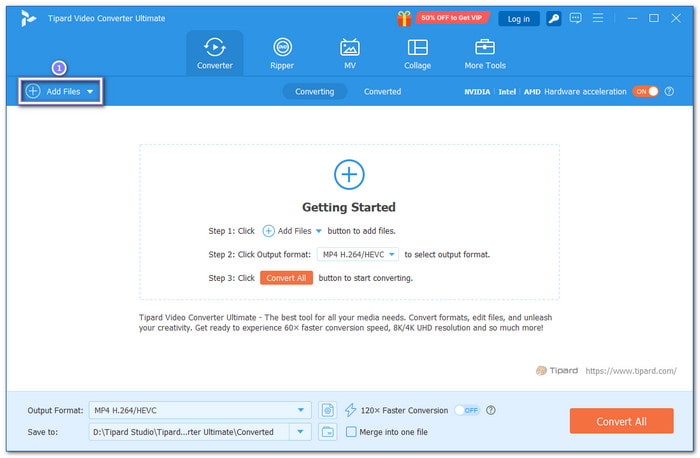
Step 2 Add your video file
Open the software. Click Add Files. Choose the video you want to fix. You can also select and drop the file into the program. You may add more than one video if you want to clean multiple clips at once.
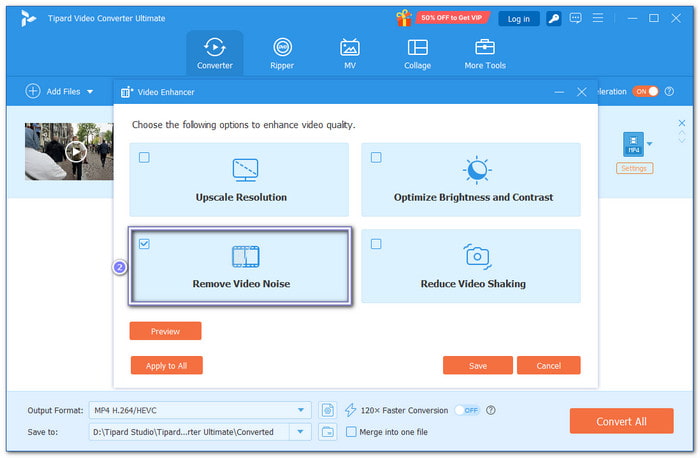
Step 3 Enable the removal of video noise
After your video is loaded, click Enhance Video. Then, tick the option Remove Video Noise. It reduces grain, artifacts, and unwanted visual noise. You can also turn on Upscale Resolution to make the video clearer. Then, enable Optimize Brightness and Contrast to improve the overall look.
Step 4 Preview, choose format, and save
Before saving, click Preview to see the outcome. Pick an output format such as MP4, AVI, MOV, or MKV if it looks good. After that, hit Convert All to export your clean video and apply all the modifications.

Part 4: FAQs of Premiere Pro Noise Removal
Does the sharpness of a video change when noise is removed?
Yes. Noise removal can make your video look less sharp. It happens when the effect is too strong. It smooths the image and removes small details. Use low settings to keep details clear.
Does noise removal work on all video formats?
Yes. Premiere Pro can handle many formats. But results depend on your original video quality. Low-quality videos may still look noisy even after editing.
Can I use Premiere to enhance the quality of my videos?
Yes, you can improve video quality in Premiere using simple tools. To improve clarity, you can increase the resolution. To recover details, you can change the sharpness. Brightness and contrast can be used to correct the color.
Conclusion
Do you find it easy to denoise in Premiere Pro? Or is it hard and a bit confusing, especially if you are a beginner? That is why a simpler option may suit you better. Try Tipard Video Converter Ultimate. With just one click, it can turn your noisy video and audio into a cleaner and clearer result.

All-in-one video toolbox: convert, edit, upscale, enhance, and compress your videos easily
100% Clean & Safe
100% Clean & Safe
More Reading


About the Author