
YouTube, being a video-sharing platform, has specific rules for video size that you must follow. There are YouTube video size requirements for all types of videos you want to upload. If you do not follow these guidelines, your video may not display correctly or may not upload at all.
So, this post will talk about all of that. We will help you understand the sizes YouTube allows, the video formats it supports, and the best frame rates to use. It is extremely helpful, especially if you are planning to start your own YouTube channel. You will get all the basic information you need in one place. And, of course, we will share a great tool that can help you meet YouTube's size and format needs.
Let us ensure your next upload fits perfectly and plays smoothly on any screen!
Part 1. YouTube's Recommended Video Specs
Let us say you have just finished making a video. Before you upload it to YouTube, you should know the right video settings. If the settings are incorrect, the video may appear blurry, load slowly, or fail to upload. So, here are the best video specs YouTube wants you to use:
- Video formats that YouTube accepts: MP4, MOV and AVI (MP4 is the best video format for YouTube, as it keeps your videos looking good and keeps the file small.)
- YouTube maximum video size: 256 gigabytes or 12 hours long (Your video cannot be bigger or longer than that.)
- Frame rates YouTube allows: 24fps, 25fps, 30fps, 48fps, 50fps, or 60fps (60fps looks very smooth. 30fps is okay, too.)
Part 2. Best YouTube Video Dimensions & Ratios
Not all videos on YouTube look the same. Some are wide, some are tall, and some are made for phones. That is why video size and shape (called dimensions and ratio) matter a lot. Here is a guide to help you choose the best YouTube video dimension size and ratios:
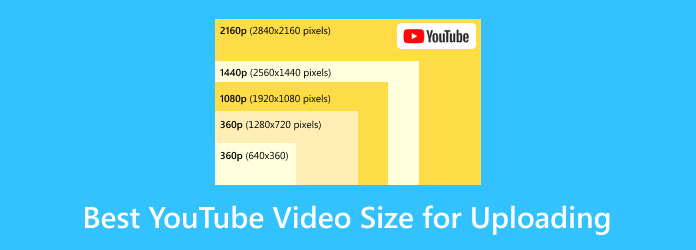
1. Standard YouTube Videos (Wide - 16:9)
It is the normal YouTube shape and is great for most videos.
Best resolutions:
- 3840×2160 - 4K (very sharp and clear)
- 1920×1080 - Full HD (most common)
- 1280×720 - HD (smaller but still good)
2. YouTube Shorts (Vertical - 9:16)
Shorts are designed for quick, fun, and vertical videos, and the YouTube Shorts size is 9:16. They appear in the Shorts feed.
Best resolution:
- 1080×1920 - Full HD (tall like a phone screen)
3. Mobile-Friendly Videos
People watch a lot of YouTube on phones.
Good choices:
- 1920×1080 - works great on phones and computers
- 1280×720 - faster to upload and still clear
Do not use black bars on the sides or top. YouTube adds those when the shape is wrong.
Part 3. YouTube Video Size Limits & Requirements
YouTube has rules regarding the size of your videos. These rules help the platform function more effectively for all users. If your video is too small, it might look blurry. If it is too big, it might take a long time to upload.
Here is what you need to know about YouTube video size limits and requirements:
1. The max resolution allowed:
- 7680×4320 - This is 8K (super sharp, for big screens)
2. The minimum resolution allowed:
- 426×240 - This is the lowest-quality YouTube supports
If your video is smaller than 426×240, YouTube will not process it. It is recommended to upload a video at 720p or higher for optimal clarity. Additionally, your video must match the correct aspect ratio, such as widescreen (16:9) and vertical (9:16) (for Shorts).
Part 4. How to Resize Videos for YouTube
Tipard Video Converter Ultimate can do a lot for your video. It not only converts your video to another format or helps you edit clips. It also allows you to crop, change the aspect ratio, and resize your video as you prefer.
You can use its video cropper feature to crop unwanted parts of your video. It also allows you to change the aspect ratio to 16:9, 4:3, 21:9, or custom sizes. It helps your video fit YouTube's screen better without black bars and get the perfect YouTube video size. You can also use its video compressor to reduce the file size. It allows you to lower the resolution and bitrate or use a slider to reduce the file size.
So when you upload your resized video to YouTube, it plays smoothly, fits the screen well, and loads faster for viewers.

- Works with over 500 video and audio formats.
- Offers tools for video, audio, photo, and data.
- Gives full control of output video and audio settings
- Compress large videos to save space or speed up upload time.
- Comes with built-in editing tools, including crop, rotate, and filter options.

How to Crop/Change Aspect Ratio Videos for YouTube
If your video does not fit YouTube's screen or has black bars, do not worry. You can fix that by cropping or changing the aspect ratio, and Tipard Video Converter Ultimate is here to help you achieve the YouTube video size and width and height requirements. All you need to do is follow the steps provided below!
Step 1 First and foremost, get Tipard Video Converter Ultimate installed on your Windows or Mac computer. You can click the download buttons above for an easier downloading process.
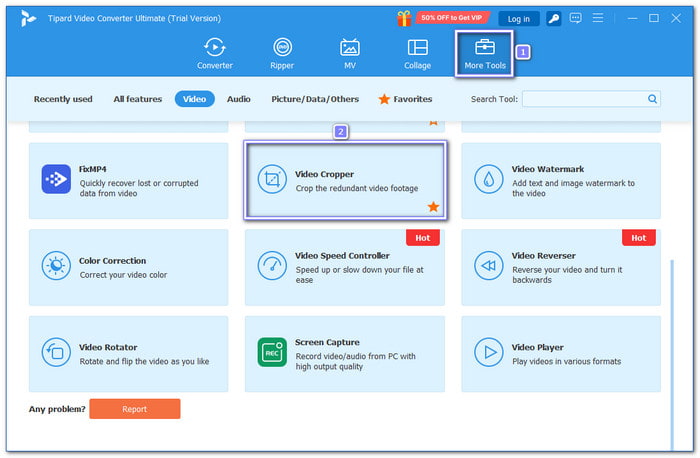
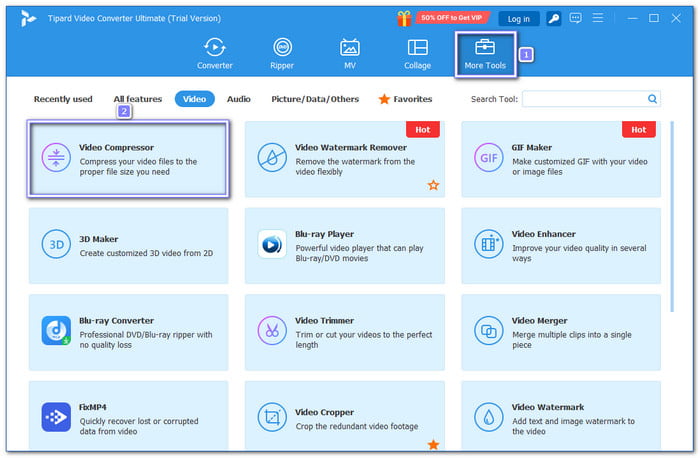
Step 2 On the top menu, click More Tools and select Video Cropper. You will see a big add sign. Click it, upload the video you want to crop, and change the aspect ratio.
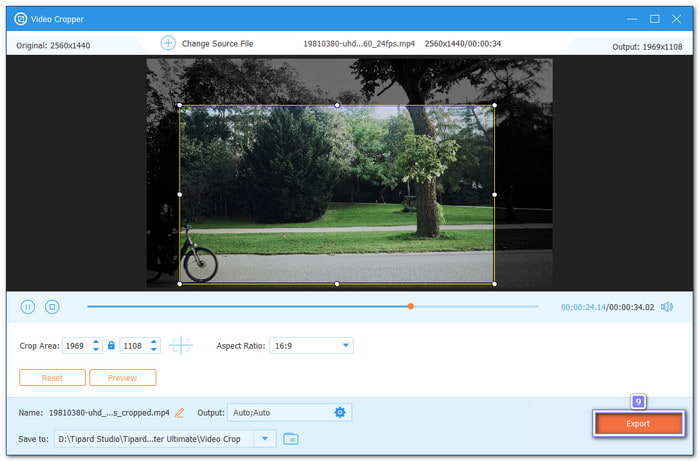
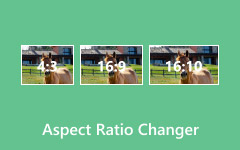
Step 3 After adding your video, look for the Aspect Ratio drop-down. You can pick from 16:9, 4:3, or 21:9, or use Freely to set your own size. For YouTube, 16:9 is best. You can also drag the cropping box to crop the unwanted video frame or type the specific numbers for height and width under the Crop Area.
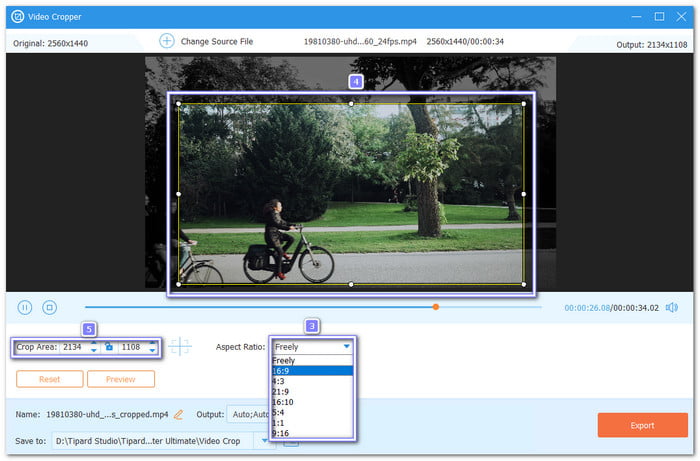
If your video looks too tall or too wide, adjust it until it looks right in the Preview.
Step 4 Click the Output option to fine-tune video and audio settings if needed. Here, you can modify the format, resolution, frame rate, etc. Next, go to the Name and Save To options. You can also change these if you wish.
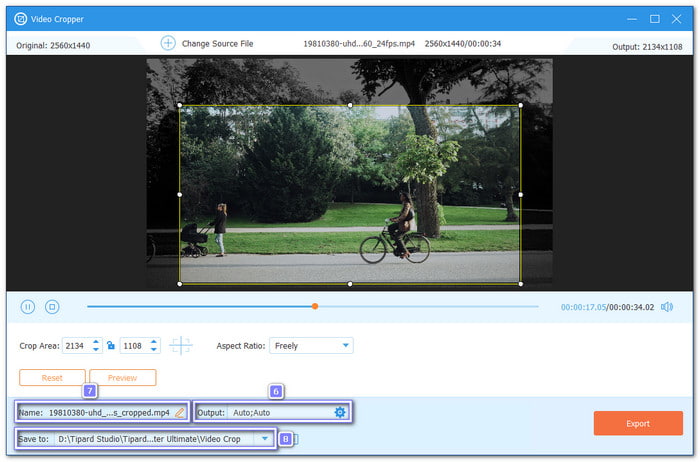
Step 5 Once you have achieved your desired size and removed unwanted frames, hit the Export button. Now, it is ready to upload to YouTube with the correct screen size.
How to Compress Video to Reduce File Size for YouTube
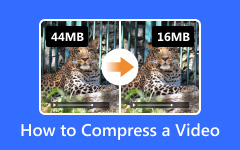
Uploading videos to YouTube can take time if the file size is too large. Additionally, YouTube may lower the video quality after it is uploaded. To fix this, you can compress your video without compromising its quality. Tipard Video Converter Ultimate can help; learn how to do it by following the steps presented below.
Step 1 Suppose that you already have Tipard Video Converter Ultimate. So, what you need to do now is open it, navigate to the More Tools tab, and select Video Compressor from the list of features.
Step 2 Click the add button in the center. Locate the video in the folder where you want to reduce the file size. Click it once, then press Open to load it.

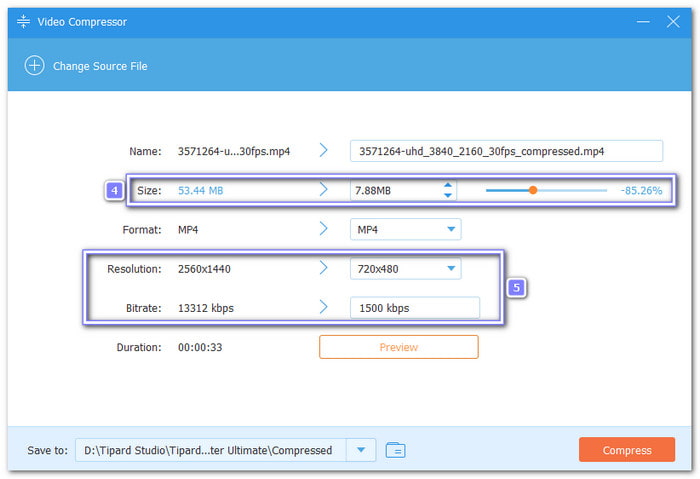
Step 3 Once the video is loaded, you will see a slider. Drag it to the left to make the file smaller. You can also click the Down Arrow button to decrease the file size. Additionally, you can lower the Resolution and Bitrate under their corresponding options. Keep in mind that lower resolution corresponds to smaller size, and lower bitrate corresponds to uploading faster, as well.
The good thing is that you can see the changes to your video file under the Preview. It showcases 10 seconds of your video.
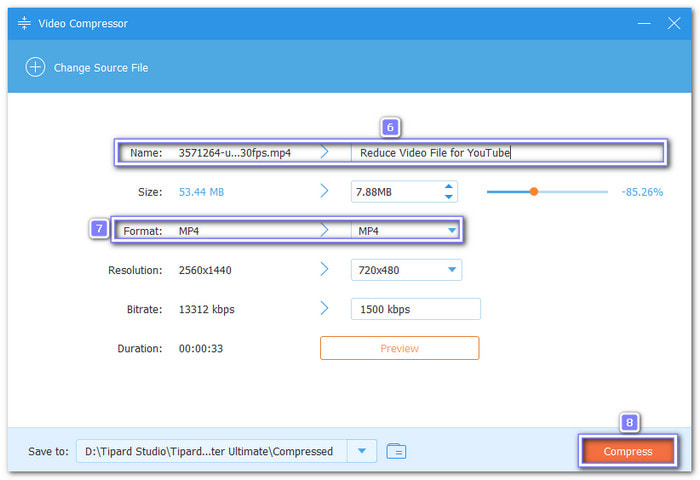
Step 4 Before diving into compression, you can also change the Name and Format of your video. So, everything is ready before you upload it to YouTube.
After all that, click the Compress button, and please wait until the process is complete. It will only work on the video for a few seconds. When it is done, a folder will open. That is where your new, smaller video is saved. You can now play it on your computer and check the size!
Conclusion
With the booming popularity of YouTube today, it is essential to know the optimal video size for YouTube. It matters, especially if you are planning to be a YouTuber or want to start your own channel.
In case your video is too large or has extra frames you want to remove, rely on Tipard Video Converter Ultimate. It can crop your video, adjust its aspect ratio, and compress it to a smaller size without significantly compromising quality. It is quick, simple, and does not require a tech expert to use. It can really help you when it comes to videos!
More Reading


About the Author
