

Looking for ways to take a screenshot on a 60 percent keyboard? Well, capturing on a 60% keyboard might be tricky since these layouts often lack dedicated keys, like Print Screen. But the good news here is that there are more ways and shortcuts you can use to take a screenshot on your screen effectively. In this guide, we will teach you all the best methods for an effective capturing process using a 60% keyboard. Thus, proceed to this tutorial and learn more.
Part 1. Screenshot on a 60% Keyboard Without a Print Screen Key
When using a 60 percent keyboard, there are times when there is no Print Screen button on it. Well, for some users, it might be challenging to capture their screen since the capturing button is not available. The good thing here is that there are various alternatives you can use, so you can still take a screenshot: Some of the methods are:
- Using Snipping Tool - This tool in Windows is useful for capturing your screen. You can even capture in many ways, such as freeform, rectangular, window, and full-screen.
- Using Game Bar - Another tool you can use is Game Bar. This tool can offer its built-in screen capture feature, allowing you to take a screenshot effectively.
- Accessing Excellent Screenshot Program - You can also download and access a third-party screenshot tool for an effective capturing process. Some of the programs can even offer basic editing, ideal for image enhancement.
Part 2. Where is the Print Screen Key on a 60% Keyboard
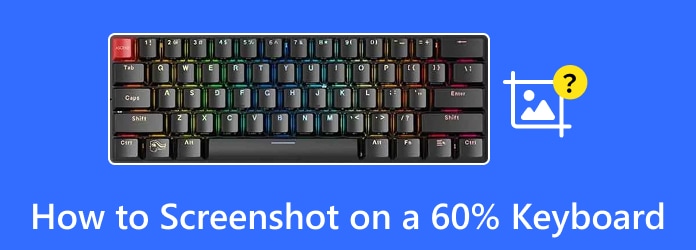
The Print Screen button is not physically present when using a 60 percent keyboard. Instead, it is usually mapped as a secondary function, often accessed through the Fn key, combined with another key, like Insert, P, Left bar, or other symbol keys, depending on the keyboard's design. Plus, if you want to check the Print Screen button or any capturing buttons on your keyboard, you can also check the manual for more information.
Part 3. How to Screenshot on a 60% Keyboard via Snipping Tool
Want to learn how to screenshot on a 60 percent keyboard wooting and other models? Then, one of the tools you can rely on is the Snipping Tool. It is an excellent tool that can let you capture any content from your screen. You can even annotate screenshots with shapes, pens, highlights, and more. Plus, the process of taking a screenshot is simple, making it ideal for all users. You can also access this program on various devices. You can take a screenshot on Dell, Asus, Lenovo, and other Laptop and PC brands.
If you want to know how to take a screenshot on a 60 percent keyboard using the Snipping Tool, you can follow the instructions below.
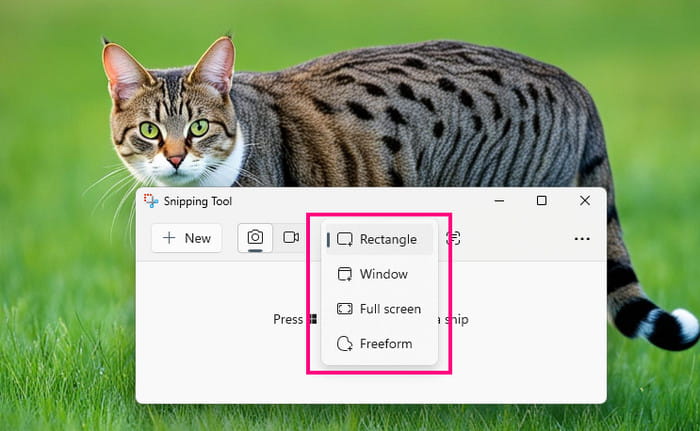
Step 1 On your device, launch the Snipping Tool. You can also press/tap the Windows + Shift + S keys as a shortcut.
Step 2 Once the tool shows up, proceed to the Snipping Area and choose how you want to take a screenshot. You can select rectangular, freeform, full-screen, and more.
Step 3 After taking a screenshot, you can begin the saving process.
Limits:
- It doesn't support the auto-saving process.
- There are times when the screenshot tool closes/crashes.
Part 4. How to Capture on a 60% Keyboard with Game Bar
To screenshot on a Windows 60% keyboard, you can use the Game Bar tool. It is a perfect program if you want to capture games and other content from your screen. What we like here is that you can capture the entire screen or select a particular area. It also has a simple capturing procedure, making it more ideal for all types of users. To start taking a screenshot, you can check the steps below.
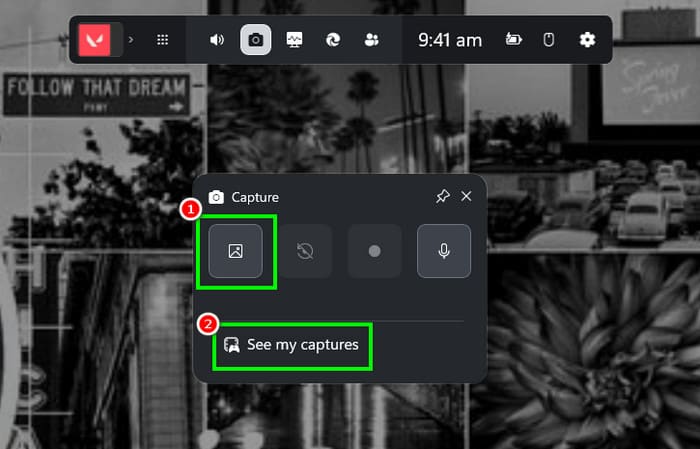
Step 1 On your device, you can start opening the content you want to capture. Launch the Game Bar tool by pressing the Windows + G keys on your keyboard.
Step 2 After that, the interface of the tool will appear on your screen. Click the Capture function to start taking a screenshot.
Step 3 Once done, click the See My Captures button to check the captured screen.
Limits:
- The tool can only capture a full-screen mode.
- There might be a performance issue when using it on a low-end PC.
Part 5. How to Screenshot and Screen Record on a 60% Keyboard
Both Snipping and Game Bar tools are ideal when it comes to capturing your screen. However, you must know that they are only available on Windows. Plus, there are some drawbacks you might encounter during the capturing process. So, if you are looking for the best screenshot tool, look no further than Tipard Screen Capture.
This program is perfect if you want to change the shortcuts for taking a screenshot and recording, keep the original quality, and access it on both Windows and Mac. It also has a simple UI, allowing you to take a screenshot easily and quickly. The best part here is that you can select the screen area you want to capture or take a screenshot of the entire area. Lastly, Tipard Screen Capture is fast to launch, allowing you to achieve the result you need without consuming much time. To learn how to take a screenshot on a 60 percent keyboard using Tipard, see the steps below.
Step 1 Download Tipard Screen Capture on your Windows or Mac. Then, install it to start the screen-capturing process.
Step 2 After you launch the interface, click the Camera symbol on the right interface. Then, start selecting the screen that you want to capture.
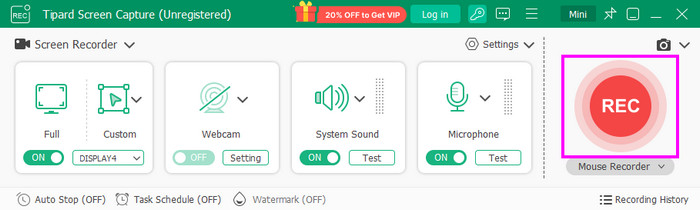
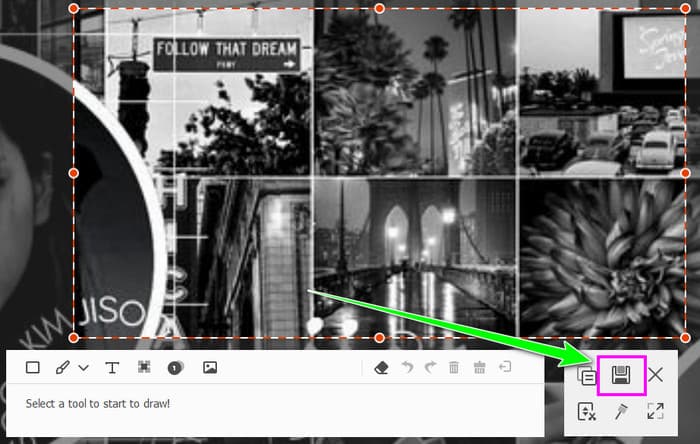
You can also enhance your captured screen by using annotation tools, such as pen, shapes, lines, adding text, and more.
Step 3 Once the preview shows up, you can start clicking the Save symbol to export the image to your device.
Conclusion
If you want to take a screenshot on a 60% keyboard, you can use all the methods we have recommended in this tutorial. Both Snipping Tool and Game Bar can give you the result you need. Plus, if you want a screenshot tool that can work on both Windows and Mac while giving you the best quality and smooth process, we suggest using Tipard Screen Capture. This software ensures that you can capture any content on your screen and save it based on your preferred output, making it the best screenshot tool for all users.

Record full screen, portion, window, game, and phone seamlessly without lag
100% Clean & Safe
100% Clean & Safe

More Reading

About the Author

 Click here to join the discussion and share your comments

 Tipard Screen Capture