Windows offers built-in ways to take screenshots or capture static images. Not just one or two, but four! If you want to learn all these Windows screen capture methods, this guide can help. We will also show various ways to record your screen. So here, you will learn not only to take screenshots, but also to record your screen in Windows.
Part 1. How to Take Screenshots (Capture Static Images) in Windows
There are four simple approaches to take screenshots in Windows. So, please take time to learn how each method works below.
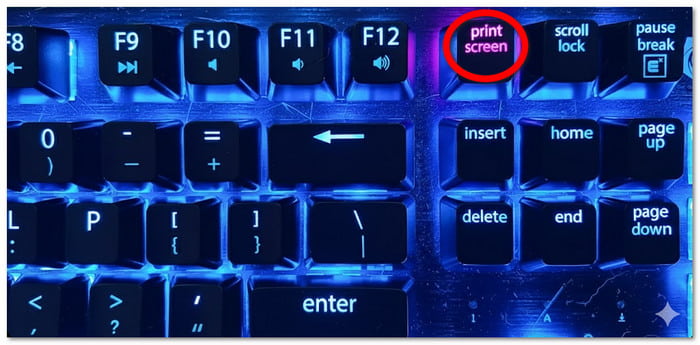
1. The Print Screen (PrtScn) Key (The Classic)
The Print Screen key is the most basic screenshot method in Windows. It is built into almost every keyboard. With one press, it captures the whole screen. It works fast and needs no app. It makes it useful for quick screen captures anytime. Here is how to capture a screen in Windows using the Print Screen (PrtScn) key:
Step 1 Find the PrtScn key on your keyboard.
Step 2 Once found, press it to capture the entire screen. It copies the screenshot to your clipboard.
Step 3 If you want the screenshot saved automatically as a file, click the Windows Logo + PrtScn. Your Windows screen will dim for a moment, and the image will be saved in Pictures > Screenshots.
Keep in mind: This method does not open an editor. You must paste the image yourself. It also cannot select a custom area.
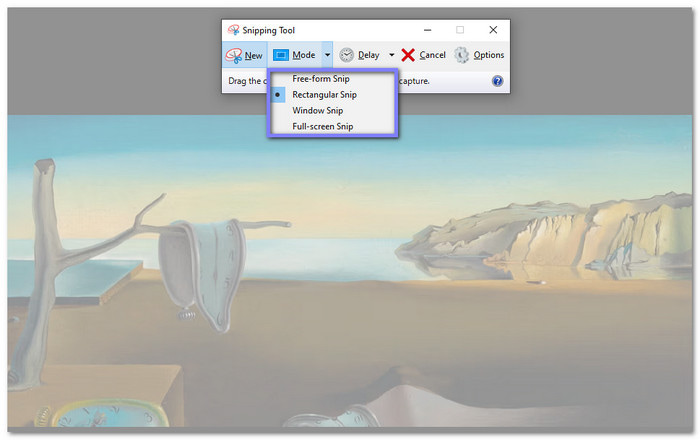
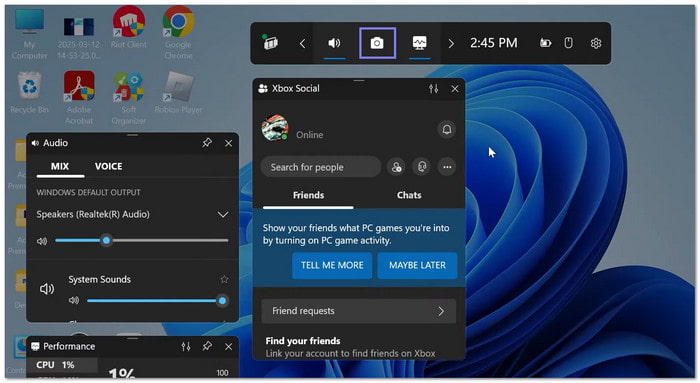
2. Snipping Tool (The Versatile Built-in App)
Snipping Tool is a built-in Windows app made for controlled screenshots, perfect for partial screen capture in Windows. It lets you choose what part of the screen to capture. You can grab a small area, one window, or the full screen. After capturing, the image opens right away.
Step 1 Open the Snipping Tool by typing "Snipping Tool" in the Start menu or clicking Windows Logo key + Shift + S.
Step 2 Choose a capture mode. The most common is Rectangular, but you can also select Window, Full-screen, or Free-form.
Step 3 For the Rectangular mode, click and drag your mouse to select the area of the screen you want to capture.
Step 4 The screenshot also opens in the Snipping Tool. You can edit it, annotate it, and save it as a photo file on your computer.
Keep in mind: It takes more steps than keyboard shortcuts, and the editing tools are basic.
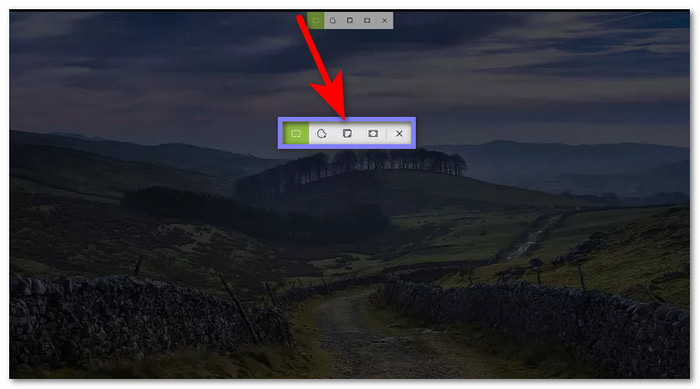
3. Snip & Sketch (Windows 10) / Integrated into Snipping Tool (Windows 11)
Before taking a screenshot, this tool lets you pick the capture shape. It makes the command to capture the screen in Windows simple. A quick shortcut opens the overlay, and a preview pops up instantly. You can draw, crop, or save your screenshot, and with its sleek, modern design, Snip & Sketch makes quick edits and sharing effortless.
Step 1 Run Snip & Sketch by pressing Windows Logo key + Shift + S.
Step 2 Choose a capture shape: Rectangular, Free-form, Window, or Full-screen.
Step 3 After selecting, the screen area will be captured and saved to your clipboard automatically.
Step 4 A notification will pop up in the bottom corner of your Windows screen. Click it to open your screenshot in the Snip & Sketch editor.
Step 5 You can use the editor to annotate, crop, or highlight, and then save or share your image.
Keep in mind: The pop-up can be missed. Editing tools are limited. It is not made for batch screenshots.
4. Game Bar (For Games & Apps)
Game Bar runs as an overlay, so it does not stop what you are doing. With one click, it captures the screen as an image file, making screen capture on PC quick and easy. The screenshots save automatically. It really helps when capturing moments during gameplay or active app use.
Step 1 Open the Game Bar by pressing Windows Logo key + G while in a game or app.
Step 2 In the toolbar, select the Capture menu. Then, hit the Camera button to take a screenshot.
Step 3 The screenshot is immediately saved as a PNG file. You can find it in File Explorer under Videos > Captures.
Step 4 You can also view your screenshots in the Game Bar's Gallery and share them directly from there.
Keep in mind: It does not work in every program. The overlay may feel distracting. Capture options are limited. It must be enabled in settings first.
Part 2. How to Record Your Screen in Windows
If the above is about taking screenshots, this section is all about recording your screen in Windows. So, please get your content ready and learn how to record it below.
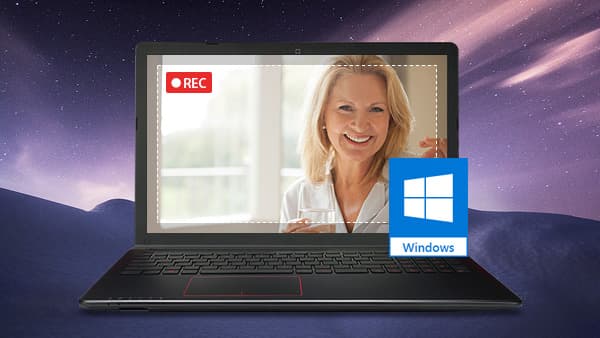
1. Tipard Screen Capture
Recording your Windows screen is great for showing tutorials, gameplay, presentations, or anything happening on your computer. You are lucky because Tipard Screen Capture makes screen capture recording on Windows simple. It lets you record your entire Windows screen or just a portion.
If your screen has sound, it can capture it, too. You can even take screenshots while recording, which is another great feature. With the preview screen, you can watch your video immediately and keep only the parts you need.
- Capture your screen along with system audio and webcam.
- Easily trim recordings to keep only the parts you want.
- Set auto stop to end recording at a specific time.
- Record in high quality smoothly without lag or stutter.
- Export in multiple formats, like MP4, MKV, MP3, FLAC, and GIF.

Step 1 First, get Tipard Screen Capture on your Windows computer using the Download buttons above. Once the download is complete, please install the program and run it.
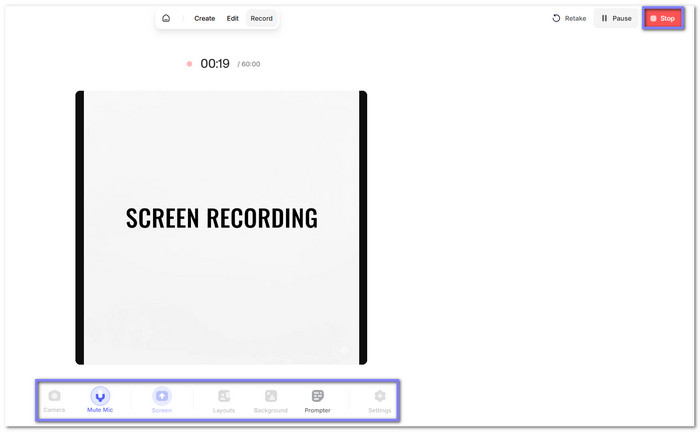
Step 2 The Screen Recorder option is automatically selected for you. Now, decide whether you want to record the whole Windows screen or just a portion. You can also turn on System Sound if you want to capture the audio, too.
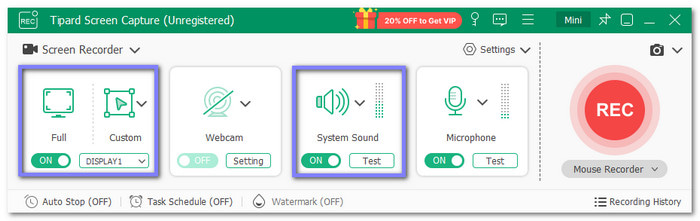
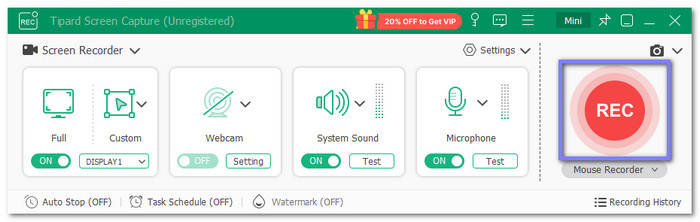
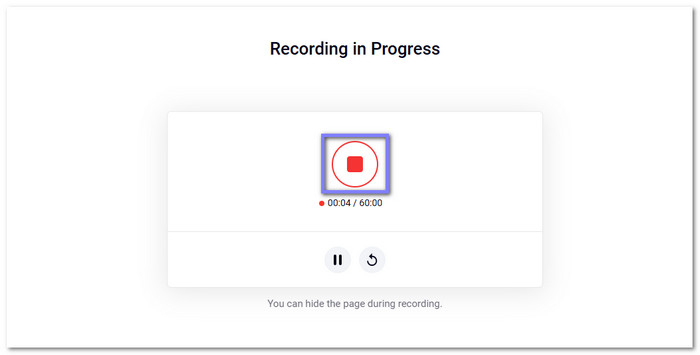
Step 3 What you need to do now is to prepare the specific screen you want to record. Once everything is set up, press the REC button.
While Tipard Screen Capture records your Windows screen, you can take screenshots using the Camera button. You can also take advantage of annotation tools to highlight, draw, or add notes to essential parts of your screen in real time.
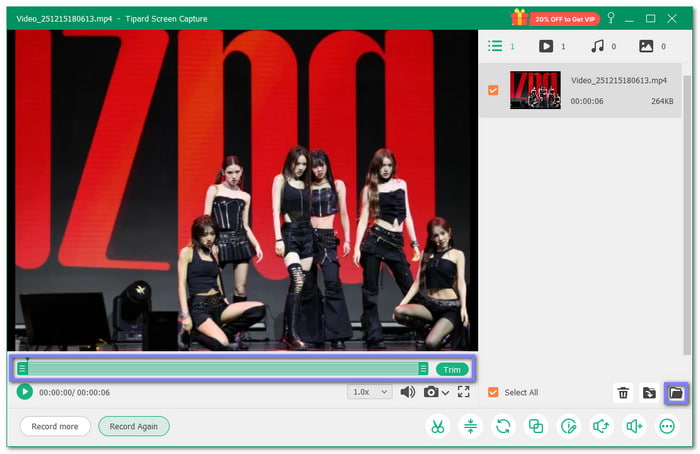
Step 4 If you think you are done recording your screen, click the Stop button. After that, your recording will appear in the preview display. You can use the Trim option to remove unwanted sections.
Once you are satisfied, save your video. If you need to record more, just click the Record more button, and you will be back in the main interface.
Important reminder: It also works as a screen recorder for Mac, not only on Windows. And yes, it offers a free version, but it has limitations. To record without restrictions, you need to subscribe to the paid version, starting at $24.00.
2. VEED.IO
VEED.IO helps you record your screen in Windows with clear control. You can choose a specific tab, a display, or the full screen. While recording, you change the size to landscape, square or portrait and add a background.
Once done recording, you can trim the recorded screen, boost the volume up to 200%, and change the speed up to 2×. Plus, it offers clarity options, which are 720p and 1080p.
Step 1 Head to the VEED.IO - Free Screen Recorder main website using your browser. Once there, click the Start Recording button.
Step 2 It is time to choose which screen you want to record. You can select a Chrome tab, a window, or your entire screen. After selecting, click the Share button to continue.
Step 3 Hit the Record button at the top right. While recording, you can also show your camera, mute the mic, and change the layout, size, or background.
Step 4 Once done, click the Stop button at the top. Then, press the Done button to export your recorded screen.
Important reminder: Long sessions may lag. Recording depends on browser performance. Free exports have limits. Internet speed affects quality.
3. FlexClip
With one click, you can capture your screen, webcam, and voice on Windows, using FlexClip, making screen capture with audio on Windows easy. Like VEED.IO, FlexClip also allows you to capture the full screen, an app display, or a browser tab.
It is useful if you want to record webinars, gameplay, courses, presentations, and tutorials. After recording, editing starts right away. You can add text, music, subtitles, annotations, highlights, overlays, trim videos, etc. Files stay private and secure.
Step 1 Go to FlexClip - Free Online Screen Recorder & Webcam Recorder and click Start Recording on the main page.
Step 2 Choose a recording mode. Pick Screen + Webcam, Screen Only, or Webcam Only, based on what you want to capture.
Step 3 Click Start Recording. The recording begins and captures your selected screen or camera.
Step 4 Hit the Stop button when you are done. Watch the recorded screen. You can choose to re-record if needed.
Step 5 Finally, click Download and Edit. Once clicked, the video downloads automatically and opens in the FlexClip editor, where you can trim the video.
Important reminder: Export time depends on video length. Editing works best with a stable connection. Advanced tools need an upgrade.
Part 3. FAQs of Windows Screen Capture
1. Is there a Snipping Tool in Windows 11?
Yes, Windows 11 has the Snipping Tool. It combines features from the old Snipping Tool and Snip & Sketch. You can open it by clicking Windows + Shift + S or searching for Snipping Tool in the Start menu.
2. How do you access your Screenshots on Windows?
After taking a screenshot, you can find it in File Explorer. By default, screenshots are stored in the Pictures > Screenshots folder. If you use Windows + PrtScn, the screen is automatically saved there.
3. Can you type in Snipping Tool?
Yes, you can add text to your screenshot using the Snipping Tool. After capturing an image, open it in the editor. You can use the Text tool to type anywhere on the screenshot. You can also draw, highlight, or erase parts to make your image clear and easy to share.
Conclusion
Which method do you think is faster to screen capture Windows 11 and 10? We want to know your answer! But for recording your Windows screen, Tipard Screen Capture is a great choice. Whether full screen or just part of it, with audio or webcam, it is reliable and easy to use.
More Reading


About the Author