
Android screen capture is a lifesaver when you want to save an important chat, capture a tutorial, or record a high-score game moment. Whether you are troubleshooting an app, sharing a funny conversation, or creating content for social media, knowing the right tools and methods makes capturing your screen effortless and precise.

Part 1. Universal Methods: How to Take a Basic Screenshot
Method 1: The Button Combo
This is the most common way of taking a screen capture as it is system-agnostic and works across all Android phones.
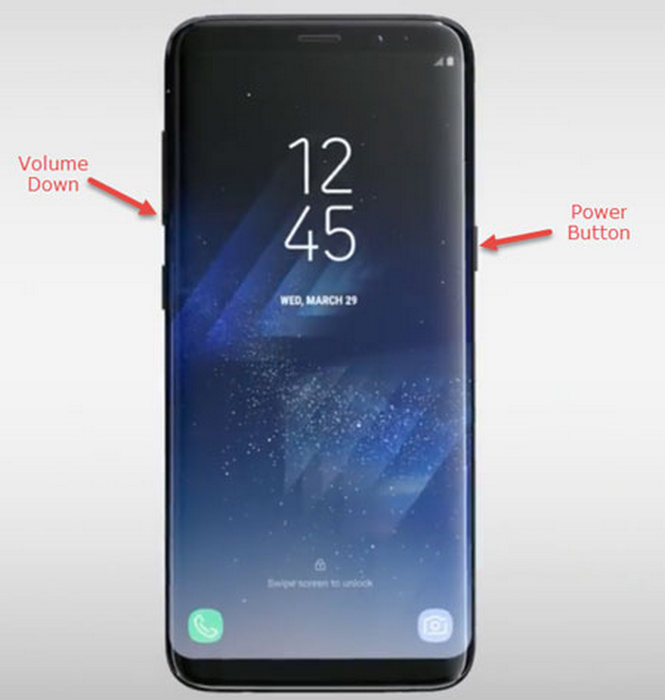
Step 1 Locate the screen you want to capture.
Step 2 Hold the volume down button and the power button at the same time.
Step 3 Hold the buttons for 1 second until the screen turns to the capture screen, giving you a sign that it has been recorded.
Step 4 Go to the screen capture for any edits or sharing requirements you may have.
Method 2: The Gesture
This method avoids pressing buttons to take the screen capture, instantly taking it via motion, which is an alternative to a screen capture gesture.
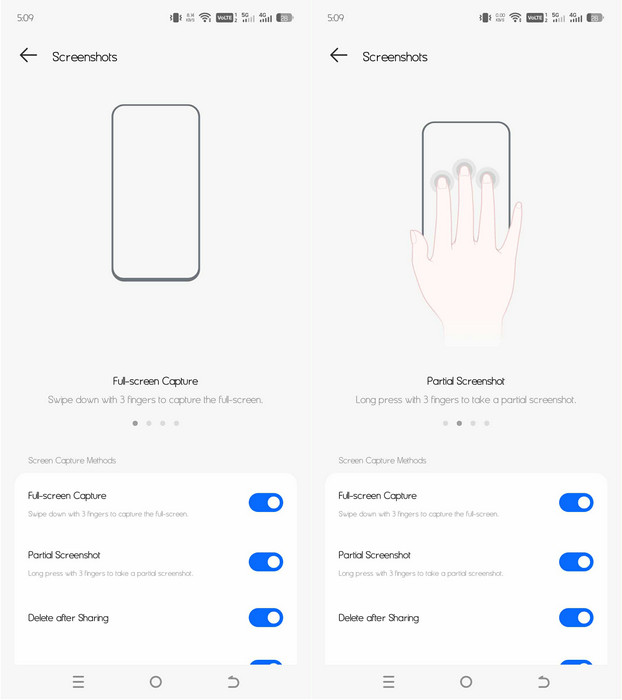
Step 1 Go to the Gestures of your Android and open the settings.
Step 2 Turn on the screenshot gesture.
Step 3 Go to the screen you wish to have.
Step 4 Create the screen capture motion, usually using three fingers downwards, and the screen will flash to let you know it has been taken.
Method 3: Using Google Assistant
In the Google Assistant app, you can use voice control to capture screenshots, which is efficient and handy if you are doing other tasks. And you do not even need to touch the screen.

Step 1 To activate the Google Assistant app, you can either say the word Ok Google or press your home button.
Step 2 Once the Google Assistant is open, say a single command: Take a screenshot.
Step 3 There will be a screen that will flash, and that will indicate the screenshot that you captured.
Step 4 A screen will open, and you can save, edit, or share the screenshot.
Part 2. Advanced Built-In Capture Features
Scrolling Screenshot
Your phone will automatically scroll to the content you would like to save and create a continuous, seamless screenshot.
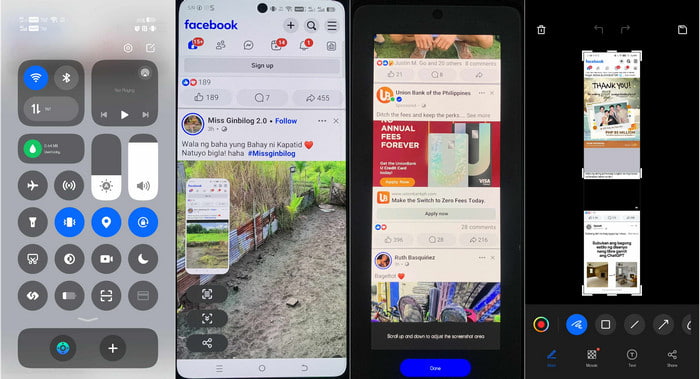
Step 1 To start, capture a screenshot using any method.
Step 2 On the screenshot preview, tap Scroll or Capture More.
Step 3 Tap until the entire screen is captured.
Step 4 Save the extended screenshot, which is the screenshot that has multiple images connected.
Screen Recorder
The built-in screen recorder is also helpful, especially if you are making tutorials, app demonstrations, or doing live gameplay. The screen recorder captures very smooth, seamless screen capture Android video activity done on the screen.
Step 1 Swipe down and open the Quick settings panel.
Step 2 On the panel, tap the Screen Recorder option.
Step 3 If you have audio or quality settings, select any that you want.
Step 4 Tap Start and record the actions that you need.
Step 5 Tap Stop to save the activity as a video.
Part 3. Best Screen Capture Apps for Android
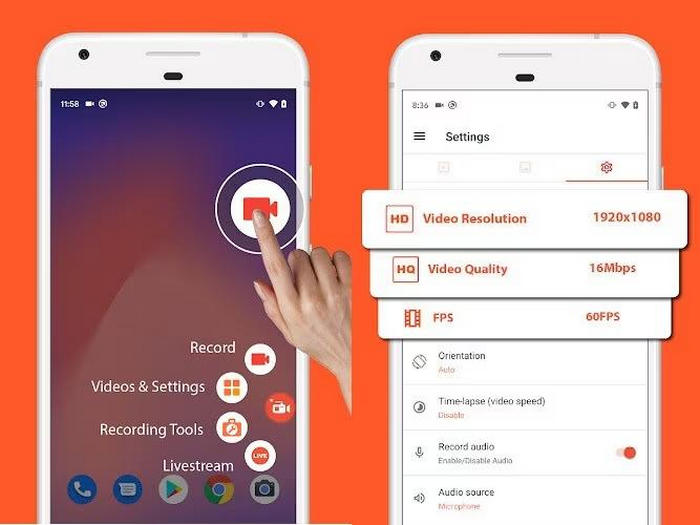
1. AZ Screen Recorder
AZ Screen Recorder is a trusted Android screen recorder that offers smooth performance while capturing video without a watermark, and allows you to customize quality settings.
Step 1 Go to the Google Play Store and install AZ Screen Recorder.
Step 2 Launch the application and provide the necessary permissions.
Step 3 Press the record button that is displayed on the screen.
Step 4 Press Start when you want to begin and tap Stop when you want to save your screen recording.
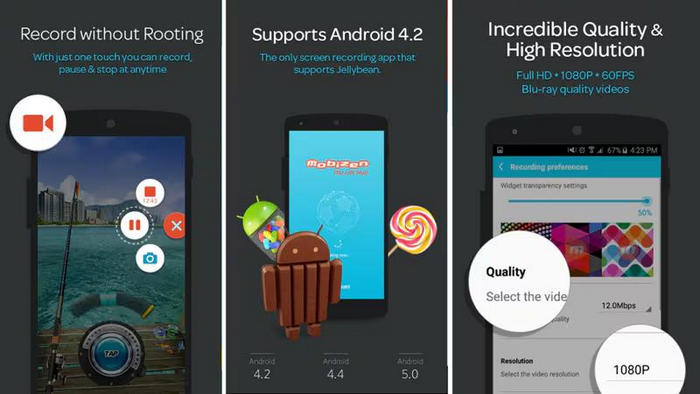
2. Mobizen Screen Recorder
Mobizen screen recorder is one of the most popular options as it has clear video quality, built-in editing tools, and face cam capabilities. It is most used for screenshots on Android, recording gameplay, and tutorials, as it does not require advanced settings.
Step 1 Download Mobizen Screen Recorder on your phone from the Play Store.
Step 2 Open the app and provide permissions for the microphone and overlays.
Step 3 Press the Mobizen widget button to float and begin recording the screen.
Step 4 Press Stop to save the screen recording to the Mobizen gallery.
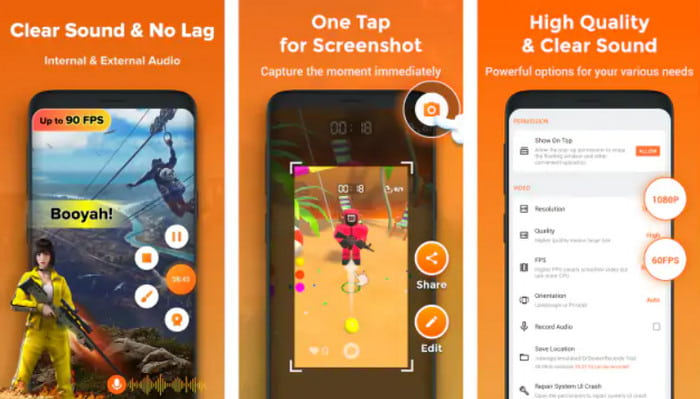
3. XRecorder by InShot
XRecorder is one of the smoothest and most stable apps in the market, alongside having the best quality recording with mic support, internal audio options, and settings to customize the FPS.
Step 1 Open the app and provide overlay and storage permissions.
Step 2 Press the floating control panel to commence recording.
Step 3 Press Stop to save the video recording.
4. Super Screen Recorder
Screenshots and videos can be taken using Super Screen Recorder, and it allows you to live stream and draw during the screen recording. Super Screen Recorder is great for walkthroughs and testimonials since you can draw on the things you want to emphasize during the recording process.
Step 1 Launch the application, and allow it to use the floating control button on the screen.
Step 2 Take and begin recording your screen.
Step 3 To save the recording, press the button that says Stop.
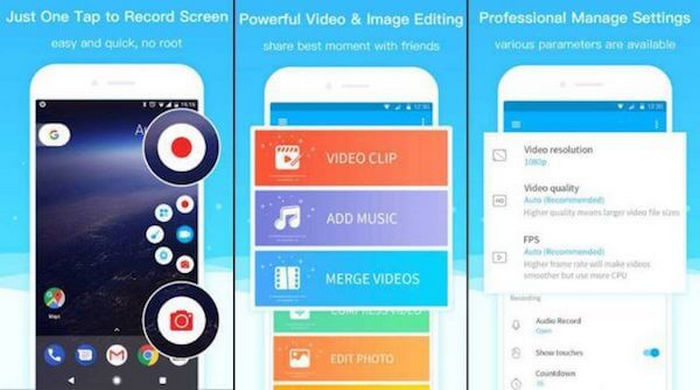
5. RecMe Screen Recorder
Recme has a good screen recorder; it is high-quality and saves your videos in a variety of formats. If you want to make a quality screen recording, it maintains good recording quality, good audio quality without screen recording performance issues.

Step 1 Go to the application and set your video quality, audio source, and video format.
Step 2 Press the record button on the screen and press it anytime to pause/resume the recording.
Step 3 Press Stop. It saves your video in the RecMe library.
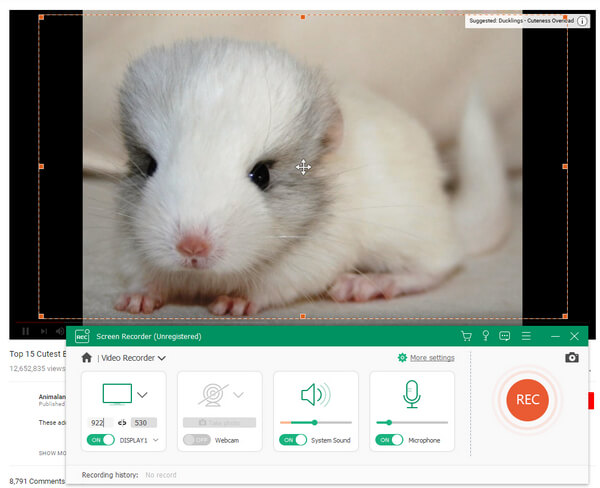
Part 4. Professional Solution: Using a PC Tool
Tipard Screen Capture is a versatile and high-quality screen recording tool for Windows and Mac that allows you to record screens, videos, audio, and even external devices like iPhones or Android phones. It's designed for professionals who want smooth, lag-free recordings with customizable settings, making it perfect for tutorials, gameplay, webinars, and more.
- Capture screen in HD with system sound and microphone audio.
- Record full screen, specific windows, or custom areas.
- Add webcam overlay, images, or draw on-screen during recording.
- Preview, trim, compress, merge, and export in formats like MP4, WMV, MKV, or MP3.

Step 1 Access the Tipard site to download Tipard Screen Capture compatible with your operating system.
Step 2 Run the installation wizard in your setup files and complete the installation of the software.
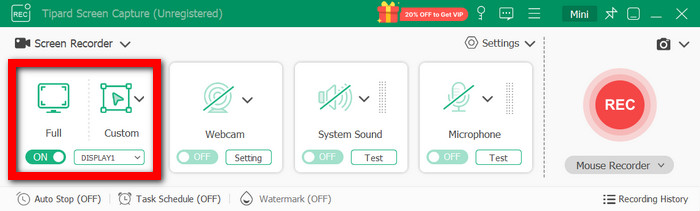
Step 3 Run the program, and on the main interface, click on the Screen Recorder option. This will prepare the program to capture your screen.

Step 4 Choose from the choices of screen recording modes: Full or Custom.
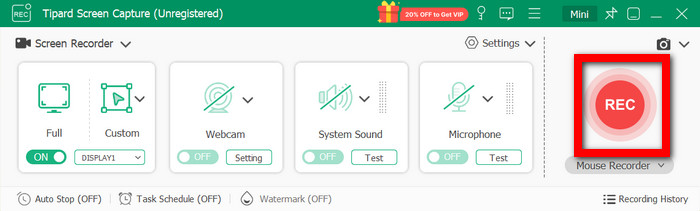
Step 5 By clicking the REC option, your video recording will commence, and you will have options to toggle on a webcam, screen drawing, callouts, images, keystroke and mouse action indicators, and more.
Step 6 Click on the Stop button once you are finished recording your video.
Step 7 Lastly, select the Import option to send the video to your preferred destination on your computer.

Conclusion
Screen capture software for Android makes saving, sharing, and recording anything on your device simple and efficient. With built-in features, apps, or Tipard Screen Capture, capturing high-quality content has never been easier.
More Reading

About the Author
