

How to screen record on PS4 can become easy with practice. Use the right tools to capture those remarkable moments. Crowned best player of the match? Record and save it. Want to create how-to videos? Record the steps. Want to share your favorite game moments? This guide aims to show various built-in recording ways and additional options PS4 offers to help record your game moments in the best quality without extra hassle and effort.

Part 1. Optimize Your PS4 Video Clip Settings
You can improve the quality of game clips with the right recording settings. It is kinda easy to edit and share game clips using PS4 options so that you can tweak video quality without too much fuss, really.
Here is what you should adjust if you want better results:
- Adjust the recording duration: Go to Settings, then Sharing and Broadcasts. After that, pick the Length of the Video Clip and set the length you want. Shorter time limits work best for highlight moments, but longer lengths are better for full game walk-throughs, so you do not miss stuff.
- Edit the video quality: In Video Clip Settings, select the quality you prefer. Higher-quality clips look clearer, but they also use more storage.
- Set microphone audio: Turn on microphone audio recording. You will usually get a cleaner sound by using a headset, or even an external microphone if you have one.
- Set party audio: Enable party audio, so your party members can capture in-game voice and discussion.
- Storage space: Check that you have enough free space to store longer clips. Otherwise, the recording might stop when you least expect it, or it just would not save properly.
- Check audio and video quality: Before you record something long, make a quick test clip first. That way, you can confirm everything sounds good and looks good before you commit.
Part 2. How to Record on PS4: Full Guide
The PS4 allows for built-in game recordings without external hardware. After some negotiation to determine the settings, game clips can be recorded to the console at the press of a button.
Step 1 Log in to allow access to the game. Then log in to PS4 and open Pulsar 4. The recording is to start after the game starts.
Step 2 Two quick taps of the Share button, then start recording. A notification will confirm that the recording is in progress.
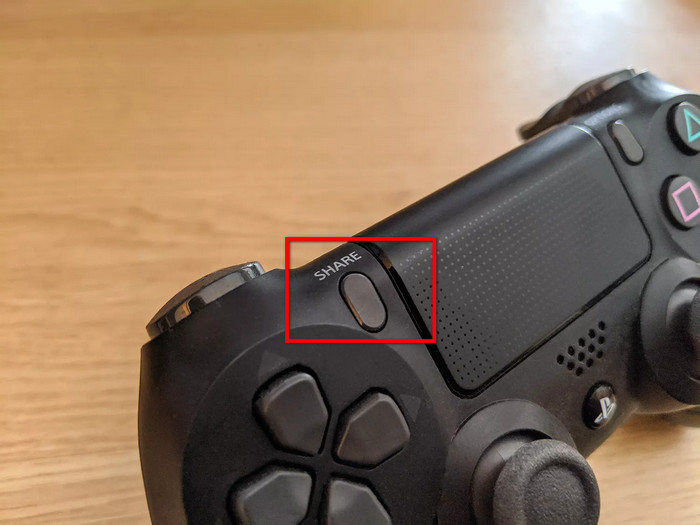
Step 3 All actions within the game may also be performed. The PS4 will record for a duration set in its settings.
Step 4 Tapping the Share button stops the recording. The recording will also stop if the predetermined duration of the recording is fulfilled.
Step 5 The recorded video can be accessed via the Capture Gallery.
Step 6 The Capture Gallery allows for basic edit functions to include trimming of the video as well as video sharing.
Part 3. How to Export PS4 Gameplay Clips to Your PC or Mac
After capturing gameplay, getting the video over to a computer really opens up more options, for example, advanced editing, making backups, or pushing it to streaming services and social media. Using a USB storage device is one of the easiest ways to move gameplay clips from a PS4 to a PC or Mac, making it easier to edit, share, or record VR gameplay alongside other gaming content.
Step 1 Go into the Capture Gallery and pick the video you want to export.
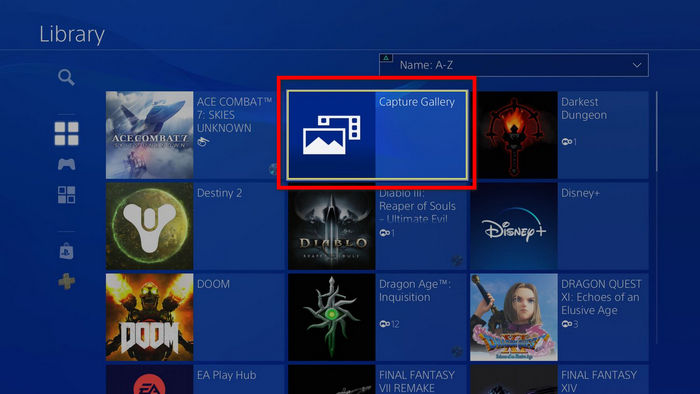
Step 2 Press the Options button on your controller, then a menu should pop up. Choose Copy to USB Storage Device from that list.
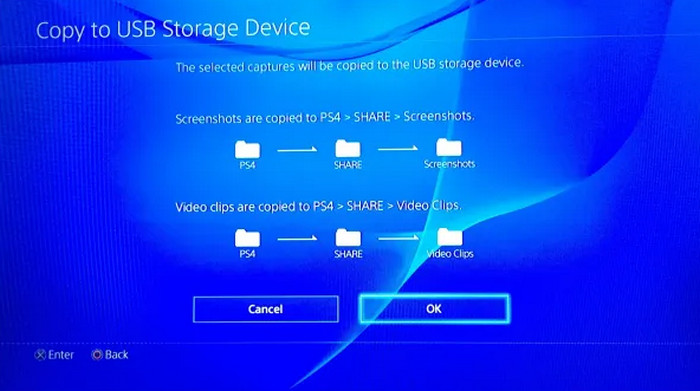
Step 3 Select the videos you want to copy, then hit the Copy option. USB devices can take a moment to move the files, so yeah, wait a bit.
Step 4 Once the copying has finished, you can unplug the USB storage device from your PS4.
Step 5 Plug that USB storage device into your PC or Mac. The gameplay videos you transferred are then set to be edited online, or organized first, and saved for upload.
Step 6 Connect the USB drive to the PC or Mac again and open the transferred gameplay clips. The videos are now ready for editing, sorting, or uploading using compatible video editing tools or through online platforms.
Part 4. Advanced Method
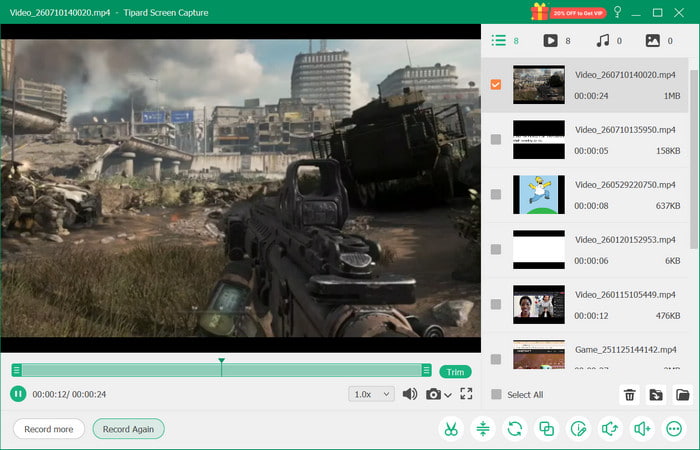
For gamers who want an even better recording, a capture card along with some screen recording software will create a more professional setup. This will allow for the recording of PS4 or PS5 gameplay on a computer, and will offer a lot of control over the performance and resolution of the recording. Once the console is connected via a capture card, Tipard Screen Capture has great tools to record and edit gameplay videos.
- Keeps original video quality for clearer gameplay recordings.
- Allows quick sharing of recorded videos to YouTube, Instagram, and other platforms.
- Compresses large video files while maintaining excellent video quality.
- Captures gameplay, system sound, microphone audio, and webcam footage together.
- Helps trim, compress, and convert recordings before saving or sharing.
Step 1 Download and Install
First, download Tipard Screen Capture, make sure it is on your Windows or Mac.
Step 2 Plug the Console into the Capture Card
So take the Console and just connect it to the Capture Card. You may use HDMI cables to link the PS4 to the capture card, and then from the capture card to your computer, via USB.
Step 3 Open Tipard Screen Capture
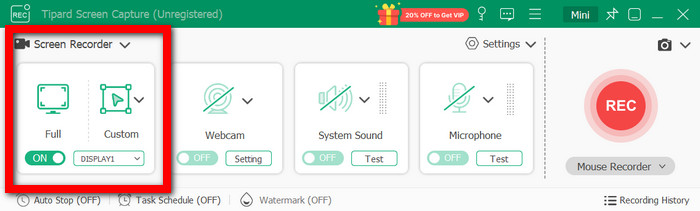
In the app, you will be setting up and tweaking the recording settings, then you choose Screen Recorder mode so the recording starts. After that, select between Full and Custom.
Step 4 Set Your Recording Preferences
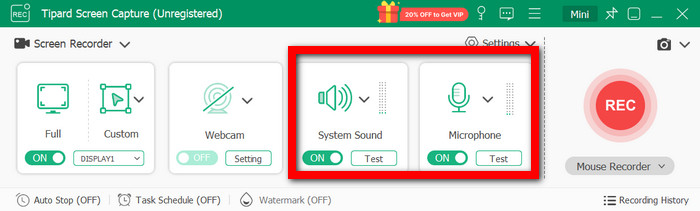
Choose the capture area, enable System Sound, and turn on the Microphone option if you want commentary. You can also create a webcam overlay (optional), if you like.
Step 5 Start Recording Gameplay
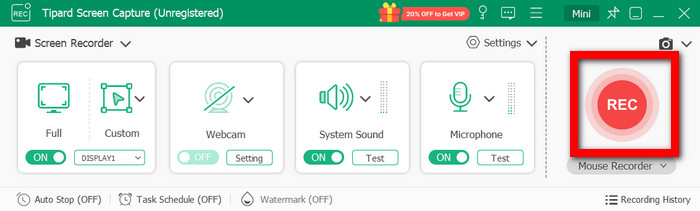
Go to the capture card preview, then just hit the REC button. That is it, recording should kick in, and yeah.
Step 6 Stop and Take a Quick Look
Now, click the Stop button to end recording. You can preview the captured video. It is straightforward, though; sometimes it takes a sec.
Step 7 Edit, Then Export the Video
Cut the clips if needed, compress the files, or convert the captured footage into things like MP4. When you are done, save the finished video or share it somewhere, like YouTube, if you want.
Part 5. FAQs on How to Record on PS4
Is voice commentary allowed in PS4 gameplay recording?
Yes, it is allowed, as long as you use the microphone audio while you record. Then you can add voice commentary to your PS4 recordings. Basically, gameplay footage can be captured, along with reactions, explanations, and live narration, using either an external microphone or a compatible headset to record gameplay on PC or PS4.
Where do you save PS4 gameplay recordings?
PS4 gameplay video clips are automatically saved to the Capture Gallery in PS4. They can be reviewed, trimmed, copied, or shared. They can be moved to an external source device.
How long can PS4 record gameplay?
PS4 gameplay recording time varies with the video clip length settings chosen by users. There are no limitations to recording length in PS4 since users can change their recording times depending on the storage space available.
Conclusion
How to record screen on PS4 has become easy through recording and capture options and advanced recording methods. Through adjusting settings, moving the clips, and even using tools such as Tipard Screen Capture, you can easily record videos for editing and sharing.

Record full screen, portion, window, game, and phone seamlessly without lag
100% Clean & Safe
100% Clean & Safe

More Reading
About the Author