
How to Save a DVD to Mac OS

As people increasingly prefer to watch videos on digital devices and mobile devices, saving a DVD to Mac has become a necessary skill to almost all Mac computer users. Before we get into this tutorial, we should remind you of the regulation of ripping DVDs. Copping and saving DVDs, especially those encrypted and protected ones, can be legally ambiguous. The Motion Picture Association of America and the Digital Millennium Copyright Act prohibit ripping protected DVDs. However, many experts and analysts argued that if customers purchase a DVD, they have the right to look at the DVD content at any devices as they wish. Moreover, sometimes, people just want to save home DVDs to hard drive or cloud services. Anyway, we are going to introduce multiple ways of saving a DVD to Mac for different purposes.
Method 1. Save DVD to video on Mac with Tipard Mac DVD Ripper
When choose a DVD ripper for Mac, the first thing you should consider is output quality. From this point, we recommend Tipard DVD Ripper for Mac. This DVD ripping application is able to enhance video quality as much as possible during ripping a DVD. Moreover, it has the capacity to break and remove restrictions from commercial DVDs, including the latest encryptions, copy protections and region code.
Install DVD Ripper
Download and install DVD Ripper for Mac on your computer. Put the protected DVD into Apple supported DVD drive and run DVD Ripper for Mac.
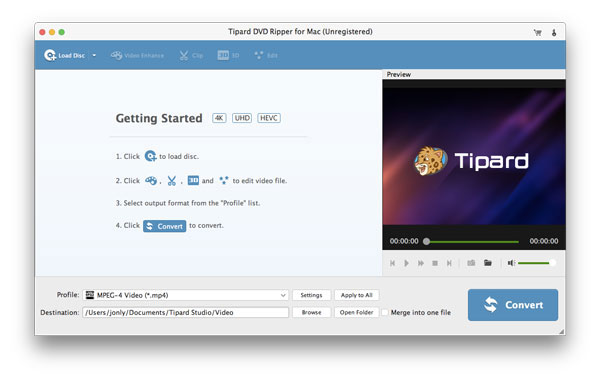
Load DVD
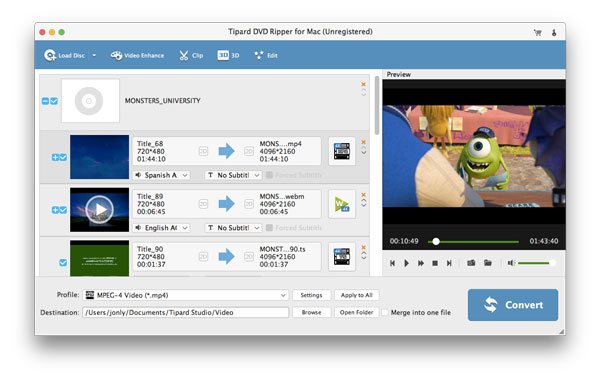
Hit the Load Disc button on top of the screen to load DVD content from DVD drive. Tick the checkbox in front of each video you want to rip to local hard drive.
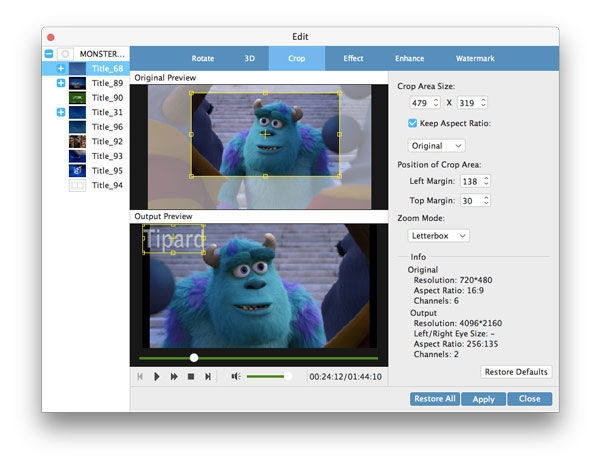
Personalize videos
Tipard DVD Ripper for Mac has integrated video editor. You can personalize the DVD videos by hitting the Edit button on top ribbon. Then you can crop, trim and merge video clips, add watermark or filters on videos.
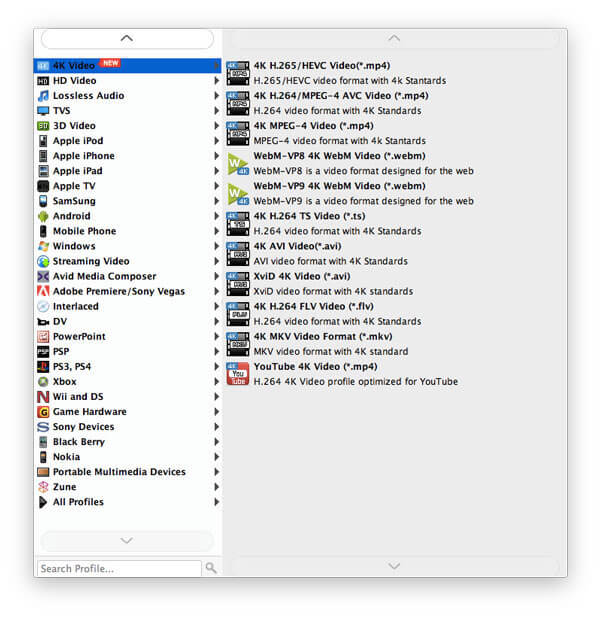
Customize configuration
Unfold the drop-down list of Profile on bottom of the interface and choose a proper video format. And set a location to save the ripped video by pressing the Browse button. If you need more custom options, you can hit the Settings button and reset the configuration window.
Tip: This Mac DVD ripper supports to encode and optimize protected DVD for playback on iPhone, iPad, Apple TV and other portable devices.
Start ripping
After settings are done, click on the Convert button to start ripping a DVD with original quality on Mac.
Method 2. Save a DVD to ISO image file on Mac with DVD Cloner
If you want to copy a protected DVD to Mac, you can try Tipard DVD Cloner for Mac. It has the ability to extract an ISO image from any DVD. Moreover, it has the capacity to break and remove restrictions from commercial DVDs, including the latest encryptions, copy protections and region code. So, you can copy an encrypted DVD to Mac for backup or DVD creating.
Install the latest version of Tipard Mac DVD Cloner on your Mac computer. Put the DVD you'd like to copy to Mac into optical drive.
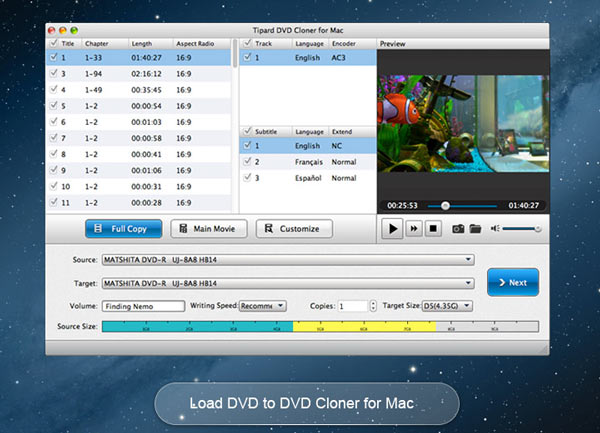
Run DVD Cloner and click on the Load DVD option in File menu on the top ribbon. Then this program will import all files from the DVD. Make sure that the Full Copy button is pressed. That will guarantee to copy entire DVD to Mac.
Locate to bottom area, select your DVD from the Source drop-down list and set ISO image in the Target option.
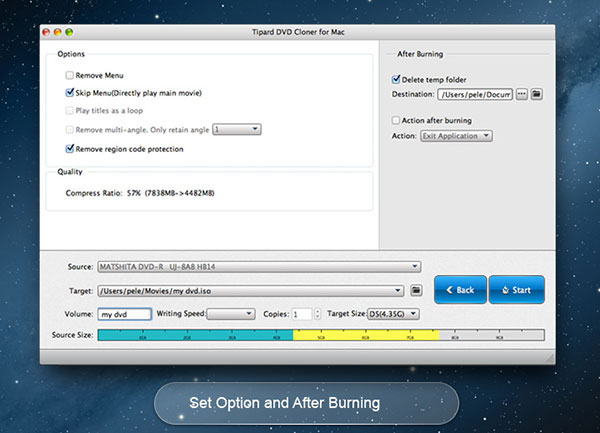
Click on the Next button to open the next window and pick a folder to save the ISO image in the Destination field.
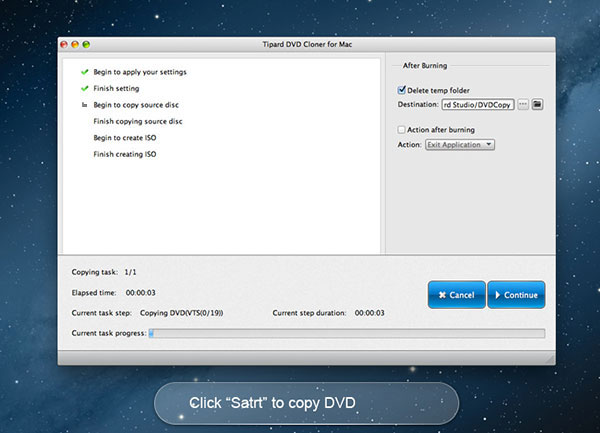
If you are ready, click on the Start button to extract ISO image from your DVD.
Method 3. How to copy home DVD to Mac with Disk Utility
If you want to back up entire DVD to Mac, you will not need to install third party tools. You can also create ISO from DVD with it. Apple has integrated ripping DVD feature into Disk Utility. This system utility could back up and save home DVD to Mac easily.
Load home DVD
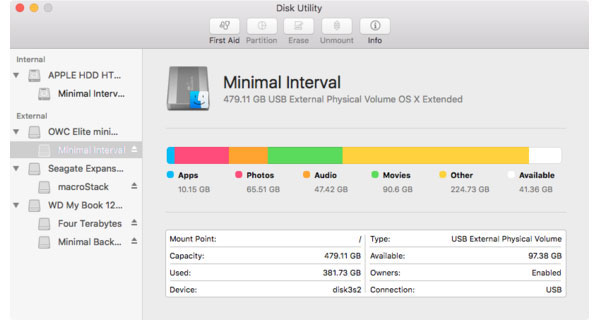
Insert your home DVD into optical drive. If it starts auto-playing, you need to stop it. Make sure your hard disk has enough space to store the home DVD copy. Go to Applications folder and open Disk Utility.
Customize settings
Once Disk Utility opened, press your home DVD on left side bar and click on the New Image on top ribbon.
When the Save As dialog shows up, you can input a name for the home DVD image and pick a location to save it. Then choose Read/Write from Image Format drop-down list and change Encryption to None.
Save home DVD to Mac
Once you click on the Save button, Disk Utility will start saving the entire DVD to Mac with .dmg extension.
Watch home DVD on Mac
After saving DVD to Mac is done, you can eject your home DVD. But the DVD copy is unplayable. If you want to watch it, you have to mount the image. In Disk Utility, choose Open Disk Image from the File menu list and open the .dmg file. Then you can watch the image file as a physical DVD.
Method 4. Save DVD to MP4 on Mac with Handbrake
If you need a freeware and not care about video quality, you can use Handbrake to save DVD to MP4 on Mac. Handbrake for Mac is one of the most popular DVD rippers on market. But freeware always has some limitations. Handbrake cannot convert encrypted DVD. Plus, the DVD encoding speed is slower.

Import DVD
Insert the unprotected DVD into Mac computer's optical drive and open Handbrake. Press the Open Source button on top of the screen and choose the disc to import it.
Change configurations
Unfold the Title drop-down list and choose the video clip you want to save to Mac. Handbrake also supports to rip a DVD chapter to MP4 on Mac.
Drop a destination to store the outputs by pressing the Browse button.
Then unfold the Container option in Output Settings area and choose MP4 from the list.
Go to Presets panel on right side of the screen and choose a proper encode method.
More parameters
For advanced users, more custom parameters are available in Picture, Filters, Video, Audio, Subtitles and Chapters tabs. Or you can keep them default.
Start encode
Finally, hit the Start Encode button on top of the screen, Handbrake will start encode unprotected DVD content to MP4 on Mac. It will take a while to save DVD to MP4 Mac with Handbrake.
FAQ about Saving a DVD to Mac
How to convert DVD to MP4?
To do this, you would need Tipard DVD to MP4 Converter. Download and install software on your computer. Launch it and insert a DVD disc to your computer. Click Load Disc to load videos. Unfold the Profile drop-down list and choose MP4 in it. Finally, click on the Convert button to convert DVD movie to MP4.
How to convert Blu-ray to DVD?
To convert Blu-ray to DVD, you can use HandBrake. Import Blu-ray disc into Handbrake and then it will scan the Blu-ray disc. Choose the output format as MPEG2. At last, click the Start button to convert Blu-ray to DVD format with Handbrake.
How to burn MP4 to DVD on Mac?
You can use Tipard DVD Creator for Mac to do this. Install and launch MP4 to DVD Creator for Mac. Click the Add File button in the toolbar and select the MP4 video files you want to burn into DVD. Click the Edit Menu button, then select DVD menu template and customize the frame, button and text as you like. Click Convert button to start the conversion.
Conclusion
We talked about how to save a DVD to Mac in this tutorial. As you can see, there are multiple ways to save a DVD to Mac. If you do not want to install third party tools, you can use Disk Utility to save a DVD to Mac as a DVD image. When you want to watch the DVD image, you can mount it within Disk Utility. Handbrake is a free DVD ripper compatible with Mac OS X. It is able to encode and save a DVD to MP4 on Mac. Then you can play the DVD video on any digital devices, like iPhone. While Disk Utility and Handbrake are free of charge, both cannot save protected DVD to Mac. So, we recommended a professional DVD ripper, Tipard DVD Ripper for Mac. This application has the capacity to rip and save a protected DVD to Mac without quality loss.

 DVDShrink for Mac to Copy and Compress DVD
DVDShrink is more often been used as DVD Compress software. For Mac users, DVD Cloner can be the best alternative.
 The Best DVD43 Alternative to Decrypt DVD
Here's a quick guide on decrypting your DVD's copy protection and copying dvds with the best DVD43 alternative.
 How to Rip DVD to Computer on Windows
How to rip a DVD with easy-to-use DVD Ripper software? Just a few clicks to rip DVD to computer with super fast speed.
 Top 10 MP4 to DVD Creators to Burn MP4
Want to create DVD with your preferred MP4 video? Here we introduce top 10 MP4 to DVD converters to help you.