5 Effective Ways How to Burn DVDs for Windows and Mac Users
Knowing how to burn a DVD is crucial to becoming an expert at the craft and distributing essential information or preserving priceless memories. Whether you're making family movies or business presentations, having this ability helps you easily accomplish your objectives. With so many easy-to-use techniques accessible for Mac and Windows users alike, you have all the resources you need to produce DVDs of superior quality. Let's explore five practical methods that streamline the procedure so you can quickly realize your goal.

Part 1. What You Need Before DVD Burning
Before DVD burning, you need to consider the following:
1. Understanding DVD Disc Formats: Learn about formats like DVD+R, DVD-R, DVD-ROM, and DVD-RW. Understand how each format affects burning, compatibility, and playback.
2. Choosing Compatible Discs: Select DVDs compatible with your burning software, devices, and playback equipment. Look for format symbols/icons to ensure compatibility and avoid issues during burning and playback.
3. Researching Brand Compatibility: Research or consult user manuals to identify DVD brands compatible with your devices for optimal burn DVD performance. Some players may prefer specific brands for better performance and reliability.
4. Considering Disc Durability: Opt for professional-grade discs known for durability, especially for important data backups. Ensure the discs can withstand handling and storage conditions without compromising data integrity.
Part 2. 5 Ways to Burn a DVD on Windows/Mac
Method 1: Using Tipard DVD Creator (Windows/Mac)
The best way to burn a DVD is via Tipard DVD Creator, a versatile software available for Windows and Mac. With its user-friendly interface and powerful features, Tipard simplifies the DVD-burning process. Follow these steps to create professional-quality DVDs effortlessly.
Download and install Tipard DVD Creator from the official website on your computer.
After installation, launch Tipard DVD Creator from your desktop or applications folder.
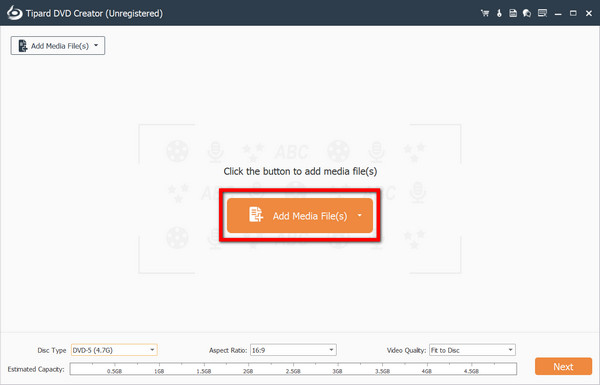
Click the Add Media Files button to import the video you want to burn to the DVD. Alternatively, drag and drop the files directly into the software.
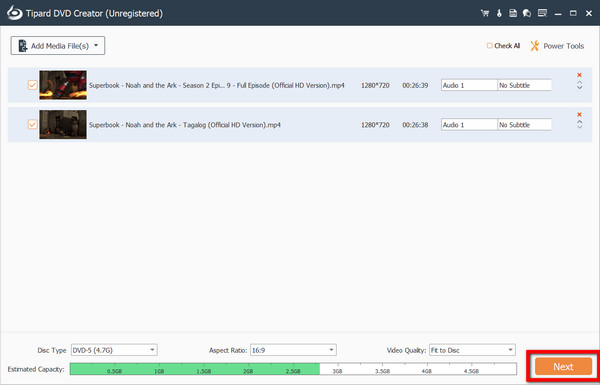
After that, hit the Next button, and then you may use the built-in editing tools provided by Tipard DVD Creator to edit the video files if needed. You can trim, crop, add watermarks, adjust effects, and more.
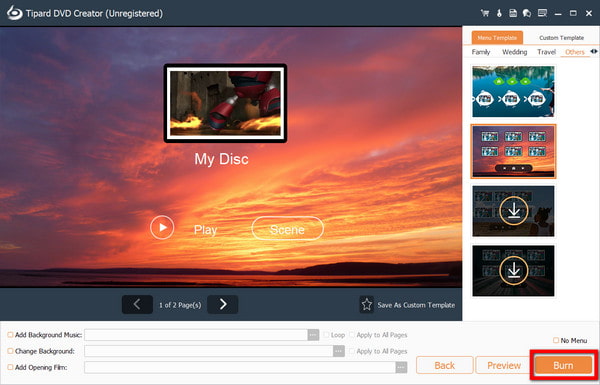
Choose a DVD menu template from the options Tipard DVD Creator provides. You can add text, graphics, background music, and other customizations to the menu.
Preview the DVD project to ensure everything looks as expected. Once satisfied, insert a blank DVD into your computer's DVD burner and click the Burn button to start the burning process.
Method 2: Using Windows DVD Maker (Windows Only)
Another method is via Windows DVD Maker, which is available for Windows users. Easily create and customize DVDs with built-in features.
You can use the Start menu to launch Windows DVD Maker or use the Windows search bar to find it.

Click the Add Items button to add video files to the DVD project.
Customize the DVD menu by choosing a theme, adding a title, and selecting background music.
Tap Burn to initiate the procedure. To finish burning the disc, insert a blank DVD and follow the on-screen directions.
Method 3: Using Finder (Mac Only)
Next is through Finder, which is exclusive to Mac. Quickly burn DVDs with a simple right-click option. Follow the steps below.
Insert a blank DVD into your Mac's DVD drive.
Open Finder and navigate to the video files you want to burn to the DVD.
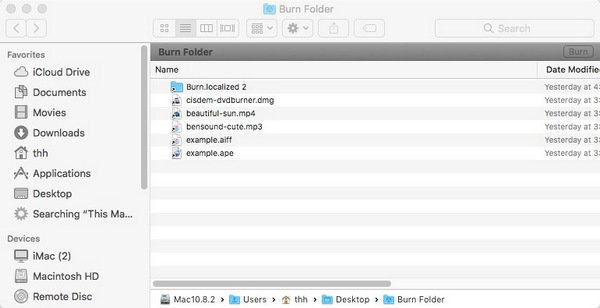
Choose the videos that you wish to burn to a DVD.
Right-click the selected files and choose Burn [X] Items to Disc from the context menu.
To begin the burning process, click the Burn button. Hold off till the procedure is over.
Method 4: Using Burn (Mac Only)
Using Burn, a straightforward application for Mac, you quickly burn your video files to DVDs with just a few clicks. Burn is a free and powerful way to burn DVD on Mac.
Download and install the Burn application from the Burn website.
Launch the Burn application from your Applications folder.
Click on the + button to add video files to the project.
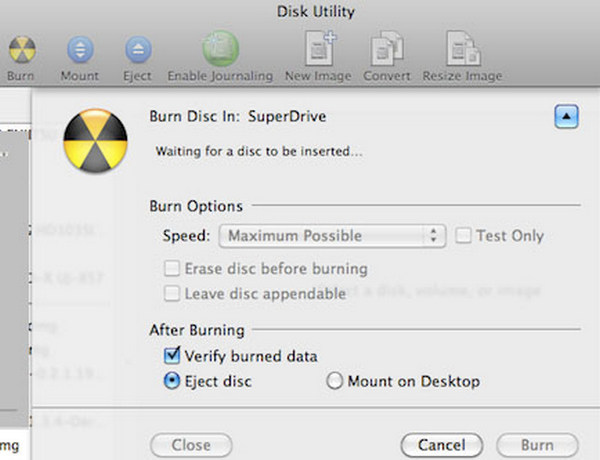
Insert a blank DVD into your Mac's DVD drive.
The burning procedure will begin when you click the Burn button.
Method 5: Using BurnAware Free (Windows/Mac)
The last one is via BurnAware Free, available for both Windows and Mac, offering a user-friendly interface for burning DVDs. It can also burn ISO to DVD. Follow the detailed instructions.
Visit the BurnAware website and download the BurnAware Free software for your Windows or Mac operating system.
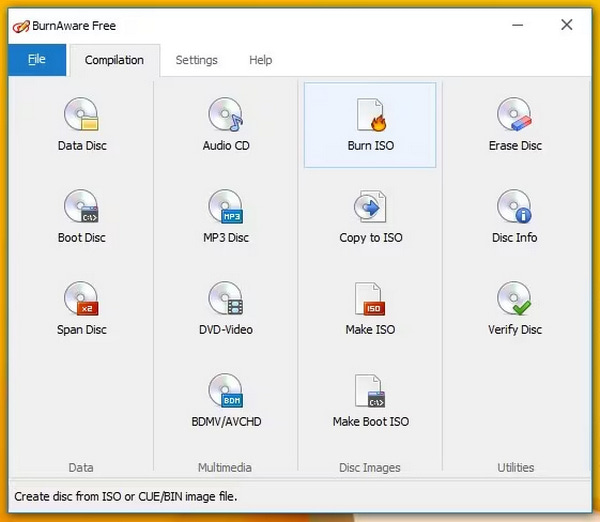
In BurnAware Free, select the DVD-Video option from the main menu.
Click on the Add button to add video files to the DVD project. Alternatively, you can drag and drop the files directly into the software.
Put a blank disc into the DVD burner on your computer. To begin the burning process, click the Burn button. The video files will start to encode and burn to the DVD using BurnAware Free.
Part 3. FAQs About How to Burn a DVD
What is the best DVD-burning software for beginners?
Tipard DVD Creator, with its intuitive interface and user-friendly features, is often regarded as the best DVD-burning software for beginners. Its versatile functionality allows users to add subtitles with DVD Creator easily, ensuring professional-quality DVDs effortlessly.
Can I burn DVDs using free software, or do I need to purchase a premium tool?
Yes, you can burn DVDs using free software like BurnAware Free. Premium tools offer advanced features, but free options provide basic functionality sufficient for many users' needs, making them cost-effective.
How can I ensure my burned DVDs are compatible with various DVD players?
To ensure compatibility, use widely supported disc formats like DVD-R or DVD+R, avoid high-speed burning, and test the burned DVDs on multiple DVD players. Additionally, choose reputable brands for both discs and burning software.
Are there any specific settings I should use when burning MP4 toDVDs?
For optimal playback when creating MP4 to DVD, adhere to standard DVD format settings such as NTSC or PAL. Finalize discs properly, avoid overburning, and opt for lower burning speeds alongside high-quality video compression settings for superior results.
Can we create a DVD with a menu and chapters using these methods?
Yes, it's possible. Many DVD-burning software options, including Tipard DVD Creator and Windows DVD Maker, offer features to create custom menus and chapters for your DVD projects, enhancing navigation and user experience.
Conclusion
Thanks to this guide, you can quickly transfer video to DVD. With easy-to-use instructions provided for both Mac and Windows users, burning DVDs is now more straightforward than before. Whether your purpose is to provide vital information or preserve priceless memories, becoming proficient in DVD burning allows you to accomplish your objectives. Accept these methods and start making DVDs of a professional caliber with ease. If you don't have a DVD drive on your computer or other device, you can try to copy the DVD to USB.