
Do you want to burn MP4 to DVDs using VLC for backup purposes? Then, it would be helpful to read the article. The post will provide all the necessary information for burning DVDs using VLC. Also, we will introduce another offline program to use. It will give you more choices when backing up your files to DVDs. So, if you want to burn a DVD with VLC, read the post here.

Part 1. How to Burn DVDs Using VLC
Some users ask, “Can I burn DVD with VLC?” If you are among those users, we’ll gladly answer the question for you. If you are not aware, VLC Media Player can burn DVDs. The program is open-source and free software capable of playing various multimedia files. It includes various streaming protocols like Audio CDs, VCDs, and DVDs. VLC also supports formats like MP4, MOV, WMV, and AVI.
Is it Easy to Burn DVD Using VLC?
Returning to the topic, burning a DVD in VLC is a possible task. You can get your desired outcome if you know the tool's process. Also, the program allows you to adjust some video settings. But, it would be challenging for non-professional users to burn DVD using VLC.
The VLC DVD maker’s interface has many functions and options you need to use. It won't be easy for beginners if they don’t know enough about the process. If you want to use VLC, we suggest you ask for assistance from skilled users when burning DVDs. Aside from that, you must consider the output format of the video before proceeding to the burning process. You must meet the requirements to burn DVDs:
The video must be formatted properly for DVD burning. You first need to encode the video to MPEG-2, and the audio must be AC-3.After meeting all the requirements, you can proceed to the main procedure. Worry no more. We will guide you to get the result you want. Let’s see the detailed tutorials below to burn DVDs with VLC.
How to Burn DVD in VLC
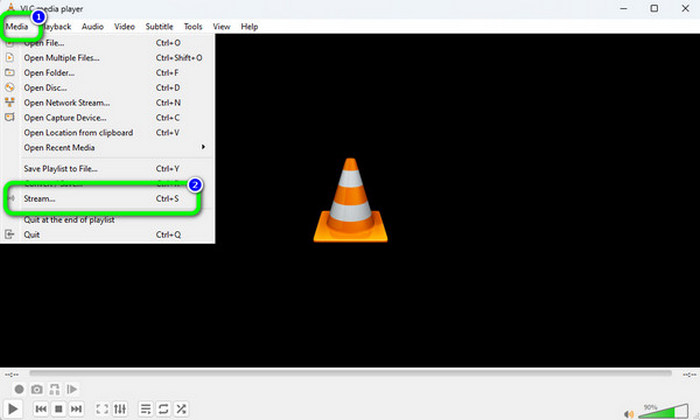
Step 1 Download VLC Media Player on your computer. Then, proceed to the installation procedure to access the program. Once you are done, launch it on your device. After that, go to the Media menu and choose the Stream option.
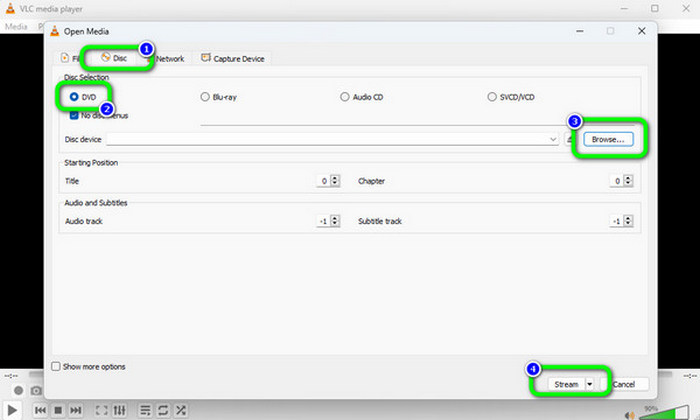
Step 2 After that, there will be a pop-up window that will appear on the screen. Go to the Disc menu and select the DVD option. Then, click Browse to load the video from your computer. Proceed to the next step by clicking the Stream > Next button. After that, click the Add option to set the destination File.
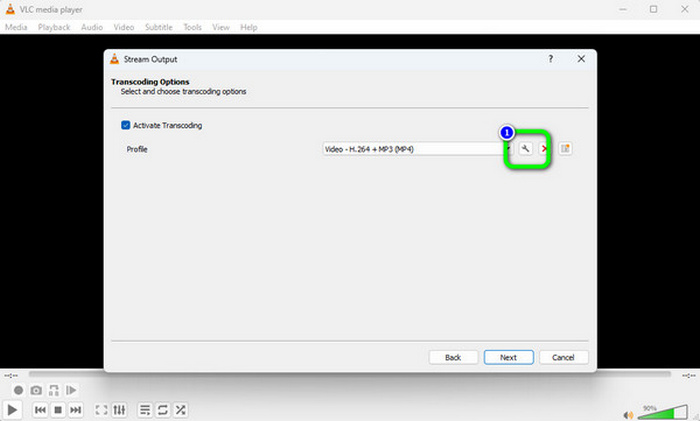
Step 3 Then, another small interface will show up on the screen. Click the Next button to see another interface. After that, select the Tool option to start changing codecs before burning DVD using VLC.
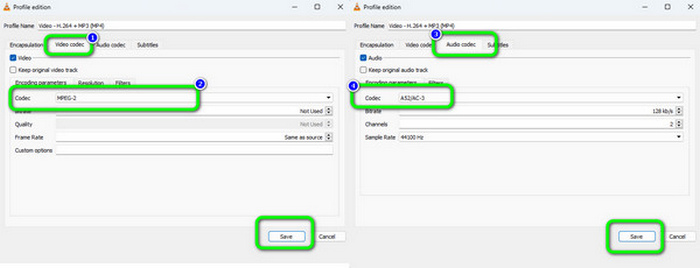
Step 4 Now, we need to change the codec of the video and audio. First, go to the Video codec menu. Click the Codec section to select the MPEG-2 option, and click Save. Then, go to the Audio codec menu. Click the Codec section to select the A52/AC-3 option. After that, click the Save button.
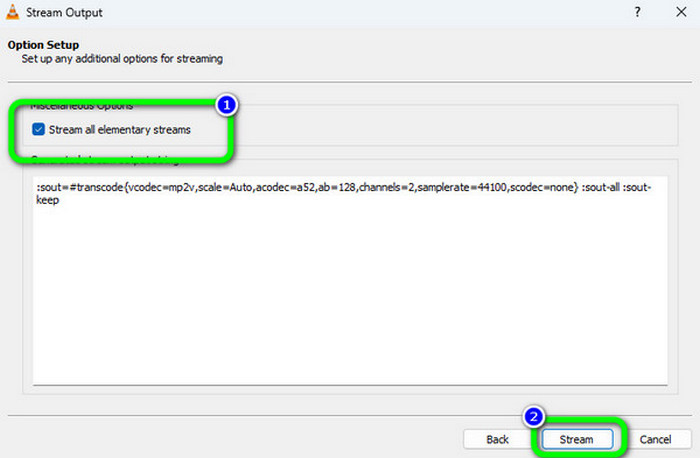
Step 5 After you save the video and audio codec, click the Next button from the Stream Output window. For the final process, hit the Stream option from the lower interface to initiate a DVD-burning process. with this free DVD burning software.
Part 2. Pros and Cons of Using VLC to Make DVD
In this part, we will give you the pros and cons of VLC when burning a DVD on Mac or Windows. You will have a deeper understanding of how to burn DVD using VLC and the program's capabilities.
- The program is among the most effective burning software offline.
- It's fast to burn DVD using VLC.
- It lets you add subtitles to the video.
- The interface of VLC is hard to understand, especially for novices.
- Some functions are hard to locate.
- The video must be in MPEG-2 format only.
- VLC burning DVD has no editing function.
Part 3. Best Alternatives to VLC to Create DVD
You can see that it's quite difficult to use the VLC Media Player DVD burner. Therefore, why not choose an easier alternative? This article will offer you 2 VLC burning DVD alternatives on Windows and Mac. Check them to start a convenient DVD burning process.
1. Tipard DVD Creator
If you want an easier process of burning DVDs on your computer, use Tipard DVD Creator. Compared to VLC, Tipard’s interface is much easier to understand, making it suitable for beginners. Also, the burning process only takes a few clicks, which is more convenient for all users. Plus, the DVD burner can support various formats like MOV, AVI, MTS, M2TS, VOB, WMV, MP4, and more.
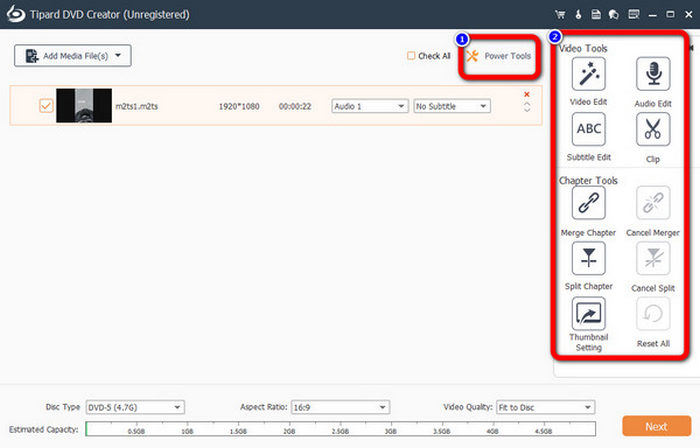
Aside from that, another feature you can experience is its multiple burning process. You can burn multiple files if you want. This way, you can get more desired files when operating the DVD maker. Aside from burning videos, you can also use some editing functions. You can add effects to the video, crop, watermarks, and subtitles.
Plus, you can adjust the video’s brightness, saturation, hue, and contrast. In addition, you can also use the Menu function to insert more designs for the video with customized buttons. This way, you can improve your video before proceeding to the burning process.
- Author DVD from videos in various formats.
- Add multiple titles and video, audio, and subtitle tracks.
- Offer DVD menu templates and allow you to customize DVD menu.
- Burn DVD/Blu-ray while maintaining the best video and audio quality.

How to Author DVD with Tipard DVD Creator
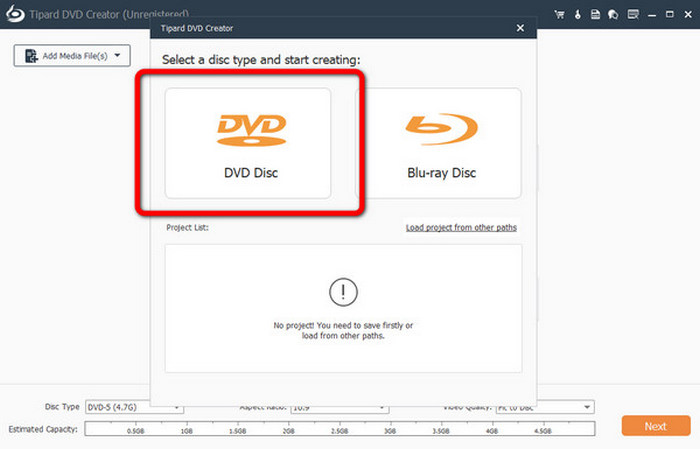
Step 1 Download and install Tipard DVD Creator on your computer. Insert your blank DVD disc into your computer (or an external DVD drive connected to your computer). From the interface, select the DVD Disc option. After that, the program’s main interface will appear.
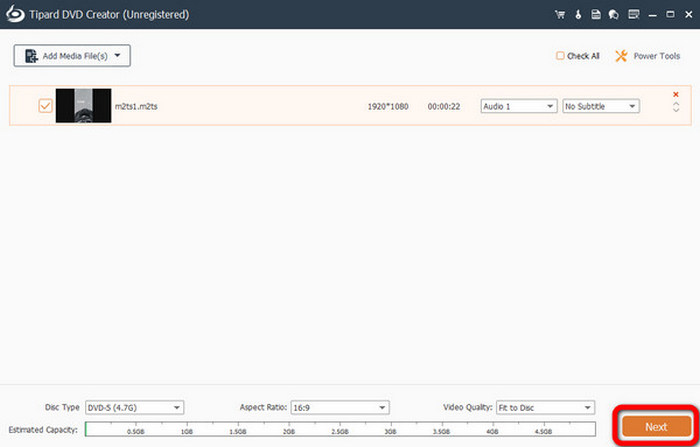
Step 2 Go to the center interface and click the Add Media Files button. After that, the computer folder will pop up on the screen. Then, browse the video you want to burn.
Step 3 After editing the video, you can select a DVD disc type on the bottom left side, like DVD-5 or DVD-9. Click the Next button to proceed to another interface for the burning process.
Step 4 You can add a Menu to your video or make a custom DVD menu if you want. The program offers various Menu templates you can choose from the interface. To proceed with the burning process, hit the Burn button.

2. DVD Flick
DVD Flick is a free and lightweight alternative to VLC burning DVD. It can author DVD with videos, audio files, and subtitles. You can add multiple titles and chapters. It also offers you some DVD menu templates. This simple VLC Media Player DVD burner alternative doesn't offer some editing features or DVD menu customization feature. However, it can be a nice choice to author DVD.
How to Burn DVD with DVD Flick
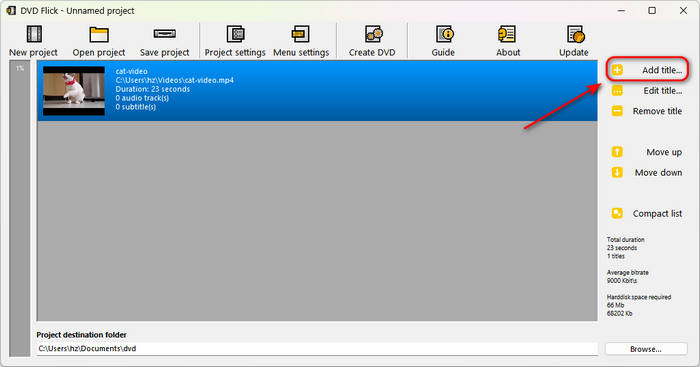
Step 1 Insert your DVD disc to your computer. Open DVD Flick and click the Add title button on the top right side to add your video, audio, and subtitle files.
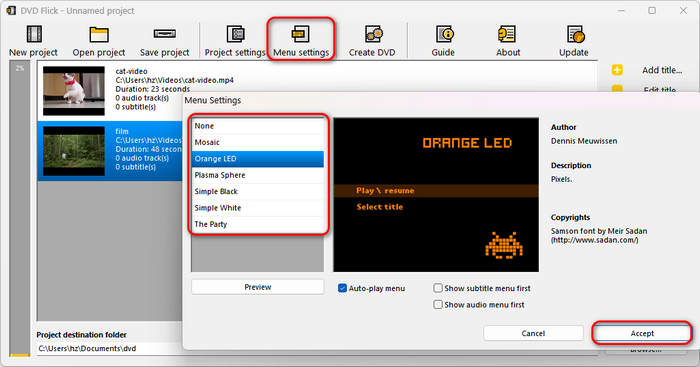
Step 2 You can click the Menu settings button on the top side to choose a DVD menu. Then, click the Accept button to confirm the DVD menu.
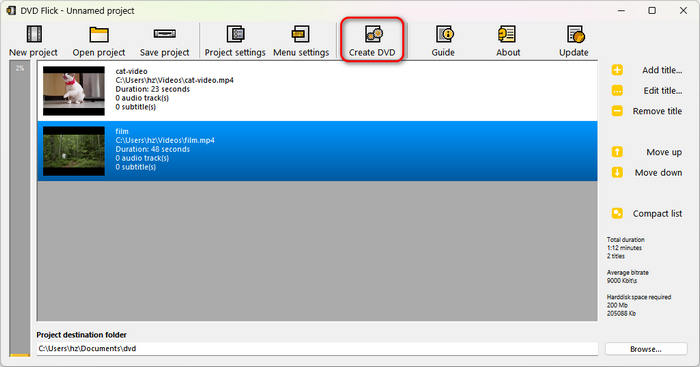
Step 3 Finally, you just need to click the Create DVD button to author DVD in DVD Flick. This VLC Media Player DVD burner alternative can offer the most simple operation to create DVD.
Part 4. FAQs about Burning DVD with VL
How do I rip a DVD to my computer using VLC?
First, insert the DVD into the DVD drive on your computer. Then, launch the VLC Media Player. Go to the Media > Convert / Save option. After that, navigate to the Disc opinion and select the DVD. The next step is to click the Browse option to load the DVD. Then, click the Convert / Save button. For the final process, choose a destination file for the DVD and click the Start button. This way, you can save DVDs from your computer.
How long does it take to rip a DVD with VLC?
Ripping a DVD with VLC usually takes 20 minutes to 2 hours, depending on your computer speed, whether you re-encode the video, and the disc's length and condition.
What is the best video format for burning to DVD?
The best video format for DVD is MPEG-2, also known as VOB. The resolution is 720:480 (NTSC) or 720:576 (PAL). The recommended audio format is AC3.
Conclusion
Using VLC as a DVD maker is helpful for all users. They can use the program since it is free to download. However, we can see that burning DVD using VLC is too complicated for beginners. If so, why not choose Tipard DVD Creator as an alternative to VLC. The program is easier to operate than VLC. Plus, it has an editing function that allows you to improve the video before authoring DVD. It even lets you customize DVD menu templates.

Burn and author media files to DVD disc, ISO, and folder
100% Clean & Safe
100% Clean & Safe
More Reading
About the Author
