You already have an audio file to use for your project. But it has parts at the start and end that you do not need. Now, you want to cut audio, but it is your first time, and you are unsure how to start.
Do not worry anymore, we are here to guide you. We will provide different tools with easy-to-follow steps to cut audio. So, please read the whole post.

Method 1: Using Built-in Operating System Tools
Sometimes, you just need a fast approach to cut audio. Fortunately, both Windows and Mac have built-in tools that can help. These tools are super simple to use. However, they do not have advanced features like a professional program.
For Windows Users
Windows includes a built-in app called Voice Recorder. It allows you to shorten audio by cutting off unwanted parts. It is useful when you only need a fast and simple trim.
Step 1 Open Voice Recorder on your Windows computer. You can find it by typing Voice Recorder in the Start menu.
Step 2 Load the audio you want to trim. If it is a recording from the program, it will already appear in your list.
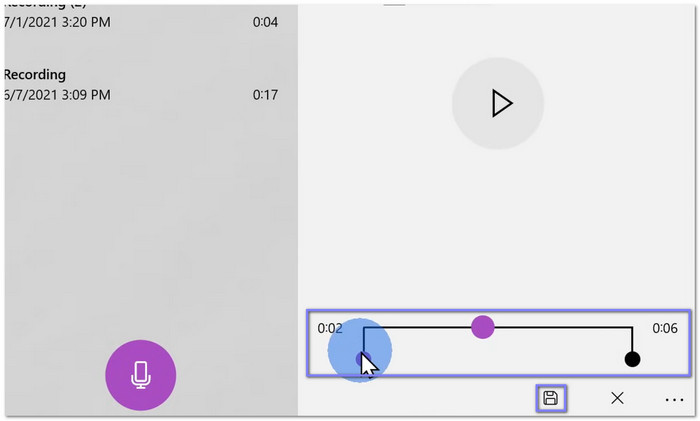
Step 3 Click on the audio file to open it, then click the Trim button. Then, move the sliders to choose the part of the audio you want to keep.
Step 4 Lastly, click the Save button to create a new trimmed audio file.
For Mac Users
Mac users can rely on QuickTime Player to cut audio files. It lets you preview the sound and keep only the section you want. It makes it a handy option for quick edits without an extra program.
Step 1 Open your audio file in QuickTime Player. You can do this by right-clicking the file, choosing Open With, and selecting QuickTime Player.
Step 2 Navigate to the Edit menu and choose Trim. A yellow trimming bar will appear. Drag the handles to select the part of the audio you want to keep.
Step 3 Click Trim to cut the audio. Everything outside the selection will be removed.
Step 4 Step 4: For the last step, save your trimmed audio by clicking File, then Save or Export. You now have a shorter version of your audio ready to use.

Method 2: How to Cut Audio in Tipard Video Converter Ultimate
If basic tools feel limiting, it may be time to try something better for trimming sound, like Tipard Video Converter Ultimate.
This program offers a more precise way to cut audio. You highlight the parts you want to keep. Or enter exact start and end times. Then, the unhighlighted parts will be removed. You can also apply fade-in and out effects for smooth sound. No matter the audio format, it can cut it, including MP3, WAV, AAC, FLAC, and M4A.
Step 1 Head to the official Tipard Video Converter Ultimate and download and install it on your computer by following the instructions. Once installed, open the program to start cutting your audio.
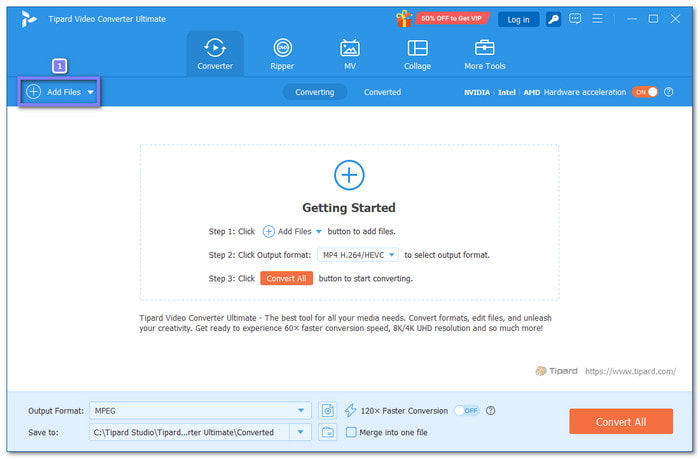
Step 2 Import your audio file by clicking the Add Files button or dropping it into the main interface. You can add many files at once if you want to edit several tracks.
Step 3 Did you see the Cut button next to your uploaded audio file? Click it to open the waveform preview.

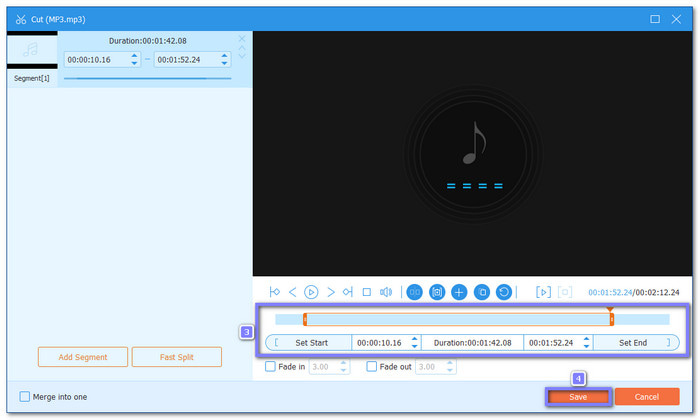
Step 4 To cut your audio, use the sliders to select the start and end of the part you want to keep. You can also enter the exact time in the boxes for precise trimming. The parts that are not highlighted will be removed. Once settled, click the Save button to apply the cut.
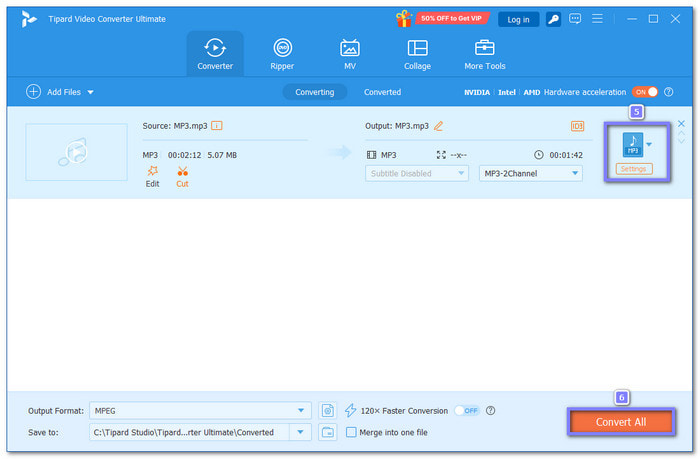
Step 5 Before exporting, you can change the output audio format to MP3, WMA, WAV, etc. You can also fine-tune the audio settings, like bitrate or sample rate. Once done, proceed to click the Convert All button to save your cut audio to your chosen location.
Method 3: How to Cut Audio in Audacity
Audacity lets you edit recordings with precision. You can remove what you do not need, and keep exactly the part you want. It also allows you to boost volume, fade sounds, and apply sound effects. It works on Windows, Mac, and Linux, making how to cut audio in Audacity easy for almost everyone.
Step 1 Run Audacity and import the audio file you want to cut. You can do this by hitting File, then Import and choosing your audio.
Step 2 Listen to your audio and decide which part you want to keep. Click and drag your mouse over that section to select it.
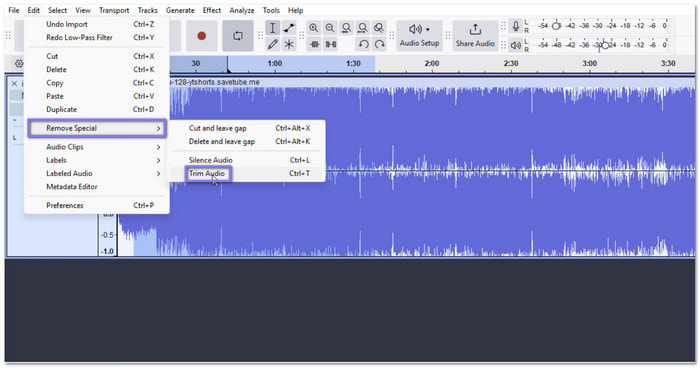
Step 3 Go to the Edit menu at the top of the screen. Hover over Remove Special and then click Trim Audio.
Step 4 Everything outside your selected section will be removed. You now have just the part of the audio you want.
Step 5 Play back your audio to make sure it sounds right. If everything is okay, save your file by clicking File, then Export.
Method 4: How to Cut Audio in Adobe Premiere Pro
For those working with video, audio cutting in Adobe Premiere Pro is handy. This program helps you separate sound from video clips and edit them without affecting the visuals. You can split, remove, or replace sections quickly. Besides that, it lets you adjust volume and add effects like fade-in audio.
Step 1 Run Adobe Premiere Pro and add your audio file to the timeline.
Step 2 Click the C key to activate the razor tool. It lets you cut the audio at the point you want.
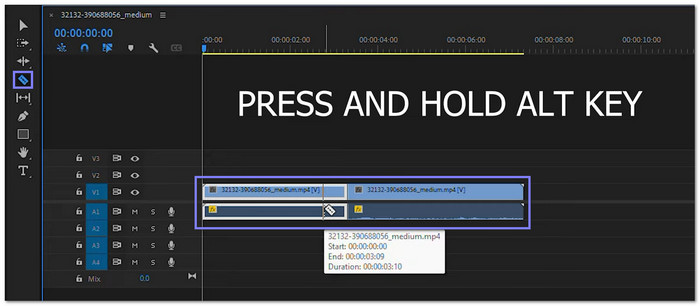
Step 3 Hold down the ALT key before cutting. It ensures only the audio is cut and not the video footage.
Step 4 Click on the part of the audio you want to remove or replace. Then, press Delete to remove it.
Step 5 Play your timeline to check your cut. You can adjust or move the audio if needed and save your project.
Method 5: How to Cut Audio Online
MP3Cut.net is a tool that allows you to cut audio online. You can trim tracks and keep only the parts you need. You can add fade-in and fade-out effects. You can also increase the volume up to 200 percent. Plus, you can change speed, shift pitch, or use an equalizer. You can do so many things with your audio using it!
Step 1 Go to MP3Cut.net and click Choose File to upload your audio.
Step 2 Once your audio is uploaded, you will be in the trim screen. Drag the sliders to select the start and end points of the section you want to keep.
Step 3 If you want, you can add fade-in or fade-out effects. You can also choose the format you want to save your audio in, like MP3, M4A, M4R, FLAC, or WAV.
Step 4 Finally, click Save to download your cut audio. If you are making an iPhone ringtone, it will save as a 40-second M4R file.

Conclusion
It is really necessary to learn how to cut audio, especially if you are working on a project and you only want the parts that matter. It is easy to do, especially when using Tipard Video Converter Ultimate. In a short time, you can have just the part of the audio you need.
More Reading


About the Author