
Have you ever felt abrupt when audio suddenly appeared or disappeared in a video? Do you know what that is called? It is the fade effect!
In this post, we will talk about what fade-in and fade-out audio effects are and show you how to fade audio in Premiere. By the end, you will know how to use these simple techniques to enhance your audio's sound. So, please stick with us, and let us get started on improving your audio transitions!

Part 1. What Is Fade-in Audio Effect
A fade-in happens when sounds start quietly and gradually become louder. Imagine hearing soft music at first, and then, over time, it slowly gets louder until it is at full volume. This effect is often used at the beginning of a song or audio clip. It helps make the start of the audio feel smooth and less abrupt. It is great for easing into the sound instead of having it start loudly all at once.
Part 2. What Is Fade-out Audio Effect
A fade-out works the other way around. It starts at a normal volume and slowly becomes quieter, eventually disappearing. Think about a song ending where the music fades away instead of stopping suddenly. This effect is beneficial when you want to end the audio gently. It creates a smooth conclusion and prevents the abruptness of an immediate stop.
Part 3. How to Fade Audio in Premiere
When editing audio in Premiere Pro, adding a fade-in and fade-out effect is a simple but powerful way to smooth transitions in your audio.
Premiere Pro offers several fade options, giving you control over how your audio enters and leaves your scene. By mastering these tools, you can create smooth, natural-sounding transitions that fit perfectly with your video. Let us go over how to fade audio in Premiere, step by step.
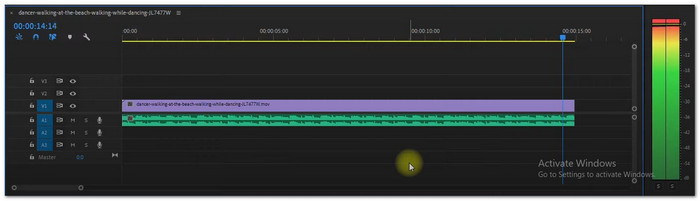
Step 1Open Your Project
First, you need to make sure your audio and video clips are on the timeline. If you have not already, drag and drop the video clip along with its audio onto the timeline. You are ready to start editing!
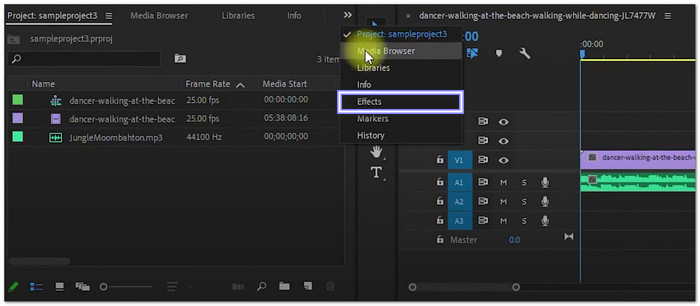
Step 2Go to the Effects Panel
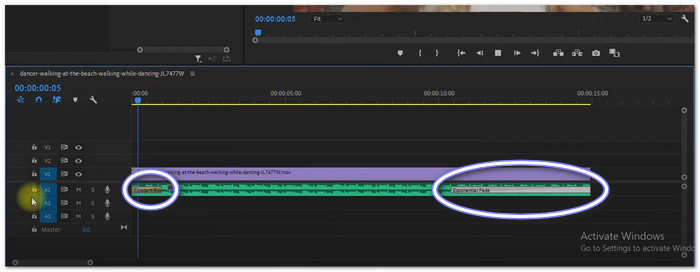
Now, head over to the Effects panel. You will find it on the right side of your screen. In the panel, open the Audio Transitions folder. Then, open the Crossfade folder. It will give you three options for fading your audio.
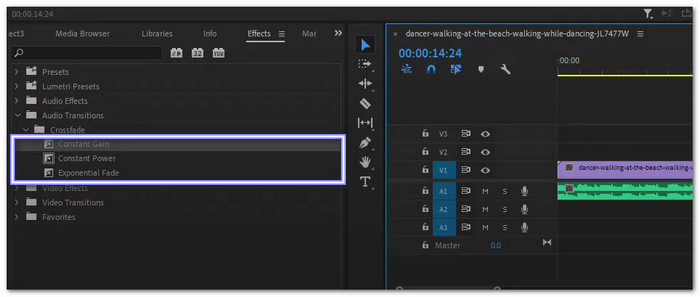
Step 3Choose the Fade Effect
You will see three fades:
- Constant Gain: This fades your audio at a steady pace. It is simple, but it might sound abrupt.
- Constant Power: This one starts slow and then fades faster at the end, giving a smoother result.
- Exponential Fade: This fades out quickly at first and then more gradually, making a sharper fade.
Choose the one that fits your needs.
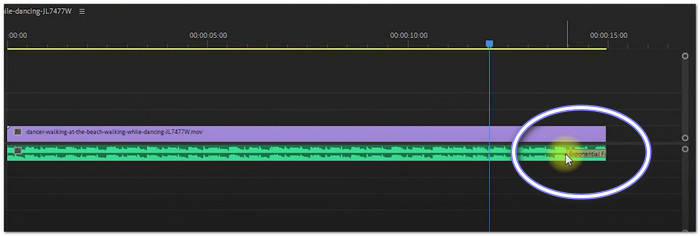
Step 4Apply the Fade to Your Audio
Pick your fade effect and drag it onto the audio clip in the timeline. For a fade-out, drag it to the end of your clip. For a fade-in, place it at the start. When you release it, you will see a small triangle appear on the timeline, showing where the fade starts.
Step 5Adjust the Duration
To make your fade longer or shorter, hover over the edge of the fade effect until you see a bracket. Click and drag to adjust how long the fade lasts. You can also zoom in on your timeline if it is hard to know the duration bracket. If you prefer, double-click the fade and type in the exact duration you want.
There you go! You have now learned how to fade in audio in Premiere Pro, as well as fade out. Experiment with the different fade options and durations until you get the sound you want for your project.
Part 4. Best Alternative to Premiere When Fading Audio
Looking for an easy way to fade audio in your videos without the complexity of Premiere? Tipard Video Converter Ultimate is the perfect alternative. It is simple, powerful, and works great on both Windows and Mac. You can quickly add smooth fade-in and fade-out effects to your audio, making it sound natural. Whether you are working with MP4, MOV, or any other popular video format, Tipard Video Converter Ultimate supports them all. Plus, it lets you export your final product in multiple formats, so you can use it anywhere.
Getting started is easy; just install, load your video, and apply the fade effect. Tipard Video Converter Ultimate makes audio editing as simple as a few clicks!
Step 1First, download and install Tipard Video Converter Ultimate on your computer. Simply click the Free Download button for your system (Windows or Mac) and open the program once it is installed.
Step 2Navigate to the MV tab and click the (+) button at the bottom. It will let you add the file you want to work with.

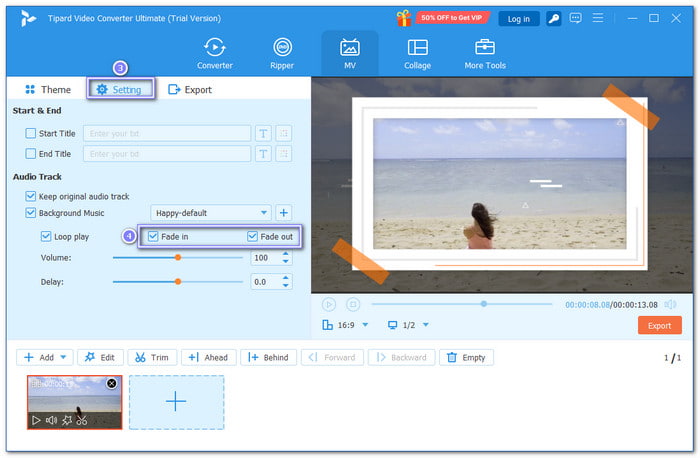
Step 3After adding your file, go to the Setting tab at the top. Under Audio Track, look for the Fade in and Fade out options. Check the boxes next to each to add these effects. You can also adjust the volume and delay of the audio to fit your needs.
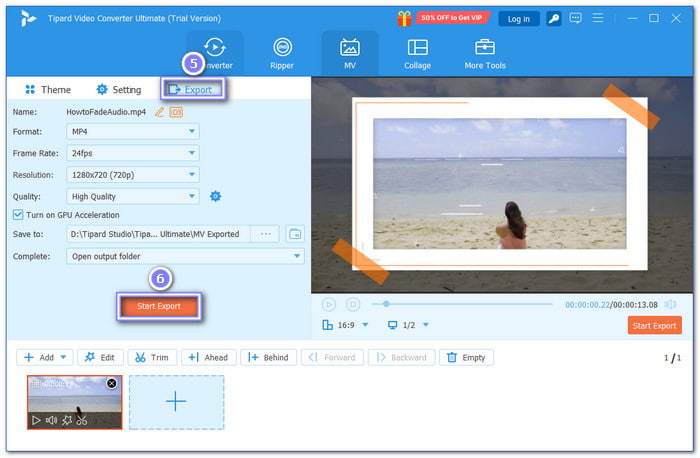
Step 4Now, head to the Export tab next to the Setting tab. Choose your format and resolution. You can also set where you want to save the file. When everything is settled, click the Start Export button to save your video with fading audio.
We want you to know that Tipard Video Converter Ultimate is more than just a tool for fading audio. It provides a lot of other helpful audio tools, too. You can boost volume, compress audio, remove background noise, and even sync audio perfectly with your video. So, try it now and make your sound great!
Conclusion
You have now discovered how to fade out audio in Premiere, as well as fade in. The question is, did you find it easy to control how your sound flows in your project using it?
In case you are having a hard time using it because you are just a first-timer, we have an alternative for that. It is Tipard Video Converter Ultimate, which is easier and quicker to use because it is beginner-friendly.
With Tipard Video Converter Ultimate, you can fade audio in and out and also take advantage of other valuable features like volume-boosting and noise removal. What are you waiting for? Give it a try, and make your audio sound better today!
More Reading


About the Author
