You may record audio that sounds clear at first. Then, you notice unwanted background noise. It can be a fan sound, hum, or light hiss that was not noticed during recording.
It is where Audacity Noise Reduction helps. It is a simple feature in Audacity that cleans up unwanted sound and improves audio clarity. And this guide will teach you how to use it step-by-step.

Part 1. How Audacity Performs Noise Reduction
Noise can make audio unclear. Good thing, Audacity removes it by learning what the noise sounds like and then cleaning it from the full recording.
It first studies a short part of the background sound. It becomes the noise profile. Then, it scans the whole track and finds similar sound patterns. After that, it lowers only the noise while keeping the voice as clear as possible. The final sound depends on the settings used, so that the effect can be light or strong.
In simple terms, Audacity listens to the noise, recognizes it, and reduces it without damaging your voice.
Part 2. How to Use Audacity Noise Reduction
Audacity Noise Reduction gives a simple way to reduce background noise and clean up audio fast. Learn how to use it below!
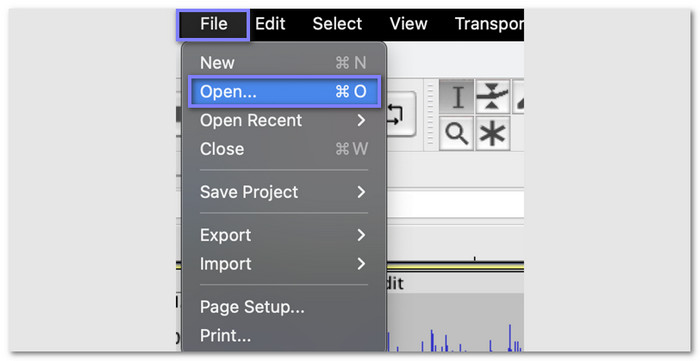
Step 1 Launch Audacity. Go to File > Open. Pick your audio file from your computer. You can also press Ctrl + O (Windows) or Command + O (Mac).
Step 2 Find a few seconds with no voice. This part should only have background noise. Click and drag your mouse to choose it. It helps Audacity learn the noise in your recording.
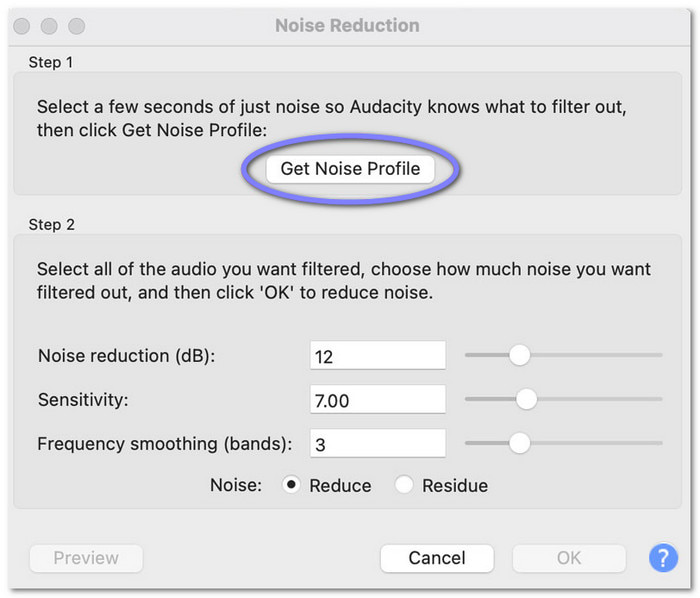
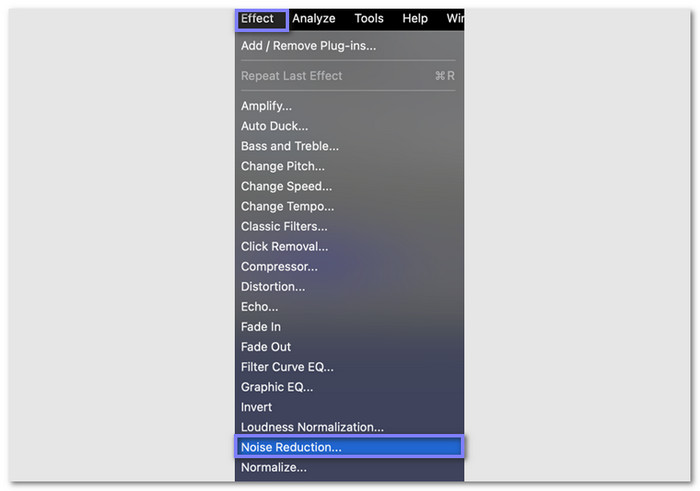
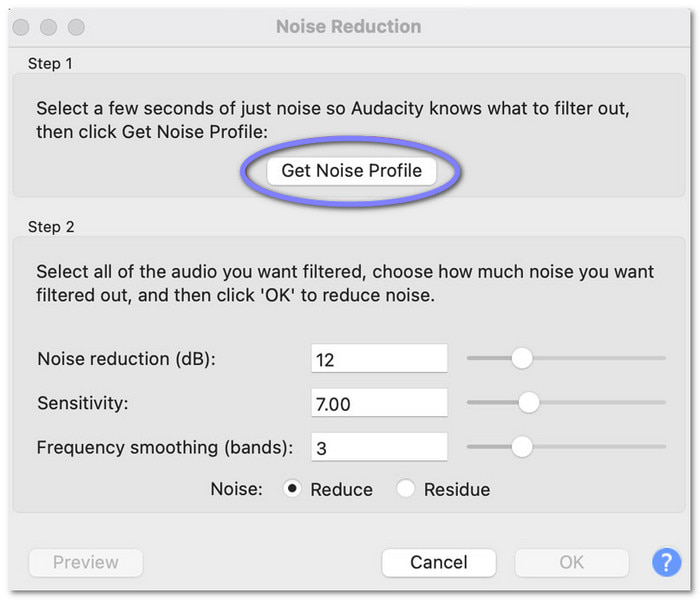
Step 3 Go to Effects > Noise Reduction. A box will appear. Click Get Noise Profile. The box will close. Audacity will now study the noise you selected.
Step 4 Select the whole track or the part you want to clean. Open Effects > Noise Reduction again. This time, click OK to apply it. The tool will remove the background noise based on the profile.
Step 5 Play your audio. If you still hear noise, repeat the steps. You can also adjust settings like Noise Reduction level for better results.
Part 3. 3 Key Sliders to Reduce Noise in Audacity
These three sliders control how clean your audio will sound during background noise reduction in Audacity. Small changes can make a big difference. Start low, then change step-by-step.
1. Noise Reduction
It controls how much noise is removed. The default is 6 dB, which is a good start. Raise it if the noise is strong. Lower it if your voice sounds weak. The goal is to remove noise but keep your voice clear.
2. Sensitivity
It decides what counts as noise. It goes from 0 to 24. A higher value removes more noise, but it can damage your voice and add distortion. A lower value might not be sufficient to eliminate noise. While still cleaning the audio, keep it as low as you can.
3. Frequency Smoothing
It spreads the effect across nearby sound ranges. It helps fix rough or sharp sounds after noise removal. Set it to 0 if your audio is already clean. Increase it a little if you hear strange artifacts. The goal is a smooth and natural sound.
Test and listen after each change. Stop when your audio sounds clean and natural.
Part 4. Fast Alternatives to Audacity to Remove Noise
1. Tipard Video Converter Ultimate
Unlike background noise reduction in Audacity, Tipard Video Converter Ultimate gives a faster way to remove noise with less effort. It offers a dedicated and easy-to-use noise remover, which works in a simple way. Just enable the feature and clean your audio fast.
It also supports many audio formats and codecs like MP3, WAV, AAC, FLAC, and WMA. It helps you open and save almost any audio file without trouble. More than that, it offers many other audio editing tools. It makes editing easier and faster for beginners.

- Boosts volume up to 200% for louder sound.
- Removes background noise from audio and video clips.
- Lets you change output settings like format, resolution, and encoder.
- Supports trimming, compressing, enhancing, and converting audio files.

You are done with how to remove background noise in Audacity. Now is the time to learn how to use Tipard Video Converter Ultimate to remove noise:
Step 1 Download Tipard Video Converter Ultimate from its official site. Then, install it on your computer.
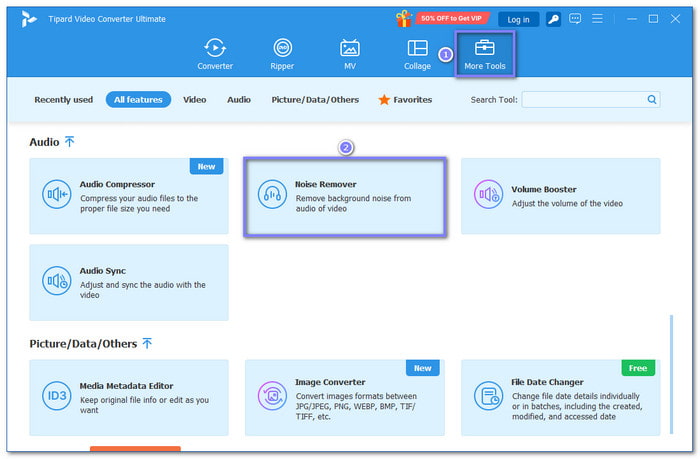
Step 2 On the main screen, click the More Tools tab. Look for the Noise Remover, and select it to open the feature.
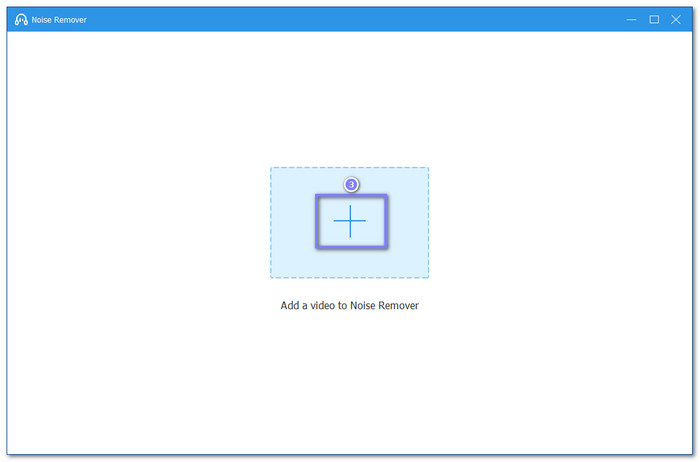
Step 3 Inside Noise Remover, click the Add button, and upload the audio or video that has background noise.
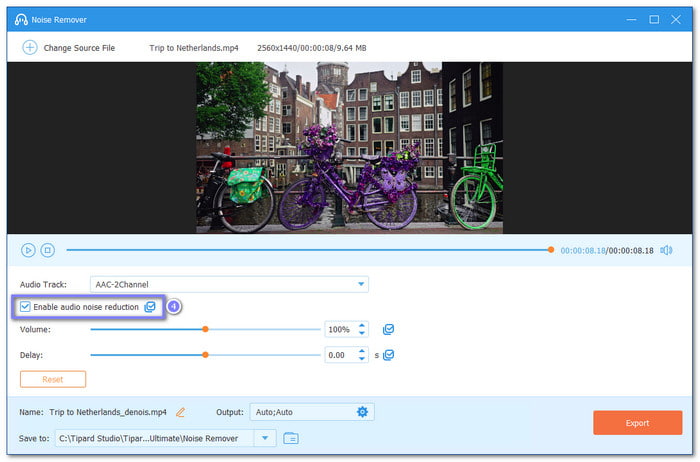
Step 4 Find the option Enable audio noise reduction. Check the box to activate it. Then, Tipard Video Converter Ultimate will start cleaning the background noise.
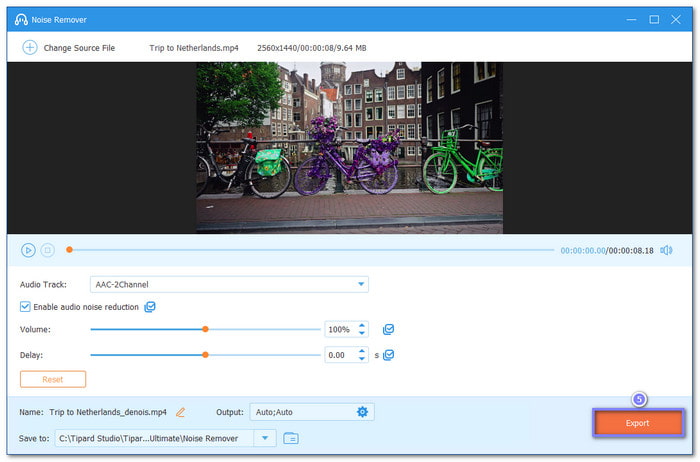
Step 5 To finish, click Export in the right corner. Then, it will save the cleaned audio or video to your local folder.
Key things Tipard Video Converter Ultimate offers:
- Lets you trim audio for fast and easy edits.
- Offers many video and audio tools in one tab for easy access.
- Converts 500+ video and audio formats with ready-made presets.
- Fixes audio delay and sync issues between audio and video accurately.
2. WavePad Free Audio Editor
Another option is WavePad Free Audio Editor if you find it time-consuming to remove background noise in Audacity. It can remove static, hiss, hums, clicks, and background noise from recordings. In addition, it allows you to preview the changes on your audio before exporting it to your destination.
Step 1 Launch WavePad. Import your audio with static noise. Use File > Open to load it into the editor.
Step 2 Find the Effects section on the left side, look for Remove Noise, and click it.
Step 3 Select the type of noise you want to remove. Play a preview of the audio. Check if the sound is cleaner and clearer.
Step 4 Once it sounds good, apply the effect. WavePad Free Audio Editor will reduce the static noise from your audio.
Step 5 Go to File > Save As. Choose your file type. Then, save your edited audio to your device.
Key things WavePad Free Audio Editor offers:
- Lets you copy, paste, delete, insert silence, and cut audio.
- Works with 50+ audio formats like MP3, WAV, FLAC, OGG, and WMA.
- Includes effects such as amplify, normalize, equalizer, reverb, and echo.
- Enables batch processing for noise reduction and effects on many files at once.
Part 5: FAQs of Audacity Noise Reduction
Is it better to have Noise Reduction on or off?
Noise Reduction should be turned on only when needed. Use it when your audio has background noise. Turn it off when your sound is already clean. It helps avoid making your voice sound unnatural.
How to make sound quieter in Audacity?
Select the part of the audio you want to lower. Then, go to Effect > Amplify. Set a lower value or use a negative number. It reduces the volume without changing the whole file.
What is the difference between Noise Reduction and Noise Canceling?
Noise Reduction removes unwanted sound from a recorded file. It works after recording. Noise canceling blocks noise in real time during recording or playback.
Conclusion
There you go! You have mastered how Audacity's background noise removal works. How do you find it? Hard or time-consuming? If yes, fortunately, there is an easier way. You can use a faster alternative like Tipard Video Converter Ultimate. It removes noise in just a few clicks and provides more audio editing features!
More Reading


About the Author