
QuickTime is known as a simple media player on Mac. It plays videos smoothly and is easy to use. But did you know it can also help you trim videos? In this guide, we will teach you how QuickTime Player's trim video works. It is simple once you try it. Let us begin right away!

Part 1. How to Trim a Video in QuickTime Player
There are actually various ways to trim a video in QuickTime Player. If you are ready to learn them, please keep reading.
Method 1: Basic Trim (Start and End)
Step 1 Open your video in QuickTime Player.
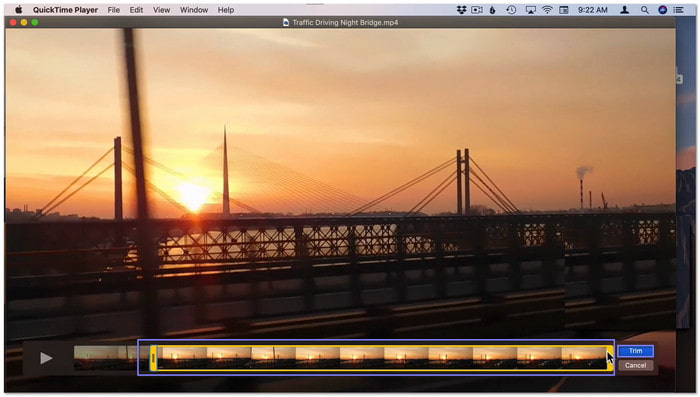
Step 2 Press Cmd + T on your keyboard. A yellow trim bar will show.
Step 3 Drag the left handle to cut the start. Drag the right handle to cut the end.
Step 4 Keep the part inside the yellow box.
Step 5 Click Trim to save your cut.
Method 2: Precision Trim (Frame-by-Frame View)
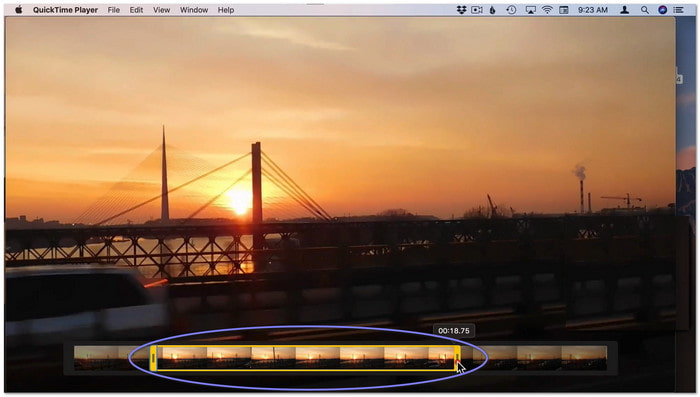
Step 1 Open your video and press Cmd + T.
Step 2 Click and hold one yellow handle.
Step 3 Move it slowly. You will see frames one by one.
Step 4 Stop at the exact frame you want.
Step 5 Click Trim to apply changes.
Method 3: Remove a Middle Part (Split Clip)
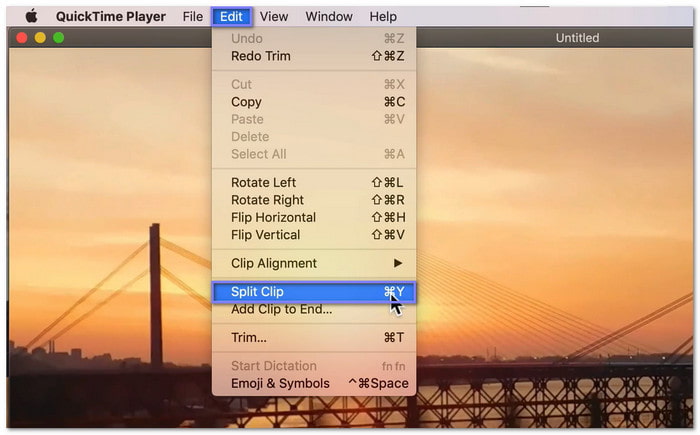
Step 1 Play your video and stop at the start of the part you want to remove.
Step 2 Click Edit > Split Clip or press Cmd + Y.
Step 3 Move to the end of that part.
Step 4 Split again using Cmd + Y.
Step 5 To remove the middle section, click it and hit Delete.
Method 4: Use Arrow Keys for Fine Control
Step 1 To access the trim bar, press Cmd + T.
Step 2 A yellow handle should be clicked.
Step 3 Press the Left or Right arrow key.
Step 4 Move frame by frame for better accuracy.
Step 5 Click Trim when done.
These methods help you trim videos the way you want. Try each one to see what works best for you.
Part 2. Top 3 QuickTime Video Trimming Shortcuts
Do you want to trim faster with fewer clicks? Use these simple shortcuts. They help you edit right away.
1. Command + T
Opens the trim bar so you can start cutting your video fast.
2. Command + Y
Splits the clip at the playhead. It helps you cut and remove parts in the middle.
3. Left and Right Arrow Keys
Moves the trim handles frame by frame when the trim bar is open. It gives you better control.
Part 3. Limits of QuickTime Video Trimming
There is no doubt that QuickTime video trimming really works well. Despite that, it has limits you should know before you use it.
1. Basic Functionality - QuickTime only offers simple tools. You can trim or split clips. You cannot add transitions. You cannot mix audio. It also does not support many tracks like professional editors.
2. Limited Export Options - You can save videos in common formats. But you cannot fine-tune the output. There is no deep control for bitrate or compression. It limits how you adjust quality.
3. Only Lossless Trim - Trimming keeps the original quality. It does not re-encode the file. It is good for speed. But you cannot reduce the file size much. You can only change the file container in some cases.
4. No Multi-track Editing - QuickTime works with one clip at a time. You cannot stack videos. You cannot add layers or effects. It cannot handle complex editing tasks.
Indeed, QuickTime is best for fast and simple trimming. For more control, you will need a full video editor.
Part 4. Easier QuickTime Alternative to Trim Videos
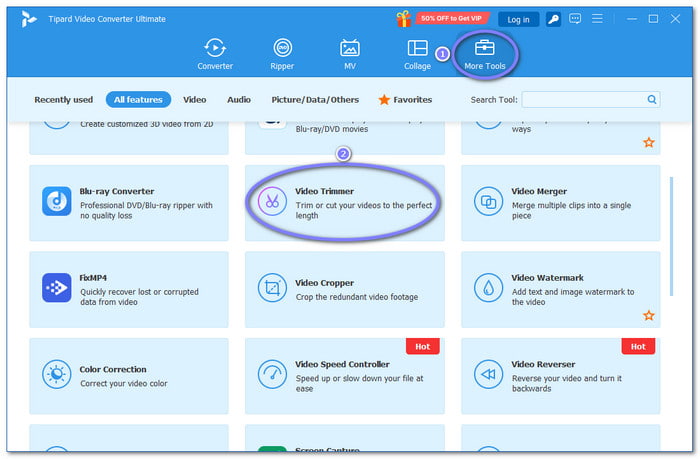
Tipard Video Converter Ultimate is an easier QuickTime alternative for trimming videos. It offers a dedicated video trimmer, where you can trim and split with ease. There is no need to worry about quality. It keeps the original video quality after trimming.
It also supports many video formats. You can import and export MP4, MOV, AVI, MKV, and more. In addition, you get extra editing tools and AI features. You can enhance video quality, adjust brightness, or remove noise, all in one place.

- Apply fade-in and fade-out effects for smooth video transitions.
- Output settings control for format, resolution, frame rate, and encoder.
- Offers more tools, like video compressor, enhancer, rotator, and cropper.
- Multiple aspect ratio support, such as 9:16, 16:9, 1:1, 4:3, 21:9, 16:10, and 5:4.
- Hardware acceleration using Intel®, AMD®, and NVIDIA® for faster processing.

You are done learning how to trim a video with QuickTime; now it is time to learn how easy it is to trim a video using Tipard Video Converter Ultimate:
Step 1 Download Tipard Video Converter Ultimate on your Mac or Windows computer. Open the file and install it. Follow the simple steps on screen. Once done, open the program to start your editing task.
Step 2 Navigate to the More Tools tab on the main screen. Look for Video Trimmer. Click it to enter the trimming workspace.
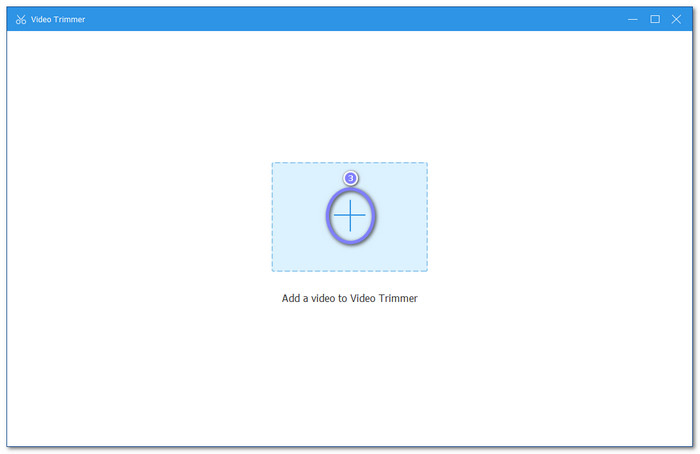
Step 3 Hit the Add button in the center. Then, choose your video from your folder. The video will load and appear in the preview area.
Step 4 Use the trimming bar below the preview. All you need to do is drag the left handle to set the start. You should also drag the right handle to set the end. Moreover, you can type the exact time for better cuts.

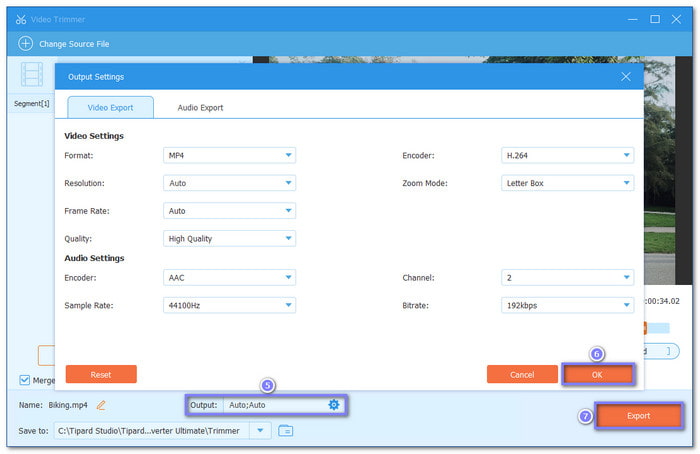
Step 5 Preview your video to check the result. You can also open the Output option to change format or resolution. Once settled, click the Export button. After that, your video will be saved to your computer.
Part 5. FAQs of QuickTime Video Trimming
Can I use QuickTime to crop a video?
No. You can only trim or split a video clip with QuickTime. For cropping, you need a video cropper tool, like Tipard Video Converter Ultimate.
Does QuickTime trim reduce quality?
No. Trimming does not lower video quality. It is lossless editing. The video keeps its original clarity.
How do you cut a video into parts on a Mac?
Open the video in QuickTime Player. Move the playhead to where you want to cut. Press Command + Y to split the clip. Do this again for more parts. Then, delete the sections you do not need.
Conclusion
If you ask, why can't I trim a video in QuickTime?
You need to be aware that it happens because of simple issues. It can be an unsupported file format, like some HEVC or fragmented MP4 files. It can also be a locked video file. Sometimes, the video just needs a few seconds to load before trimming works.
If it still does not work, you can use a better option. Try Tipard Video Converter Ultimate. You can trim using simple handles. You can also set exact start and end times. It makes video trimming fast, easy, and more flexible!
More Reading


About the Author
