- Part 1. Why Is Facebook Video Bad After Uploading?
- Part 2. How to Improve Facebook Video Quality in Facebook Settings
- Part 3. How to Improve Video Quality Before Uploading to Facebook
- Part 4. Best Video Standards for Facebook Uploading
- Part 5. Adjust Video Quality in Your Phone Settings for Uploading
Improving the Facebook video quality is important, especially for content creators, everyday users, and marketers. It helps them to stand out in a crowded feed since an excellent video can boost engagement and credibility. Whether you are posting a simple video, a story, a promotional clip, or more, having a poor visual can only frustrate viewers. So, are you looking for an effective method to enhance your Facebook video quality? Worry no more. You can read this article and learn more about how to improve Facebook video quality successfully.

- Part 1. Why Is Facebook Video Bad After Uploading?
- Part 2. How to Improve Facebook Video Quality in Facebook Settings
- Part 3. How to Improve Video Quality Before Uploading to Facebook
- Part 4. Best Video Standards for Facebook Uploading
- Part 5. Adjust Video Quality in Your Phone Settings for Uploading
Part 1. Why Is Facebook Video Bad After Uploading?
There are times when you get poor video quality after uploading your video to Facebook. It is because the platform compresses them automatically to save storage and bandwidth. This way, it can reduce bitrate, resolution, and the overall clarity. If you need a detailed explanation, you can read the details below.
- Compression Algorithm - To ensure a faster loading process and playback, the platform applies heavy compression to videos.
- Default Playback Settings - Facebook often plays videos in SD rather than HD, especially on devices with an unstable internet connection.
- Incorrect Export Settings - You can get a poor video resolution if you export the video in a format or resolution that Facebook doesn't recommend.
- Unstable Internet Connection - If you have a slow/unstable internet connection during the uploading process, then you might get poor video quality.
Part 2. How to Improve Facebook Video Quality in Facebook Settings
Do you want to learn how to improve video quality on Facebook by modifying the Settings? Well, the process is simple. Thus, to start the process, you can use the simple methods below.
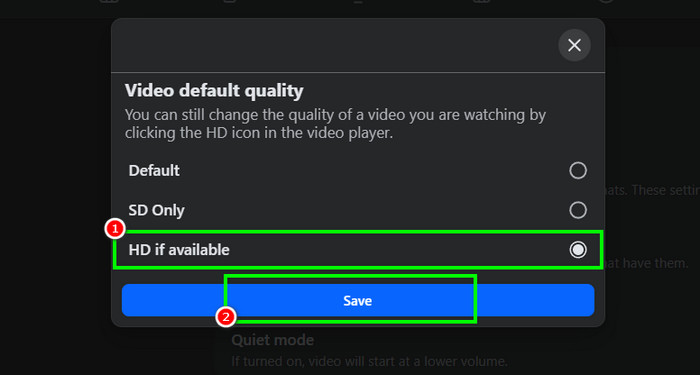
Step 1 Open your Facebook and proceed to the Settings and Privacy section. Then, click the Settings option.
Step 2 After that, navigate to the Media section and hit the Video default setting option.
Step 3 Now, you can start to toggle on the HD if available option. Tap Save to apply the changes.
Aside from that, when uploading the Facebook video, always ensure that you have a fast/stable internet connection. No matter how you set up the settings, if you have an unstable Wi-Fi or cellular data, you can still get a poor-quality video. Thus, having a fast and stable internet connection is necessary to obtain your goal.
Part 3. How to Improve Video Quality Before Uploading to Facebook
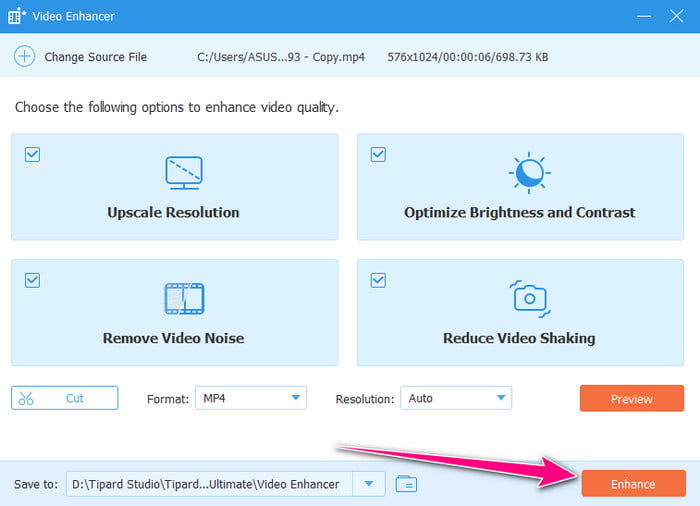
Do you have poor-quality video, and you want to enhance it before uploading to Facebook? Then you need an excellent video enhancer. For improving your video, we recommend using Tipard Video Converter Ultimate. This program can offer its Video Enhancer feature that can help you achieve your preferred output. You can improve the video by upscaling the resolution, removing video noise, optimizing brightness and contrast, and dealing with video shake. The best part here is that it is powered by AI technology, allowing you to get the result instantly. You can also change the video codec to AV1, H.264, and H.265. It also supports GPU acceleration for a faster video enhancement and conversion process. With that, if you want to start improving the Facebook video quality, use the methods below.
Step 1 Download Tipard Video Converter Ultimate on your Mac or Windows computer. Then, start the installation procedure to run it to start the video enhancement process.
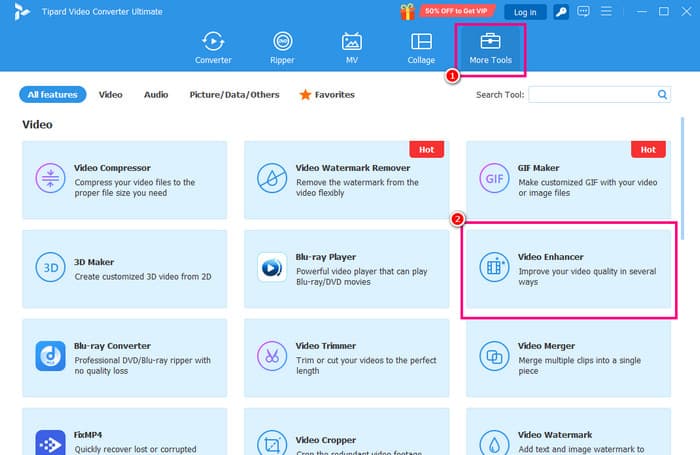
Step 2 After you launch the user interface, proceed to the More Tools section and click the Video Enhancer feature.
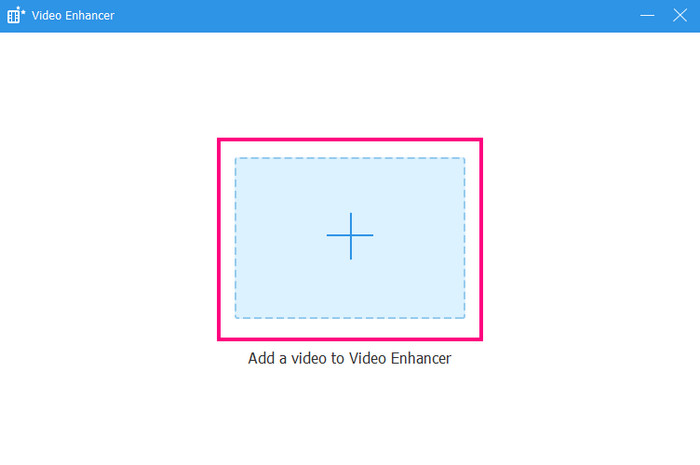
Step 3 You can now tap the Plus symbol from the center interface. When your computer folder shows up, browse and click the video you want to enhance.
Step 4 Now, you can start enhancing the video. You can check all the boxes to upscale the resolution, optimize brightness and contrast, reduce video shake and noise.
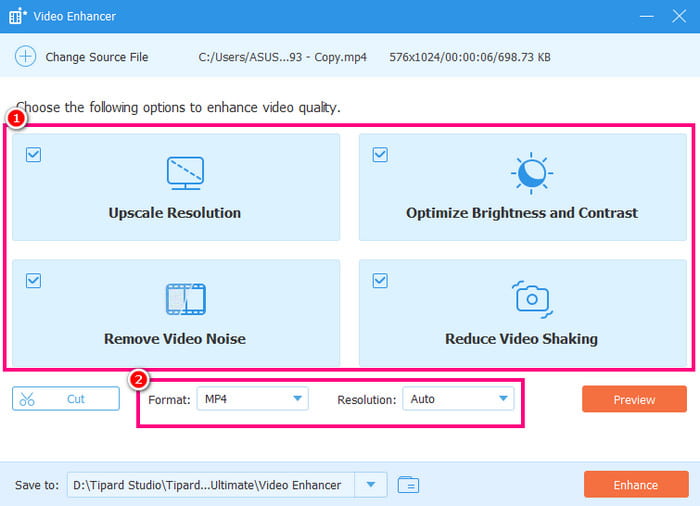
You can also go to the Resolution section and choose your preferred resolution. Plus, proceed to the Format section to select your preferred output doormat.
Step 5 For the final process, tap the Enhance button from the bottom interface. After the process, you can now watch and upload the improved video to your Facebook.
Part 4. Best Video Standards for Facebook Uploading
When posting or uploading a video on Facebook, there is a standard that you must follow to achieve your desired video output. For more information about the standards, you can read all the information in this section.
- Resolution - When uploading the video, it must have a 1920 × 1080 pixel resolution. This can give you a better viewing experience.
- Format - Always use the MP4 format (H.264 and H.265 codec). It is an ideal format for better compatibility.
- Frame Rate - Always consider the video frame rate. The recommended FPS or frame rate per second is 30.
- Bitrate - Always use an ideal bitrate based on your video resolution. If you are dealing with 1080p videos, then 8 Mbps is suggested. For 720p videos, the recommended bitrate is 4 Mbps.
- Audio - When it comes to audio, it is ideal to have AAC with 128 kbps for a better listening experience.
- Aspect Ratio - The clip's aspect ratio will depend on where you will post it. For Stories or Reels, use 9:16, 1:1 for ads, and 16:9 for feed or Watch.
Knowing the standard can help you get better output after the uploading process. Thus, always follow the best and recommended standard for a satisfying video playback.
Part 5. Adjust Video Quality in Your Phone Settings for Uploading
When using your mobile phone for capturing videos, it is better to set up the settings for achieving the best video result. To start adjusting the video quality in your phone settings, you can use the methods below.
Step 1 You can open your phone, proceed to the Settings application, and tap the Camera option.
Step 2 Then, you can now see all the options on your screen. Ensure that the resolution is 1080p or 4K. Then, the video frame rate must be 30 for standard and 60 for smoother output.
Step 3 You can also turn on the Stabilization option to reduce the shakiness of the video during the capturing process.
Step 4 After setting up everything, you can start launching your Camera app and begin taking a video with the best quality.
Conclusion
To learn how to enhance the video quality for Facebook, you can use all the provided guides from this tutorial. You even explored various reasons why you get a blurry video after the uploading process, including the setup process on your phone for better video quality. Plus, if you want to smoothly enhance your video before uploading it to Facebook, always use Tipard Video Converter Ultimate. With this program's Video Enhancer feature, you can get the best quality for your videos, resulting in better video playback.
More Reading


About the Author