
Premiere Pro is one of the most recognized video editing tools. Many people use it to make their videos look professional. One thing you can do with it is crop, which this write-up focuses on. We will show you how to crop video in Premiere, so you can make your footage exactly how you want. So, please get your video ready and let us begin the cropping!

Part 1. Why Crop a Video in Premiere Pro
Not every clip looks perfect when you place it on the timeline. Some shots have extra space. Some have black bars. Learning how to crop video in Adobe Premiere Pro helps you clean it up fast and efficiently.
Here is why cropping matters:
1. Remove distractions
You can cut out logos, watermarks, or messy edges. It makes your frame look neat.
2. Improve focus
If your subject looks small, crop the sides and zoom in. It helps viewers focus on the face or object.
3. Fix framing mistakes
Sometimes, the camera was not centered. Cropping helps adjust the shot without having to reshoot.
4. Match a new layout
If you need a square or vertical video, cropping helps reshape the frame to fit.
Part 2. Step-by-Step: How to Crop Video in Premiere Pro
You already know why cropping a video in Adobe Premiere Pro is necessary. Now is the time to learn how to do it the right way. If you are ready, please keep reading. By the end, you will know exactly how to crop a video in Premiere Pro with confidence and control.
Step 1 Open Premiere Pro and create or open a project. Import your video. Drag it to the timeline. Click the video clip once to select it. It is essential because crop controls only show for the selected clip.
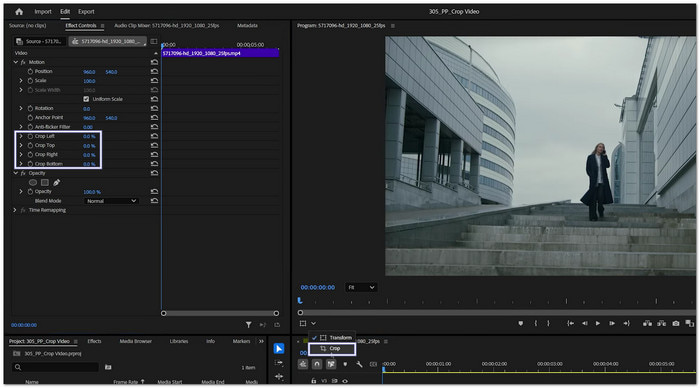
Step 2 If you use Premiere 2025 or newer, look at the Effect Controls panel. You will see crop options for Left, Right, Top, and Bottom. Change the numbers to crop each side.
You can also click the small arrow under the Program Monitor and choose Crop. Crop guides will appear on the preview screen. Drag the edges inward to crop visually. This method feels faster and more direct.
Step 3 After you crop, black space may appear around the video. Go to Effect Controls and find Scale under Motion. Increase the Scale value to fill the screen again. Keep an eye on quality. Too much scaling can reduce sharpness.
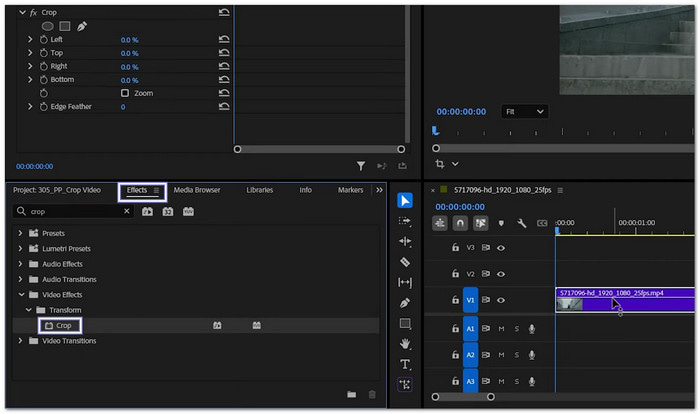
Step 4 If you use an older version, open the Effects panel. Type Crop in the search bar. Drag the Crop effect onto your video clip.
Now, go back to Effect Controls. You will see Left, Right, Top, and Bottom values again. Adjust them to crop. You can also click the Crop effect name. It will show crop handles in the preview. Drag them to set the crop area.
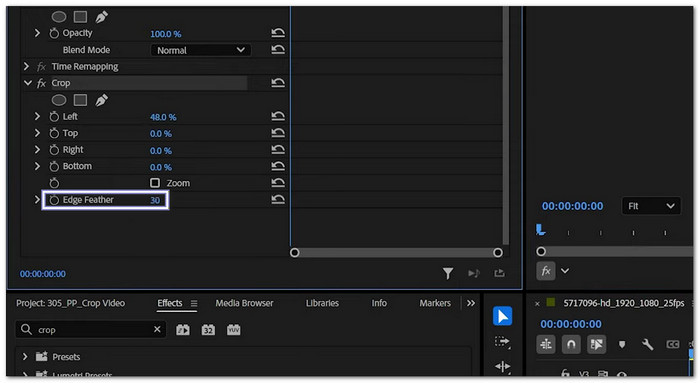
Step 5 The classic Crop effect has one extra feature. It is called Edge Feather. Increase this value to soften the cut edges. It helps the crop blend better. It is helpful for creative edits or split-screen layouts.
Part 3. The Downside of Cropping in Premiere Pro
Cropping video in Premiere Pro works well. But it also has limits. It is good to understand them before you use them too much.
Here are the main downsides:
- Quality loss after scaling: When you crop an MP4 extensively, part of the image is removed. If you then scale it up to fill the screen, the video can appear blurry or lose sharpness.
- Permanent frame loss: Cropping hides parts of the shot. If you change your mind later, you must reset or undo it.
- Not true resizing: Crop only trims the edges. It does not change the real resolution of your video file.
For the best results, crop only what you need and keep the image clear and sharp.
Part 4. The Faster Premiere Alternative to Crop Videos
We cannot deny that it takes many steps to crop a video in Premiere. You need to open panels, modify controls, and fine-tune settings. It works best for experienced editors. If you are a beginner, it can feel slow and complex.
If you want a faster, easier way to crop videos, Tipard Video Converter Ultimate is a great choice. It lets you crop videos with straightforward controls and a clear layout. You can drag the crop frame and see changes in real time.
It also offers many aspect ratios such as 16:9, 4:3, 1:1, and 9:16. It helps you prepare videos for YouTube, Instagram, or TikTok without stress. On top of that, it supports many input formats like MP4, MOV, AVI, MKV, and more. You can crop almost any video file without converting it first.
Step 1 To begin, download and install Tipard Video Converter Ultimate on your computer. Once the setup is complete, open the program and let it load.
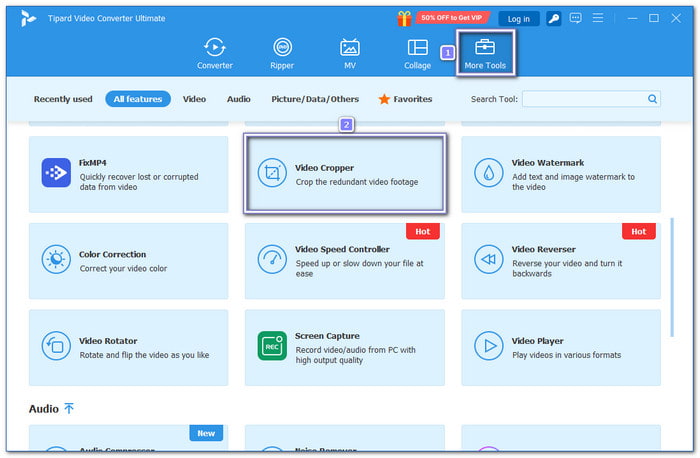
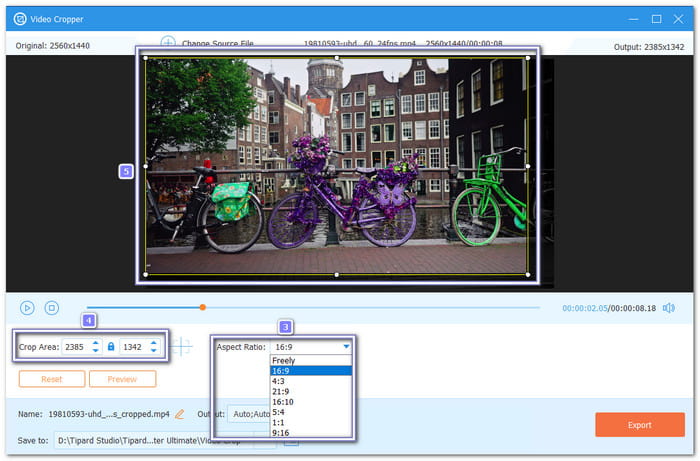
Step 2 On the main screen, click the More Tools tab. Then, choose Video Cropper from the list. Next, click the Add button in the center. A folder display will appear; select the video you want to crop and press Open.
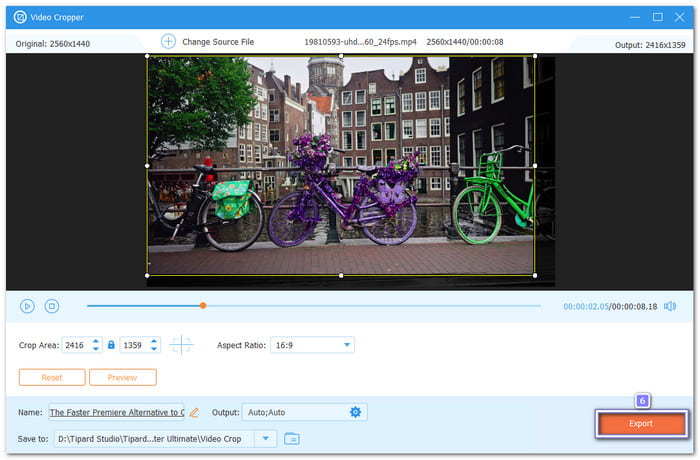
Step 3 Now, go to the Aspect Ratio menu. Pick the ratio you need, such as 16:9, 9:16, or 1:1. It helps you resize the frame fast. If you want custom sizing, type the exact numbers in the Crop Area box. You can also crop straight on the video display area. Place the selection frame over the area you want to keep.
Step 4 Rename your file if needed before saving it. When done, hit the Export button to save the cropped video to your computer. Please wait for the process to finish, and your new video will be ready.
More things this tool can do for you:
- Lets you crop directly on the preview display, set a custom crop area, or use preset aspect ratios.
- Shows a real-time preview of the cropped video before exporting.
- Allows adjustment of output settings, including format, resolution, and encoder.
- Includes additional tools such as a video rotator, trimmer, and enhancer for extra editing options.
- Suitable for cropping YouTube, TikTok, Instagram, Facebook, etc. videos.
Part 5. Pro Tips to Crop for Multiple Social Platforms
Each platform uses a different video shape. A wide video may look fine on a computer. But it may not fit well on a phone. Cropping correctly helps your content look good everywhere.
1. Know your target ratio
- 16:9 works for YouTube.
- 1:1 works for Instagram posts.
- 9:16 works for TikTok and Reels.
2. Duplicate your sequence first
Make a copy of your timeline. It protects your original edit.
3. Change the sequence frame size
Open Sequence Settings. Adjust the frame size to match the platform. Then, use Crop or Scale to fit your clips.
4. Keep essential details in the center
Phones cut off edges sometimes. Make sure faces and text stay inside the safe area.
Conclusion
Did you get the perfect look for your video using Premiere Pro to crop videos? We hope so! But if it felt tricky or took too long, it's time to try Tipard Video Converter Ultimate. It is perfect for beginners and professionals. Plus, it offers many editing features to make your video even better.
More Reading


About the Author
