
WebM to MP3 conversion allows you to extract just the audio from WebM video files, making it easier to listen, edit, or share sound-only content. WebM is a video format developed for efficient online streaming and is often used for HTML5 video playback. MP3, on the other hand, is a universal audio format known for its compact size and broad compatibility. Whether you are converting for convenience, archiving, or editing purposes, this guide will walk you through the best online tools, desktop solutions, and advanced settings for smooth and effective conversion.

Part 1. Quick Online Conversion
For those who need to convert a WebM file to MP3 just once in a while, the simplest and quickest solution is to use online tools. This option does not involve any software download, as these utilities work entirely in browser windows.
1. OnlineConvertFree
This is a minimalist online converter tool that operates using a vast number of different document types, WebM and MP3 included, thus making it easy to make swift conversions on the go.
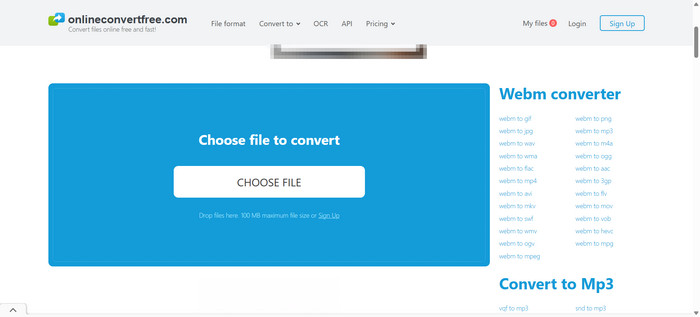
Step 1 Navigate to onlineconvertfree.com. Once there, click on Choose File and select your WebM file.
Step 2 Pick MP3 as the file to be output. Click Convert.
Step 3 Download your MP3 file once the file is processed.
- It is relatively simple to use.
- It is multifunctional in the sense that multiple input and output file types are offered.
- Conversion processes may take longer during busy times.
- The website is ad-supported, so ads may pop up.
2. CloudConvert
This one is a bit more sophisticated, allowing for customisation with features like cut time setting for significant portions of audio and several others. This makes it perfect for customers looking for extra features other than simple conversions.
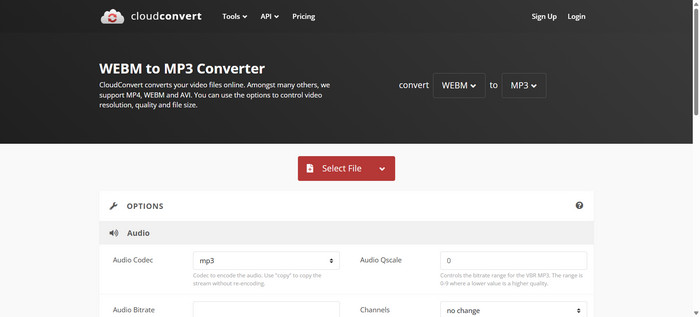
Step 1 Navigate to cloudconvert.com. Click Select File and upload your WebM video file.
Step 2 Set MP3 as the desired output format. If you wish to adjust the bitrate or trim the file, click the wrench icon.
Step 3 After clicking Convert, just wait for the process to complete, and you can then download the MP3.
- You receive excellent quality in your MP3s.
- Files may be converted in bulk using the batch option.
- Some features require creating an account.
- Low-end devices may experience lag.
3. Zamzar
Zamzar is one of the oldest and most trusted online file converters. It has a self-explanatory interface, which makes it ideal for quick, one-off WebM to MP3 conversions.
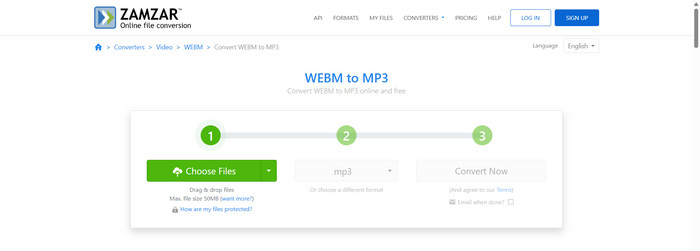
Step 1 Go to zamzar.com and upload the WebM file by clicking on Choose Files.
Step 2 Select MP3 as your output file. Click on Convert Now to process.
Step 3 Download your MP3 or get it sent through email after the process is completed.
- Beginners are welcomed with a very tidy interface.
- A wide range of supported formats is offered.
- Speed and file size restrictions are present in the free tier.
- Limited options, such as no control over bitrate, are available.
Part 2. Using Desktop Software
For those needing more customization, quality, and offline access, switching WebM video to MP3 audio files is more effective with desktop software. Here are two reliable programs.
1. Tipard Video Converter Ultimate
Tipard Video Converter Ultimate is the best in its class for a reason. It offers desktop conversion for more than 500 audio-visual file types, including WebM files. It uses GPU acceleration, which boosts processing speed and enables batch processing of multiple files. It is tailored for speed, quality, and flexibility.

- Directly converts WebM videos to high-quality MP3 files.
- Convert multiple WebM files to MP3 at once.
- Allows bitrate, codec, and sample rate adjustments before conversion.
- Trim audio from WebM clips before exporting as MP3.

Step 1 Download and Install
Access its official website, locate the software, and install it on your Windows or macOS computer.
Step 2 Launch the Program and Add WebM Files
Click the Add Files function on the left side of the window to upload the file or files that you wish to change to MP3 format.
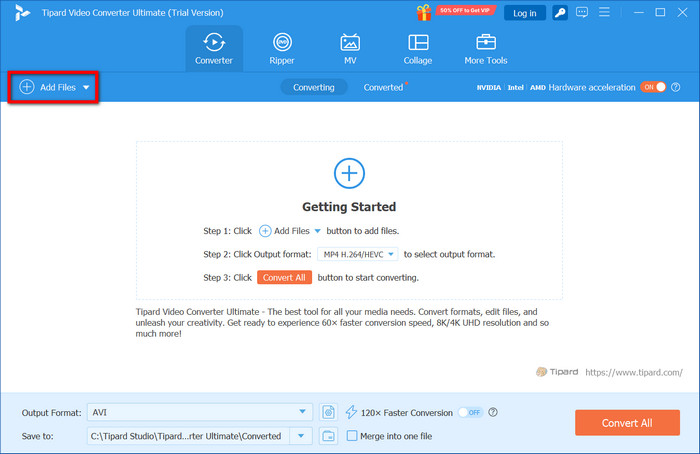
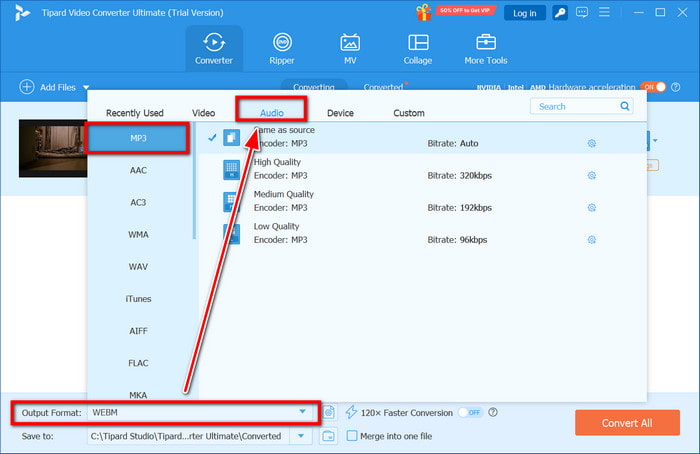
Step 3 Choose MP3 as the Output Format
Navigate to the Output Format and under the Audio tab, select the MP3 file type as the one to be generated after conversion.
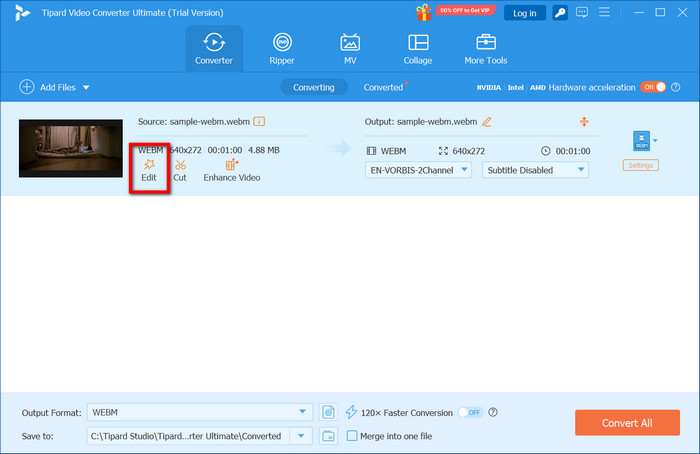
Step 4 Edit Audio (Optional)
If you only want a portion of the audio, go ahead and click Edit. Use the sliders or input fields to set the start and end times, and after trimming, click Save to finalize.
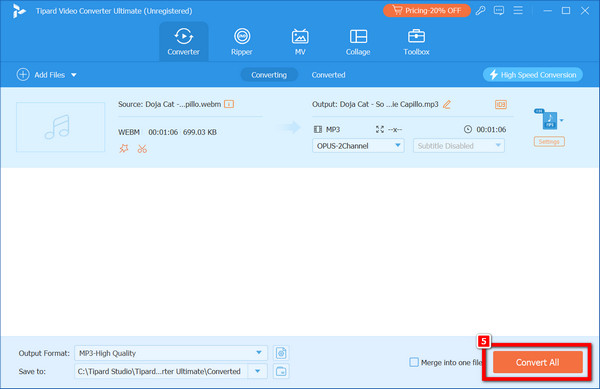
Step 5 Start the Conversion
Click Convert All in the lower right corner to begin converting your WebM files to MP3 format.
2. VLC Media Player
VLC Media Player is not only famous as a multimedia player, but it can also be used for some basic file format conversions. It can convert WebM files to MP3 without any extra plugins, which makes it useful for occasional, no-cost uses and a handy alternative to a basic MP3 editor.
Step 1 Use a Search Engine to find VLC and download it. When you open VLC, go to the menu bar, click Media and Convert /Save.
Step 2 Go to the File tab and click Add to select your WebM File.
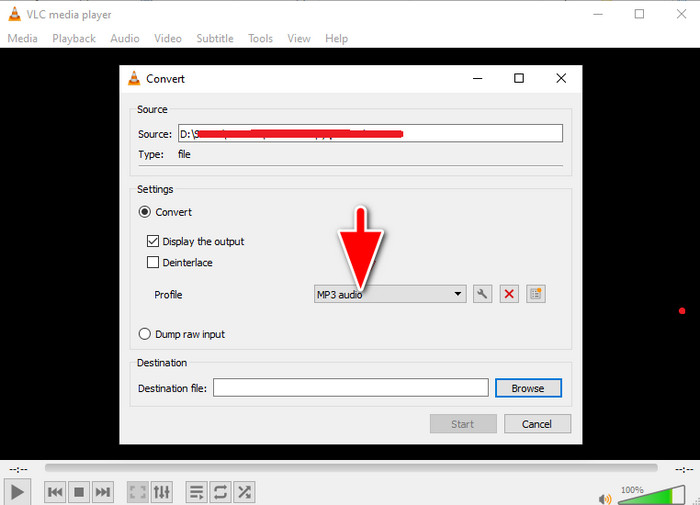
Step 3 Click on the Convert / Save button at the bottom of the window.
Step 4 Select Audio – MP3 under the profile section.
Step 5 Click on Browse to pick a destination and type the name for the output file.
Step 6 To commence the conversion process, click on Start.
Part 3. Advanced Options
For converting several files or when more output quality control is necessary, advanced features are required. For the MP3 conversion, here are three important aspects to keep in mind with WebM to MP3 conversion.
Batch Conversion
The batch conversion feature enables the simultaneous conversion of several WebM files into MP3 format. Instead of performing the same actions repeatedly for each file, the format can be applied once, saving all files in one go.
Why It is Useful:
This ensures that all your files have the same format and settings, which saves time. It is very useful in dealing with directories containing video files or audio files.
Bitrate Control
The bitrate controls the audio quality and size of the final MP3 file. The audio sounds better with a higher bitrate, but the files are larger. A good compromise between size and quality is a setting of 192kbps.
Why It is Useful:
Bitrate control allows users to match their audio to the exact quality needed. Manually setting the bitrate yields better results than using defaults, whether aiming for high fidelity or saving space.
Preserving Metadata During Conversion
Information such as the track name, performer, album, and the date associated with its production is considered metadata. Keeping this as data during conversion maintains organization and ease of identifying the files within multiple MP3s when viewed in any standard MP3 player.
Why It is Useful:
By retaining or editing presets before conversions, organized edges are created for audio files, which helps maintain the clutter when using media players and audio libraries.
Conclusion
The ability to convert a WebM file to MP3 is crucial for extracting audio from online videos effortlessly. There is no best solution for everyone, as some users prefer online tools while others rely on downloadable software. These solutions now offer more structured file naming as well as batch processing, bitrate control, and preserving metadata, making converting from WebM to MP3 more flexible than ever.
More Reading


About the Author
