The moment you realize how to record Google Meet could save you is usually the moment you did not plan for, like when the presenter speeds through deadlines, your boss drops unexpected instructions, or a classmate explains the only solution that finally makes sense. But then you check the toolbar, and the recording button is nowhere to be found.
Part 1. Using the Built-in Recorder of Google Meet
Who Can Record
Some people in a Google Meet cannot start a recording with the following:
- Holder of Google Workspace, one of these accounts: Business Standard, Business Plus, Enterprise, Education.
- Whomever the meeting conductor is, or if they are from the same organization as the meeting conductor.
- People with free Google accounts or Guests cannot start a recording.
How to Start a Recording
Step 1 Create or Join a Google Meet.
Step 2 Go to the bottom right corner, click the Activities button.
Step 3 Select Recording next to each other, Start Recording.
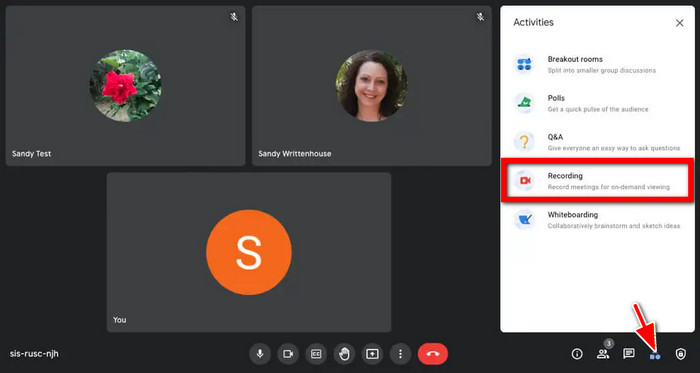
Step 4 There is a pop-up; press Start to confirm your action.

Step 5 Go to Activities, then Recording, and then Stop Recording to end it.
Step 6 Once you stop the recording, a notification will pop up along with alerts to other users in the meeting.
Part 2. Where Do Google Meet Recordings Go
Meeting recordings will always send you a notification for being organized and easy to reach here:
1. Saved in Google Drive: When the meeting is complete, the recording will automatically land in the Google account of the person who organized the meeting, as Drive will be in use.
2. Meet Recordings Folder: Created for your convenience, each recording is stored in a set location, thus the name Meet Recordings.
3. Email Notification: The person who organized the meeting will receive an email including a link to the recording for quick access.
4. Accessible to Participants: Members in the same organization can reach the recording through the shared link, and teammates can access it as well.
5. Includes Shared Content: The recording captures the active speaker and any presented materials, like slides or screen shares.
Part 3. How to Record Google Meet When You Cannot Use the Built-in Tool
At times, the built-in recorder of Google Meet might not be operational due to account restrictions or device limitations. In such scenarios, how to record meetings instantly is efficiently solved by adopting third-party tools and applications.
1. Tipard Screen Capture
Tipard Screen Capture is exceptional software since it is one of the few that can record Google Meet, the system audio, and the microphone at the same time. Lag-free recordings at a professional standard can be achieved on Windows and Mac computers.
- Capture the entire screen or only the Google Meet window.
- Add your own video and narration while recording.
- Save recordings in MP4, WMV, MKV, or other formats without losing clarity.
- Highlight important content during the meeting with on-screen drawings or callouts.
- Automatically start and stop recordings at a specific time to avoid missing any part.

Step 1 Download and Install
The most recent version of this software can be acquired by obtaining it from the official website and installing Tipard Screen Capture.
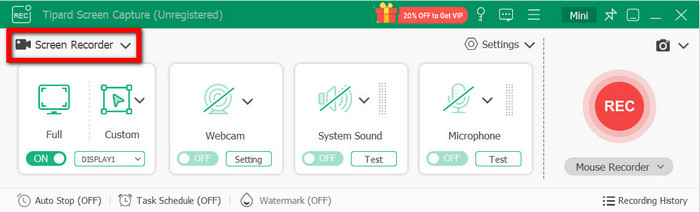
Step 2 Google Meet Recording Mode On
Move on to the Google Meet recording by selecting Screen Recorder from the available options.
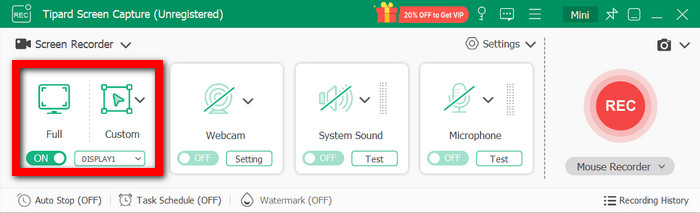
Step 3 Specify Recording Area
You can choose to record a Full or a Custom portion that contains the Google Meet window.
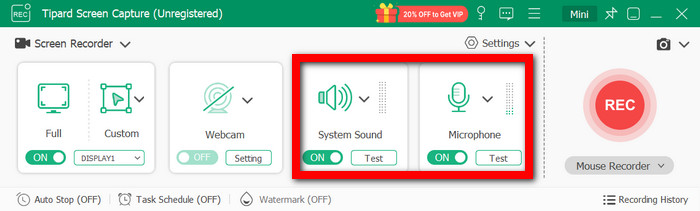
Step 4 Enable Audio Sources
For a clear recording of audio from the meeting and from your microphone, turn on System Sound and Microphone.
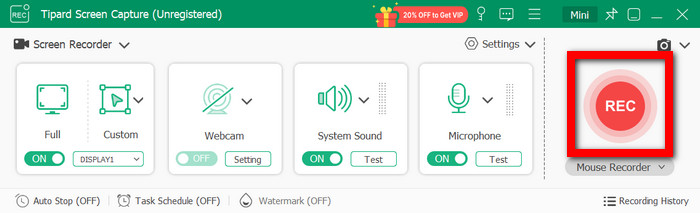
Step 5 Start Recording
Press the REC button to record. During the recording, you can also screen draw, annotate, and turn on a webcam.
Step 6 Stop and Save Recording
When the meeting is over, click Stop. Save the video by previewing it first and then saving it on your device or sharing it on a social site.
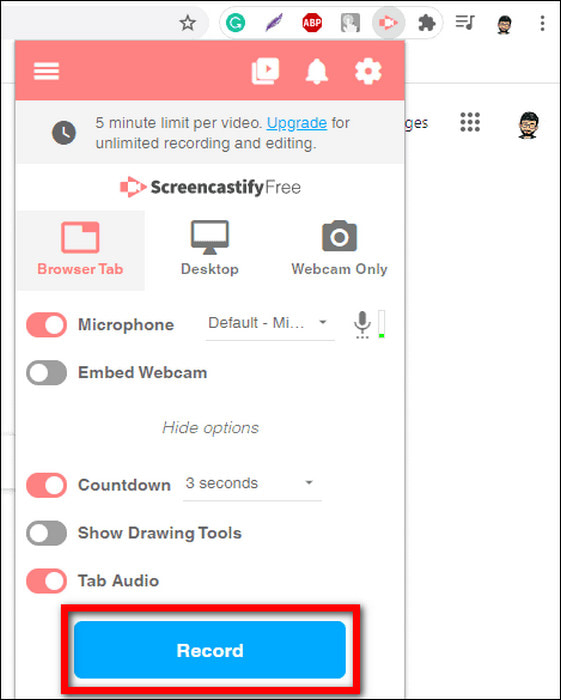
2. Record Google Meet with a Chrome Extension
If you are looking for a lighter option, there are Chrome extensions that let you record straight from your browsing window. Use Loom or Screencastify.
Step 1 Head to Chrome Web Store, and add a Chrome screen recorder, Loom, or Screencastify to your collection of extensions.
Step 2 Link your Google account to the newly installed Chrome extension.
Step 3 Once you are in Google Meet, you will see a recording option in your toolbar. Select that. You can choose to record the full screen, the current tab in your browser, or just the webcam.
Step 4 You can hit the Record button before the meeting starts.
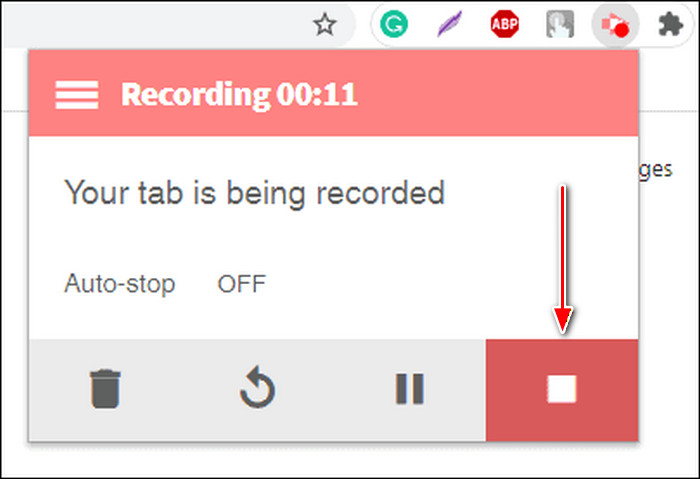
Step 5 When you finish, you can end the recording by tapping the Stop button, and through the extension ad, you can save or share your video in cloud storage or download it straight to your device.
3. For iOS/Android
If you are on a mobile device, you can use specialized apps that can record the screen and audio without any restrictions for Google Meet. You can use DU Recorder, Mobizen Screen Recorder, or AZ Screen Recorder.
Step 1 Download a screen recording app from your device’s app store.
Step 2 Allow the app you downloaded to record your screen and audio.
Step 3 Start your Google Meet after you open the app.
Step 4 Start the screen recorder and select the option to record the screen (with audio). On iOS, you can use the built-in screen recorder and make sure the microphone is on.
Step 5 Stop recording when the meeting ends and save or share the file directly from the app.
Part 4. Troubleshooting Google Meet Recording Unavailable
The message that says Recording Unavailable in Google Meet typically means that some restrictions or missing settings prevent you from recording. Here is how to resolve this:
• Check Your Account Type.
Google Meet recording is only enabled for some Google Workspace accounts for Business Standard, Business Plus, Enterprise, or Education accounts. No recording from meetings is allowed for free personal accounts.
• Confirm You Are the Organizer or From the Same Organization.
Only the meeting organizer or people from the same organization as the organizer are allowed to start a recording. Recording is not allowed for guests or users from other domains, similar to Anymeeting recording permissions.
• Use a Supported Browser.
Unsupported browsers or mobile apps might not allow recording. The latest version of Google Chrome, Microsoft Edge, or Firefox on a desktop is the most recommended for recording.
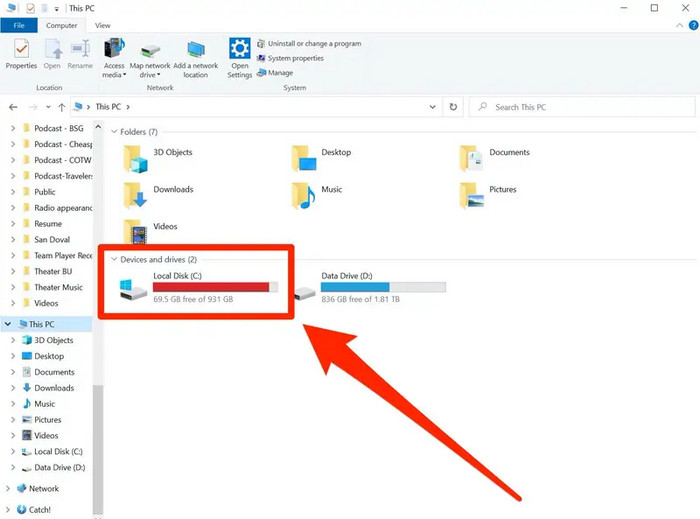
• Check Your Available Storage Space.
Google Drive is where the recordings will be saved. The recording will be unsuccessful if your Drive is full or almost full. Make Storage available or switch to an account that has enough available recording space.
• Consider Other Recording Tools.
If the Google Meet recording remains unavailable, you can consider other alternatives. Third-party solutions can record a webinar, including Tipard Screen Capture, Loom and Screencastify Chrome extensions, as well as apps for mobile screen recording.
Conclusion
Google Meet recording does not have to be complicated, even when the built-in option isn’t available. With the right tools and methods, you can capture every meeting clearly and reliably, no matter what device or account you use.
More Reading

About the Author