

Retouching video covers a variety of skills. For example, cropping a video on a Mac removes unwanted parts of the footage for various purposes. Before posting a video on social media, you need to double-check the footage and remove sensitive buildings. Moreover, this can concentrate viewers’ attention on the main object in your video. Cropping your video is an easy way to produce dimensions for a specific platform, like TikTok. This tutorial shares the proven methods and detailed processes.

Part 1. Ultimate Way to Crop a Video on Mac
If you are looking for a video cropping software for Mac, Tipard Video Converter Ultimate is a good option. It is able to crop video dimensions on Mac without losing quality using built-in AI technology. Plus, the intuitive design streamlines the workflow.

- Crop a video on a Mac in three steps.
- Optimize video quality with AI.
- Preview the result with the built-in media player.
- Support a wide array of video formats.
- Offer lots of video editing features.

How to Crop a Video Dimension on Mac
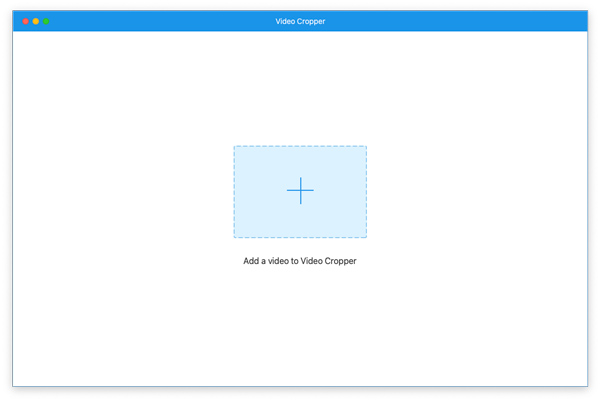
Step 1Add a video
Launch the video cropping software after installing it on your Mac. There is another version for PCs. Go to the More Tools tab at the top of the window and choose the Video Cropper tool. Click the Add button to import the desired video.
Step 2Crop your video
After the video loads, drag the cropping box on the image to enclose the area you want to keep. Click the Preview button once you are done to check the result.
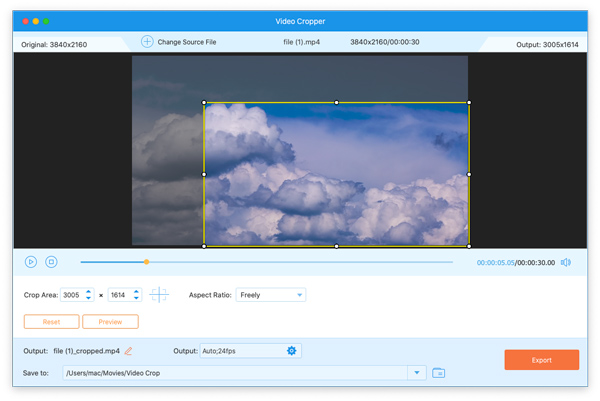
Step 3Export the cropped video
Finally, set the filename, output settings, and output folder. Click on the Export button to save the cropped video.
Part 2. How to Crop a Video on Mac in iMovie
While iMovie is a simple video editor, it is enough to crop a video frame on a Mac. Bear in mind that it only supports a limited set of input and output formats. Moreover, the workflow is a bit complicated.
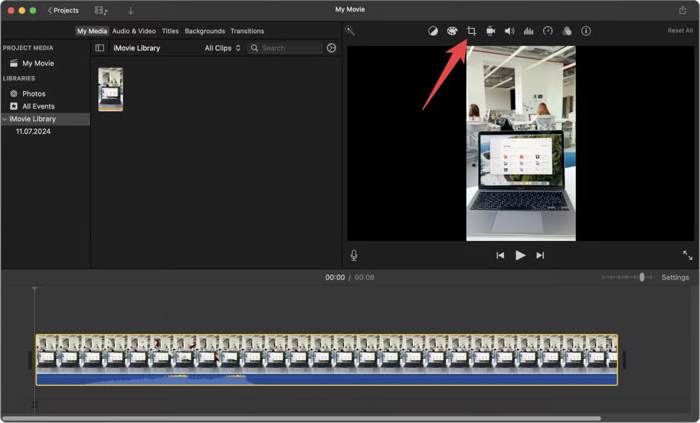
Step 1Run iMovie on your Mac.
Step 2 Click the File menu and choose New Movie.
Step 3Click the Import Media button, then select the video you want to edit.
Step 4Drag and drop the video onto the timeline.
Step 5Click the Crop tool above the media player.
Step 6Then, drag the frame to the area you wish to keep.
Step 7Click the Apply button once you are satisfied.
Step 8Finally, export the video.
Part 3. How to Crop a Video on Mac with Photos
When releasing macOS 11, Apple migrated the Photos app to Mac. It comes with a video editor that includes basic video-editing features. It enables you to crop a video on a Mac without extra applications.
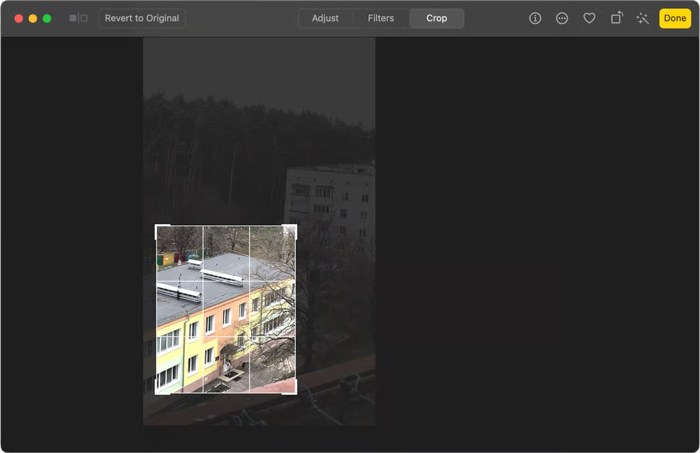
Step 1Open the Photos app.
Step 2Double-click on the desired video.
Step 3Click the Edit button in the top-right corner and choose Crop.
Step 4Next, drag the frame until it covers the area you hope to keep.
Step 5Click the Done button to save the change.
Photos will save the cropped video as a new file in the Photos app.
Part 4. How to Crop Video Frame on Mac Online
If using a desktop app to crop a video is inconvenient, an online video editor is a portable option. For example, Ezgif enables you to crop a video on a Mac online. This app doesn’t require a sign-up or login.
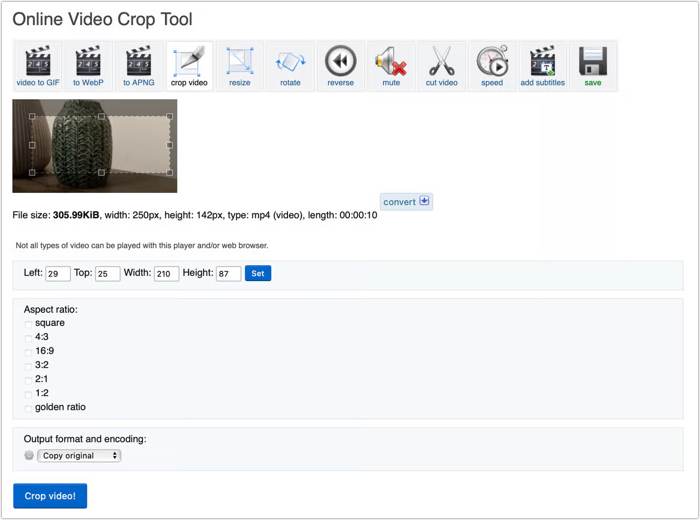
Step 1Access the online video editor in a web browser.
Step 2Choose the Crop video option on the toolbar.
Step 3Click the Choose file button and import a video from your drive.
Step 4Hit the Upload button to upload the clip.
Step 5Then, drag the box until you are satisfied.
Step 6Click the Crop video button to render it.
Step 7Finally, click the Save button to download the cropped video.
Part 5. How to Crop a Video on Mac in QuickTime Player
Although QuickTime Player doesn’t come with the video cropping feature, you can crop a video frame on a Mac with the built-in screen recording feature. This way requires settings to capture the audio.

Step 1Open the desired video in QuickTime Player.
Step 2Go to File and New Screen Recording.
Step 3Drag the cropping frame to cover the desired area.
Step 4Next, click the Options button and choose your microphone.
Step 5Click the Record button, then play the video to begin recording.
Conclusion
This tutorial shared five ways to crop a video on your Mac. iMovie is the native video editor app on Mac and can be used to remove unwanted areas from a video. The Photos app comes with a video cropping option. QuickTime Player can crop a video during recording. Tipard Video Converter Ultimate is a fast video cropping tool for Mac machines.

All-in-one video toolbox: convert, edit, upscale, enhance, and compress your videos easily
100% Clean & Safe
100% Clean & Safe

More Reading




About the Author