
In DaVinci Resolve, a widely used video cropping effort entails the removal of unwanted edges, highlighting details, or adjusting framing for different platforms. Fine-tuning of footage, creating dynamic effects, or preparing clips for social media? Whatever your need, DaVinci Resolve offers you a range of tried and tested methods for accomplishing them. In this guide, we'll explore different ways to crop your videos in DaVinci, from basic cropping tools to dynamic zoom and Instagram-specific adjustments, along with an easy alternative for quick cropping.
Part 1: How to Crop Video in DaVinci Resolve
DaVinci Resolve offers a powerful editing suite meant for complete beginners as well as professionals, bringing various advanced tools for editing, color grading, and effects. Its unique features include cropping of videos down to the precise edge with flexibility. Adjusting the framing of the video, taking care of unwanted edge details, or modifying the aspect ratio is all done easily in the Edit or Color page. Cropping can also be done with fixed or keyframed crops for smooth transition and creative framing adjustment. With real-time previews and high-quality renderings, it is guaranteed that video cropping is done efficiently and looks seamless with DaVinci Resolve, ensuring clean, balanced, and professional looks for every shot.
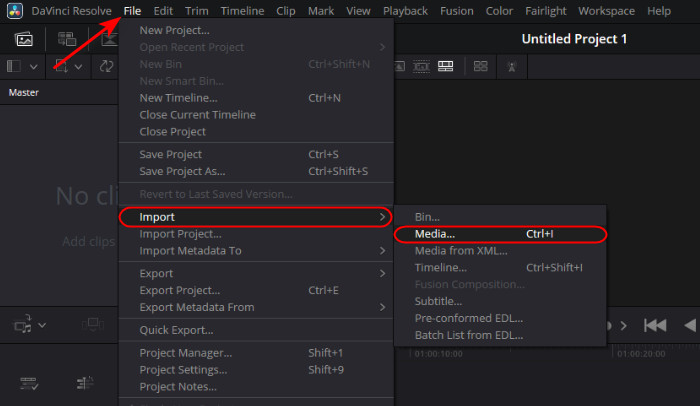
Step 1 The first step you want to take after you have launched the application is to import the videos you want to crop. To do that, navigate to File > Import > Media, and another tab will open, and you will be able to access your local directory where you can search for your videos.
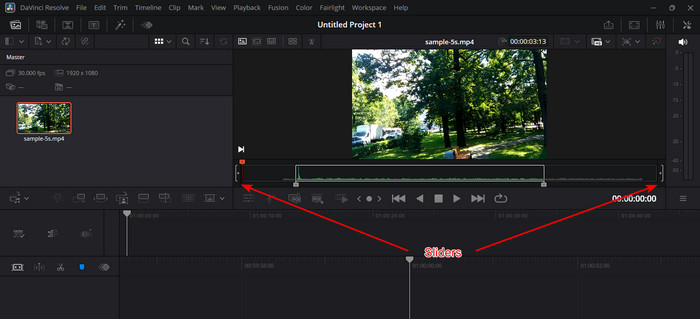
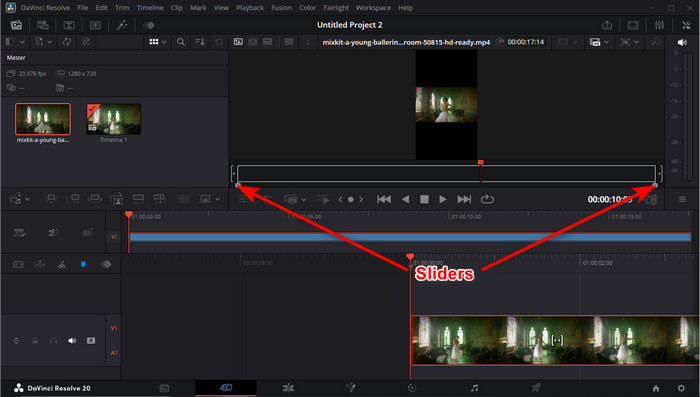
Step 2 After importing, select the video you want to crop by double-clicking it. After selecting the video, you can now start cropping. Simply adjust the sliders that are available on the video.
Step 3 After you have finished cropping, you can finally export. Do that by clicking File > Quick Export. Your saved file will be available in the folder you selected before exporting. To know how long you can screen record on iPhone, you can simply check your storage and battery percentage.

Part 2: How to Crop Video in DaVinci Using Dynamic Zoom
In this part, we will show you how ot use the feature Dynamic using Davinci Resolve. Make sure you follow the steps below. This part will help you crop your video using the built-in tool.
Step 1 Assuming that you have launched the software, the first step you would want to take is to import the video. Do that by clicking CTRL + I or navigating to File > Import > Media.
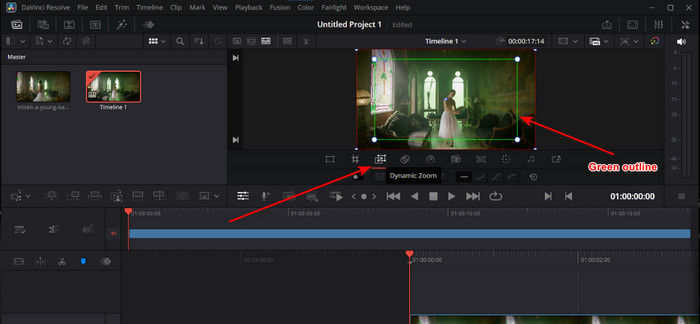
Step 2 After you have imported the video, the next step is to select the video you have imported by double-clicking it. After you have selected the video, click on Dynamic Zoom. This will enable a new set of editing tools where you will be able to crop in and out of the video smoothly. Set the green outline where you want the dynamic zoom to start cropping in your video.
Step 3 After you have applied the dynamic zoom to your video, you can now start exporting the video. Simply click on File > Quick Export, and your edited video will be available in the folder you have chosen before exporting.
Part 3: How to Crop Video in DaVinci Resolve for Instagram
In this part, we will show you how to crop your video for your instagram post or story. Make sure you follow the steps carefully. This part will help you pick the right resolution for your Instagram video.
Step 1 Assuming that you have launched the application, the first thing you need to do is import the videos you are going to crop. You can click on File > Import > Media or click Ctrl + I on your keyboard.
Step 2 After you have imported your video, select it. Do that by double-clicking the video on your app interface. After you have selected the video, go into the Master Settings tab and set the format to 1080x1920 resolution.
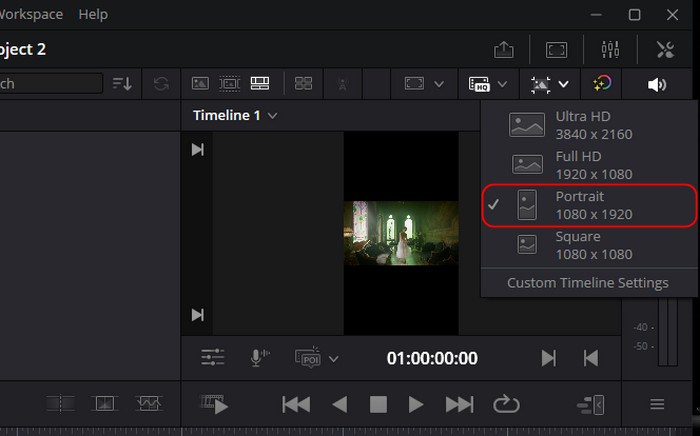
Step 3 After you have set the right resolution for the video, we can now crop the video. Cropping your Instagram video can be done by toggling the sliders on the selected video.
Step 4 After you have applied the said changes, you can now start exporting your video. Navigate to File > Quick Export. Your Instagram video will be saved in the set directory of the application.
Part 4: The Easiest DaVinci Alternative to Crop Videos
Sometimes, cropping video involves cutting away unwanted areas, focusing on the subject, or changing aspect ratios for various platforms. Although DaVinci Resolve provides great built-in tools to crop and resize footage, many beginners may feel that this may be a bit of an effort to deal with, and so opting for an easier alternative will save time and effort. One reliable option is Tipard Video Converter Ultimate, which allows you to crop videos with just a few clicks. You can also change the aspect ratio using standard templates and maintain the highest video quality after cropping, making it a convenient choice for any user.
Step 1 Download and Launch Software
The first step you would want to do is to download it by clicking the download button that is available below. After you have downloaded the app, launch it. Do that by clicking the shortcut icon of the app on your desktop.
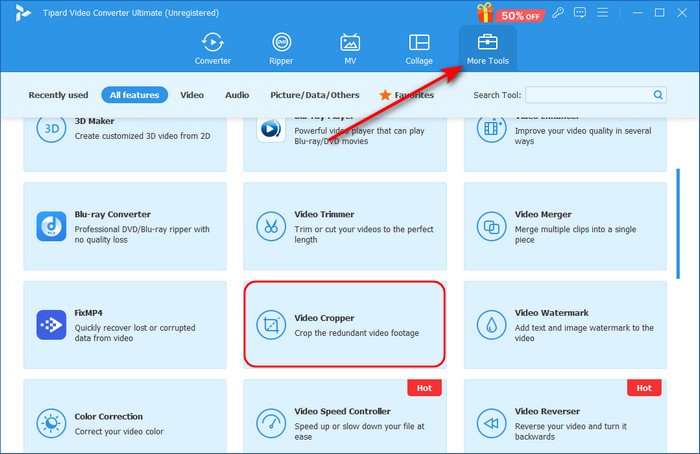
Step 2 Select Tool and Import File
After you have launched the app, navigate to More Tools > Video Cropper. This will take you into another interface where you will be able to search through your local directory and import your video.
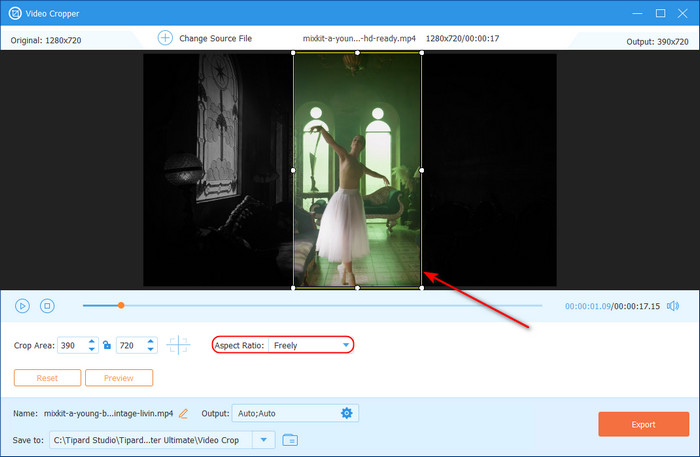
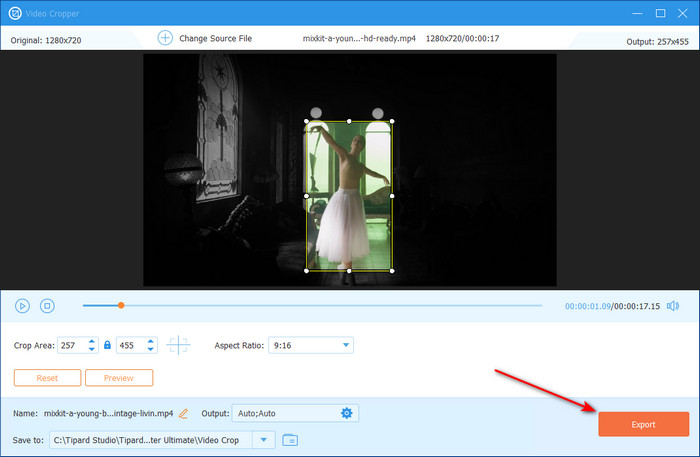
Step 3 Crop Video
After you have imported your video, you can now start the cropping process. You will be able to see a yellow outline and adjust the yellow outline to your liking. You can also utilize the aspect ratio tool that is available in the application.
Step 4 Export Video
After setting the desired aspect ratio and crop radius, we can now start exporting the video. Simply click the Export button in the bottom right corner of the app interface.
Conclusion
Cropping footage in DaVinci Resolve is simple enough, provided you know which approach to take. Whether basic tools for cropping are used, dynamic zooms are involved in settings for Instagram, or altering settings on the software, any such approach would not limit any of the powerful options the software has to offer in transforming the videos to meet desired specifications for each media outlet.
More Reading


About the Author
