Experiencing codec-unavailable PowerPoint errors during a crucial presentation can be stressful, especially when videos or audio fail to play. This guide provides clear, practical solutions and helpful tips, including media conversion, optimizing compatibility, and best practices, to ensure smooth, reliable, and hassle-free playback in your presentations.

Part 1. Why Is Codec Unavailable on PowerPoint?
The codec unavailable error in Microsoft PowerPoint indicates that PowerPoint cannot decode or play the media file that you tried to insert. Most of the time, this is a result of the media file not being compatible with PowerPoint.
There are a number of reasons that this error may be occurring:
1. PowerPoint does not support the media file format that you are trying to insert.
2. The file you are trying to insert is compatible with PowerPoint in terms of file type, but is using an internal codec that is not compatible (e.g., HEVC instead of H.264).
3. You are using an outdated version of PowerPoint that does not support the media that you are trying to insert.
4. The PC that you are using does not have the codec that is required to play the media file you are trying to insert.
5. The file that you are trying to insert is corrupted or not encoded correctly.
Part 2. Versatile Methods to Fix Codec Unavailable in PowerPoint
If the error messages say that the codec is unavailable, the most likely causes of this error are unsupported media file formats, incompatible code, or unsupported system components. Below are the solutions that are proven to fix the codec-unavailable error quickly. Please follow the steps outlined in each of the solutions to fix the error.
Method 1: Convert Media to a Compatible Format (Most Effective)
The main causes of PowerPoint playback errors are an unsupported media file format or incompatible video codecs. The best and most permanent solution to resolve this issue is to convert the media file that you are trying to insert into Microsoft PowerPoint into a format that is compatible with PowerPoint. Tipard Video Converter Ultimate is a fast, stable, and high-quality media file converter, compressor, and editor that you can use to convert media files that you are trying to insert into Microsoft PowerPoint.

- Convert videos to MP4, WMV, AVI, and other formats fully supported by PowerPoint.
- Reduce file size while keeping video quality for smooth playback on any device.
- Trim, crop, rotate, merge, add watermarks, and apply filters quickly.
- Convert multiple video or audio files at the same time to save effort.
- Hardware acceleration with Intel, AMD, or NVIDIA ensures speedy, high-quality output.

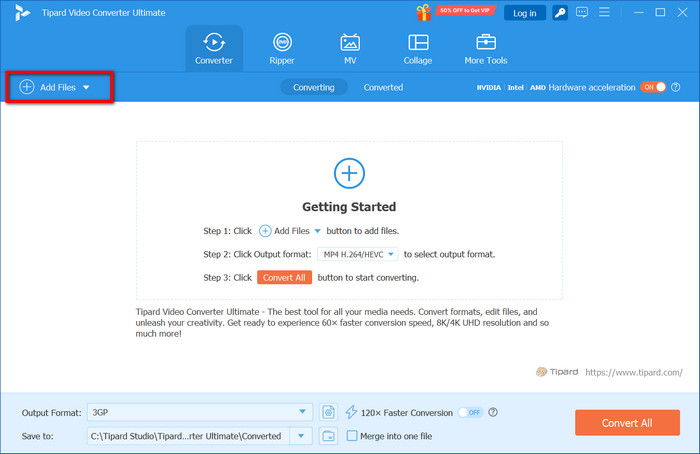
Step 1 Download and Install the Tool
Go to the official Tipard website to get Tipard Video Converter Ultimate and install it.
Step 2 Launch the Program
Start the software and press the Add Files button to locate the video or audio file that has the codec issue.
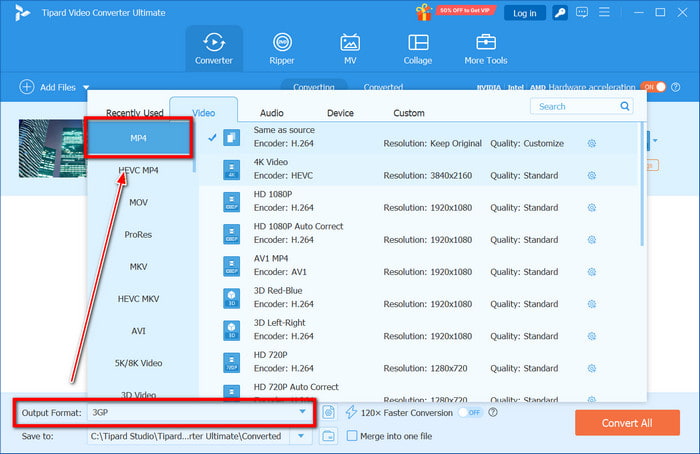
Step 3 Choose the Output Format
From the Output Format dropdown options, choose MP4 (H.264) for videos and M4A (AAC) for audio files to ensure that these files are compatible with PowerPoint.
Step 4 Adjust Settings (Optional)
If you want to prepare the file for optimized playback, you can go to the Settings menu to set the desired resolution, bitrate, or compression.

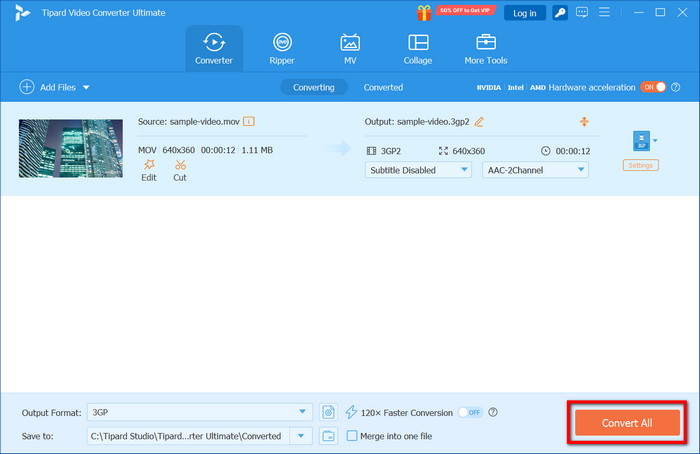
Step 5 Select Output Folder
Select a destination for the converted file.
Step 6 Start Conversion
To convert the file, click the Convert All button. You will have to wait until the file conversion is done.
Method 2: Optimize Media Compatibility in PowerPoint
In PowerPoint, there is an option that automatically improves the compatibility of the embedded media. It can be useful if there are media files that are just improperly optimized and nothing else.
Step 1 Open your presentation.
Step 2 Click on File, go to Info, and click on Optimize Media Compatibility (if this option is available).
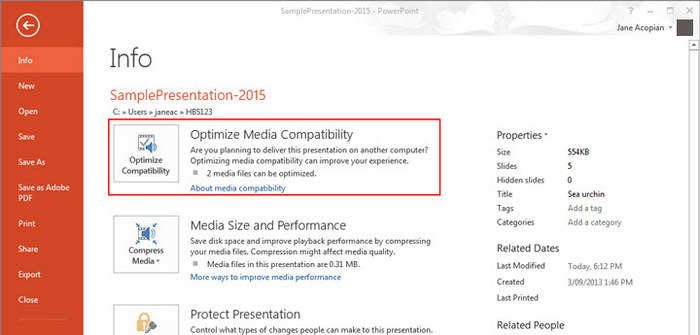
Step 3 Wait for the optimization process to complete, and then check whether the playback issue has been resolved.
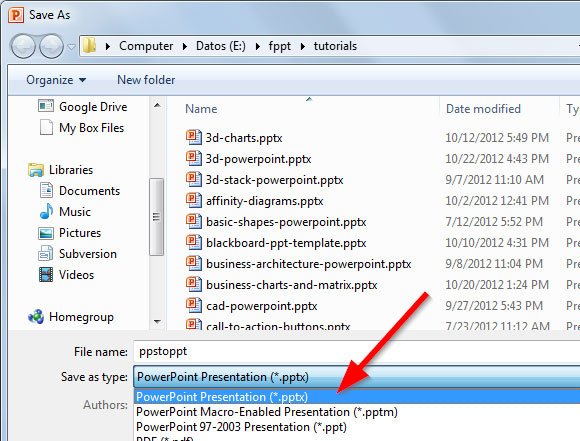
Method 3: Change File Extension (.ppt to .pptx)
Outdated PowerPoint file formats may cause issues with media playback. Changing the file extension to .pptx helps update the presentation to the newer structure with better media handling. Also, consider converting videos to the best video format for YouTube for optimal compatibility.
Method 4: Install the Required Codec
It may be the case that even if the media format is supported, the correct codec to decode the media file is missing from your Windows system. For PowerPoint to recognize and play the file correctly, you must install the correct codec.
Step 1 Determine the codec used on the media file.
Step 2 Install the codec pack and redo the process.
Step 3 Restart your computer.
Step 4 Start PowerPoint again and check the file.
Method 5: Clear the TEMP Folder
As time goes by, temporary system files build up. They can hinder software functionality, including media playback in PowerPoint. Clearing these files may fix problems related to freezing or playback.
Step 1 Close PowerPoint.
Step 2 Win + R and type %temp% and enter.
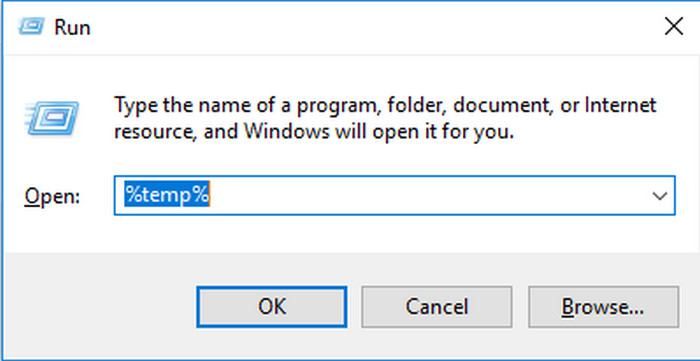
Step 3 Delete lots of .tmp files.
Step 4 Restart PowerPoint and check the media.
Part 3. Best Tips for Future PowerPoint Presentations
Good habits can help you avoid PowerPoint media playback problems. Keep these in mind, and your presentations will go smoothly:
1. Insert media: Videos and audio files should be directly inserted into the PowerPoint presentations, not linked.
2. Supported types: Videos should be converted to MP4 (H.264) and audio files to M4A (AAC) in order to be fully supported in PowerPoint.
3. Run the presentation before: Schedule a presentation dry run on the same PC you will be using to ensure all media files will play correctly.
4. Improved media playback: Use the media compatibility optimizer in PowerPoint to solve potential playback problems before the presentation starts.
5. Large videos can be problematic: Video files should be as small as possible to ensure they load and play correctly. You can compress a video to reduce file size while maintaining quality.
6. Organize media: Keep all media files in the same computer and, if you want to be sure they will be reinserted, save a backup copy.
Conclusion
Encountering a codec unavailable in PowerPoint can disrupt your presentation, but it is easily resolved with the right methods. In order to have trouble-free media playback and not have PowerPoint media playback problems, you should at least use media file converters like Tipard Video Converter Ultimate and the above-mentioned tricks. It is most likely that the absence of these good PowerPoint practices is the cause of the PowerPoint media playback problems.
More Reading


About the Author