AnyMeeting Recording – Record, Download, and Share the Online Meetings
It is not difficult to record and save an important business meeting from AnyMeeting with the default settings. But if you cannot join in the scheduled online meeting via Outlook, what should you do to record the AnyMeeting Webinars automatically? Whether you need to capture the videos directly, or choose a schedule AnyMeeting recording, you can learn more details about the 2 verified methods from the article.
Part 1. The Best Method to Record Scheduled AnyMeeting Webinars
Tipard Screen Capture is more than a scheduled online meeting recorder. It also provides video editing and sharing features. Whether you need to capture, edit, or share the recording, it is a versatile screen recorder for AnyMeeting you can take into consideration. Moreover, you can also adjust screen size, resolution, and ratio before recording. The audio source can be chosen to record with minimized noise.
- 1. Record the AnyMeeting Webinar and conference according to Outlook schedule.
- 2. Capture the online meeting video, audio, and webcam footage with the best quality.
- 3. Tweak the video resolution, frame rate, bitrate, video codecs, and more others.
- 4. Preview, edit, and manage the recorded Anymeeting videos within the program.
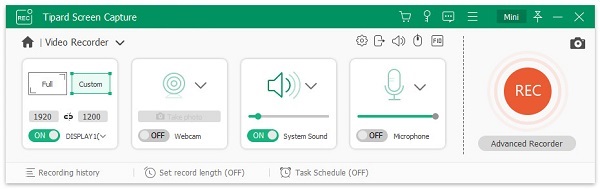
Download and launch Tipard Screen Capture from the official website. Click the Video Recorder option on the interface. You need to choose the details of the capturing before on the interface. Choose the display or webcam to record the video. Then choose an audio source like system sound or microphone to access audio.
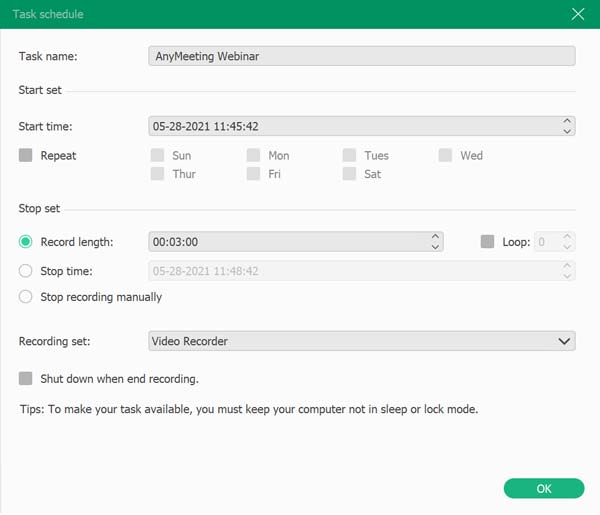
Go to the Task Schedule option and click the Add new task option. Once you have named the new task, you can arrange the schedule as the Outlook notification. It enables you to start time, stop set, stop recording manually, recording set, and more others for recording AnyMeeting Webinar.
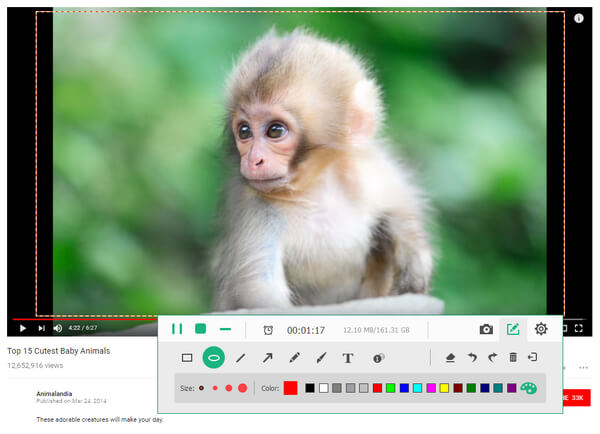
Click the red REC button to launch the recording. You can add shapes, arrows, texts, and more other elements with noting tools during the recording. If you want to end the recording, press the red square. It will save the video to the destination folder and media library automatically.
Then you can preview the recorded video in the interface. If you want to save the recorded AnyMeeting video, click the Save button, the file will be downloaded and saved on your hard drive. Moreover, you can also edit the files, or share them on the social media website within the program.

Part 2. How to Record and Save AnyMeeting With Its Default Setting
AnyMeeting gives you the choice to record and save a meeting with its default setting. Here are the steps.
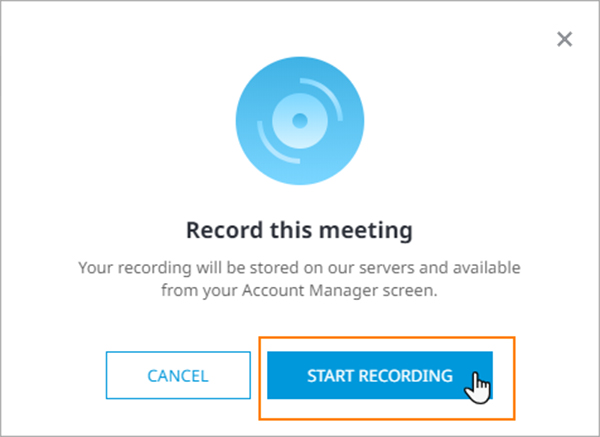
Step 1To start the recording, you need to press the Record button on top of the screen. The recording will start when the button turning red.
Step 2You may pause, resume and stop recording. If you choose to resume, it offers you to append or overwrite the previous recording.
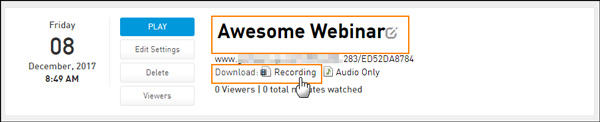
Step 3After recording, you can send your recording URL to others and save the recording video as an MP4 file at the Data Review surface. The download link is at the bottom of this window. You can choose to download Full Meeting Recording or Audio Only.
It's an easy way to record AnyMeeting. However, it doesn't provide you advanced editing tools to adjust the parameters like the video quality of the recording. Of course, you cannot have a scheduled recording directly. You can improve video quality here.
Part 3. FAQs about AnyMeeting Recording
1. What is the difference between AnyMeeting Conferences and Webinars?
The videoconferences of AnyMeeting provide a two-way dialogue with audio and video capabilities. The Webinar is used for broadcasting one-way to a large audience in a single meeting. When you have scheduled AnyMeeting Webinars, you can record the meetings without joining in.
2. Can I record AnyMeeting conferences for free?
No. AnyMeeting provides you a free version to download on its website. However, the free version doesn't have the option to record the AnyMeeting conference and save it. To realize the feature, you have to purchase AnyMeeting Pro.
3. Is there any encryption to protect my AnyMeeting recording?
Yes, you can add a password to protect your recorded videos. To add a password, you should choose the Recordings tab. Find the Edit Settings button on the file you want to add a password to. Set a password in the Recording Password field and click the Update button to save it.
Conclusion
The article shares 2 efficient ways to recording and downloading the AnyMeeting conferences and Webinars. You can simply record meetings through the AnyMeeting default setting. Of course, you can also choose the schedule recording way with Tipard Screen Capture. I hope this article is helpful to you. Leave your comment below to contact us.