
How to Root Nexus 7 Effectively With the Best Way
Nexus 7 is a powerful device. But as other Android devices, as you get more into using it, you might face more apps that require root access. Actually, rooting Nexus 7 tablet could bring more benefits. System apps, for example use many memory. Although we do not use some system apps, we cannot throw them to trash without jailbreak Nexus 7. Moreover, we cannot block ads and notifications on normal Nexus 7 phones. If you play mobile games, you can access game app files and remove limitations on a rooted Android device. In a word, you may want to root your handset to get more controls. And we are going to show you how to root Nexus 7 effectively.
Method 1. Root Nexus 7 on PC
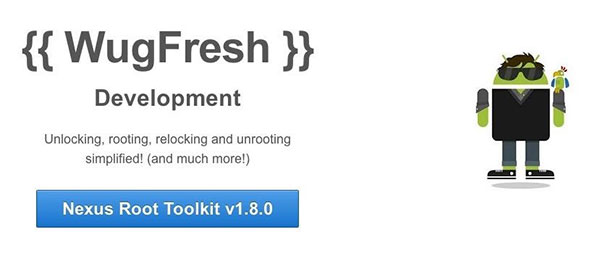
There are many Android root programs on market; while only several applications support Nexus 7. Nexus Root Toolkit is a dedicated root tool for any Nexus models. So, you can use it to root Nexus 7 without worrying about compatibility issues.
How to root Nexus 7 on PC
Installation
Download Nexus Root Toolkit from WugFresh.com and follow instruction to install it on your computer.
Connect Nexus 7
Go to Settings app on Nexus 7 and hit Build number 7 times in About tablet section. Then navigate to Settings-> Developer Options and enable USB debugging. Plug your Nexus 7 to the computer through a cable. When the permission notification pops up, tap on OK to continue.
Backup
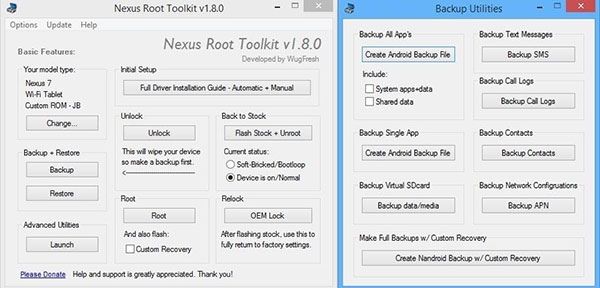
Launch Nexus Root Toolkit and click on the Backup button to back up the entire device. Then press Create Nanroid Backup w/Custom Recovery on pop-up dialog.
Prepare
Hit the Unlock button on NRT to unlock bootloader on Nexus 7. When the warning message shows on your device, read it carefully and tap on Yes to continue.
Root
If you are ready, click on the Root button to start cracking Nexus 7 immediately. NRT will push the SuperSU to Nexus 7. When the permission request shows up on your tablet, press Grant to complete rooting.
After SuperSU installed, you can reboot your Nexus 7 and access root without obstacle.
Method 2. Root Nexus 7 without PC
As you can see, rooting Nexus 7 on PC is still complicated. You have to turn on USB debugging mode and unlock bootloader. These settings may make you frustrating, not to mention rooting your device. In order to simplify Android root, many rooting tools have rolled out APK files. With an APK, such as Towelroot APK, you can root your tablet without PC and complicated settings.
How to root Nexus 7 without PC
Step 1. Unlock your Nexus 7 and go to Settings app. Find out Unknown Sources option in Security section and turn it on.
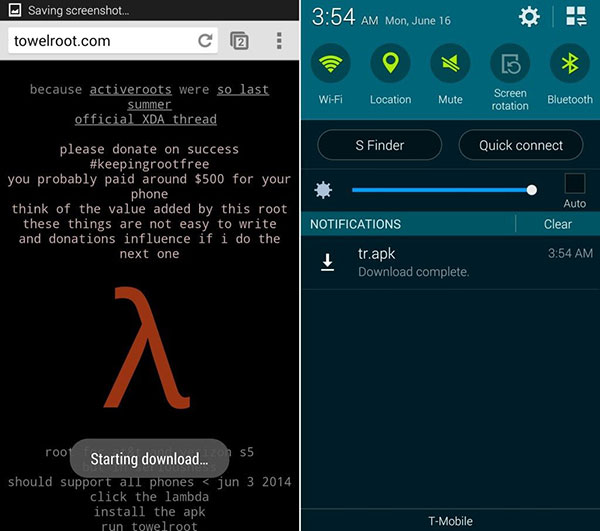
Step 2. Access Towelroot website and download the APK file to your tablet. Touch the APK file to install it on your device. During installing, you will receive the warning message. Read it carefully and tap on Install anyway to continue.
Step 3. After installation, open Towelroot app on home screen. Tap on the make it ra1n button to activate root Nexus 7 process.
Step 4. A few seconds later, your Nexus 7 will reboot when rooting process is done. Then you can install Root Checker from Google Play Store and check the root status.
Step 5. Finally, download SuperSU from Play Store and install it on your rooted Nexus 7. SuperSU is a root manager that has the capacity to protect your rooted device from malware accessing root.
Recover data on Nexus 7 when data loss in Rooting
You should understand that root and unroot an Android phone are officially not supported by smartphone carriers, manufactures and venders. If the process failed, all your personal data will loss. Don't worry! Tipard Android Data Recovery could help you recover lost data and restore it to Nexus 7. It is not only an Android system recovery tool, but also able to recover personal data from a broken mobile device. Plus Android Data Recovery is available to both Window and Mac, so everyone could use it.
How to recover Nexus 7
Install Android Data Recovery
Download and install the latest version of Android Data Recovery to your computer.
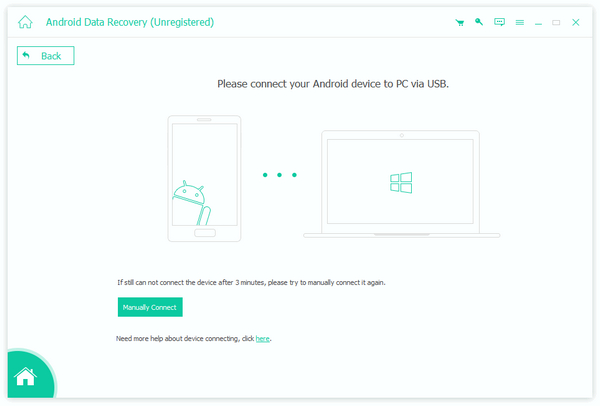
Connect Nexus 7
Connect your Nexus 7 to the computer via USB cable and run Android Data Recovery.
Enable USB debugging
The application could recognize your phone model automatically. All you need to do is to follow the on-screen instruction to turn on USB debugging mode.
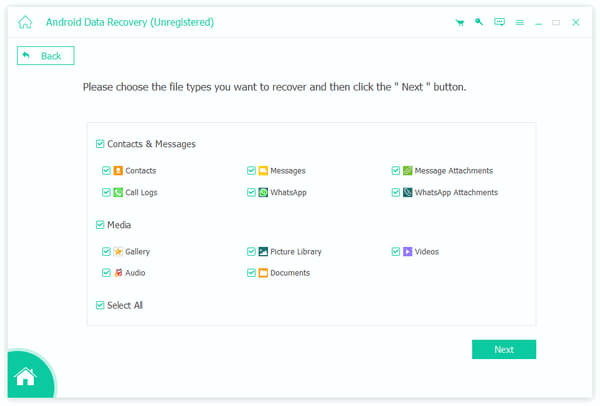
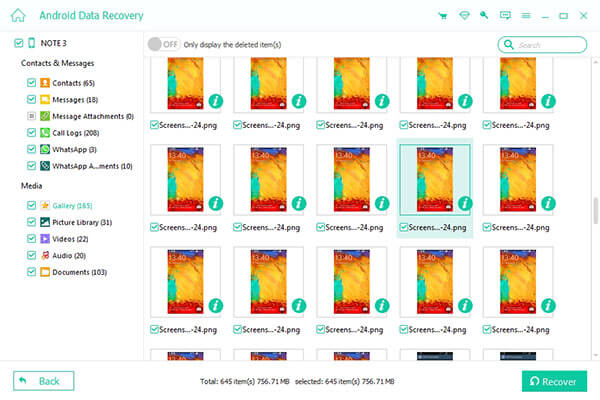
Select data
On the interface, choose the data types for recovery. Click on the Next button to go to detail window. Then you can select certain files or all files.
Start export
Once click on the Recover button, the selected data and files will recover and restore to your Nexus 7.
Conclusion
Working with a rooted Nexus 7 is awesome, because you can controls your tablet completely. If the complicated rooting process is the obstacle of enjoying rooted Nexus 7, you will find this post is helpful. We have shared multiple ways to crack Nexus 7. Towelroot APK is more suitable to mobile-first people. This method could jailbreak a Nexus 7 without PC and other external devices. If Towelroot APK does not succeed, you can try to root your device on PC with Nexus Root Toolkit. Furthermore, we have showed the step-by-step guide to recover Nexus 7 files with Tipard Android Data Recovery.

 How to Root Moto X Safely and Easily
Android rooting guides for Moto X. Read this step-by-step guidance and learns how to easily root Moto X and gain root access.
 3 Best Ways to Root Android Phone
Learn how to root Android phone and be able to modify your system with multiple ways. Just find the desired information.
 Top 5 One Click Root Tools for Android
Here are 5 best tools to one click root Android. Learn how to root Android devices with these best one click root Android tools.
 Kingo Android Root Apk/Software for Free
Kingo Android Root is one of the most popular Android root tools on market. Learn this easy-to-use Android rooting tool.