
How to Root Android Device Effectively with Easiest Way
Root Android could bring many benefits, like uninstall any apps and expand memory storage. Many people choose to not root their Android devices, because they worry about bricking their phones. That is true. If you use a wrong tool or miss a step during rooting, your handset will die. Considering many people expect to root their Android devices successfully, we are going to share the tutorial about rooting Android phone in this article. So, you can follow the guides and increase success rate. Anyway, you have to understand that rooting Android will introduce some risks, including during the process and after. If you are ready, let's do it right now.
Part 1. Preparation for rooting Android
1. Backup Android data for security
Before rooting your Android device, you should back up all data of the handset. If you need a powerful Android backup tool, we will recommend Tipard Android Data Recovery. It not only could recover any data on Android devices, but also has the ability to export files from smartphone to PC. Moreover, this backup tool is easy to use.
Download the right version of Android Data Recovery based on your operating system and install it on your computer.
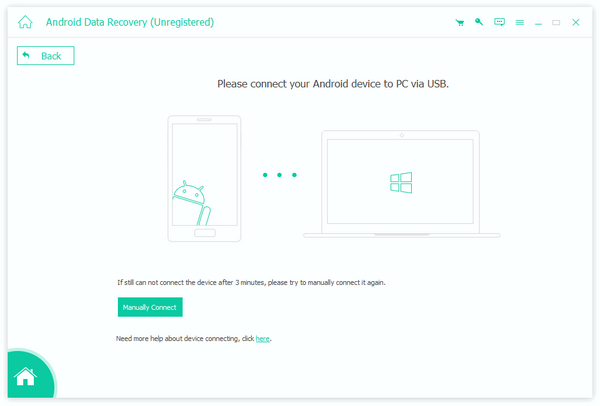
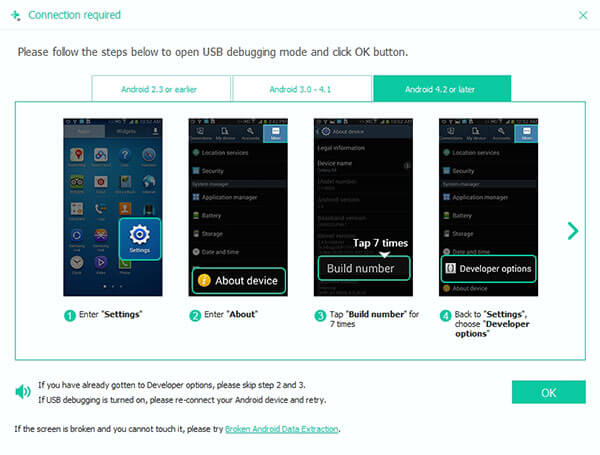
Connect your Android device to the computer via USB cable and run Android Phone Recovery. It will detect your Android phone and tell you how to turn on USB debugging mode automatically.
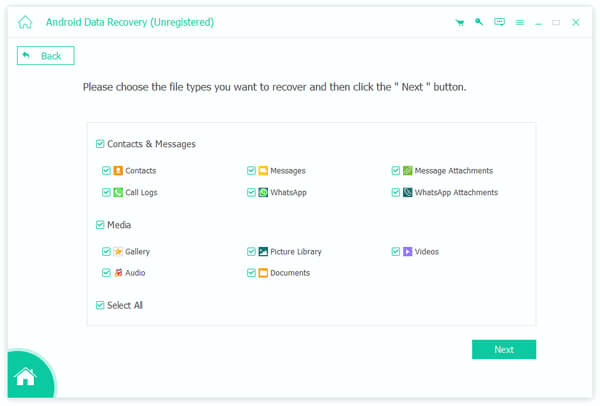
Go to the Broken Android Phone Data Extraction tab and choose the file you want to backup.
Then you can select a location and backup Android files to PC with one click.
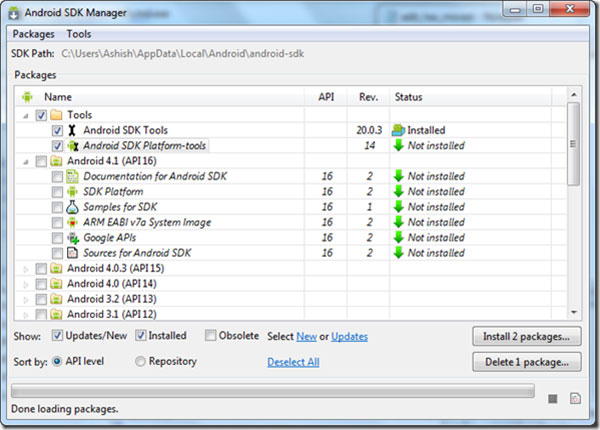
2. Install Android SDK tools
If you decide to root Android device on PC, you have to install Android SDK tools on your computer. You can find Android SDK tools from Google developer site.
Step 1: After the SDK tools installed, open it and make sure only check the Android SDK Platform-tools option.
Step 2: Click on Install 2 packages at the bottom right corner to continue.
Step 3: Trick the checkbox of Accept license and hit Install to complete Android SDK tools installation.
3. Select an appropriate tool
There are many root Android tools on market. To root your Android device successfully, you have to choose an appropriate one. We tested top five Android rooting tools, including KingRoot, CFRoot, Towelroot, Kingo Root, and Easy Rooting Toolkit. They all support one click root Android.
KingRoot works well for root Android 2.0 to 5.0 and supports part of Android 6.0 devices.
CFRoot could root most Android 6.0 handsets.
Towelroot tend to support older phone models.
Kingo is the only one tool that has the capacity to root Android 7.0 in our testing.
Programs above are only available on Windows. Easy Rooting Toolkit could run on Windows, Linux and Mac.
Part 2. Root Android phone with KingRoot on PC
The process of rooting Android with these one-click root Android tools is similar. And we will use KingRoot as the example in this part.
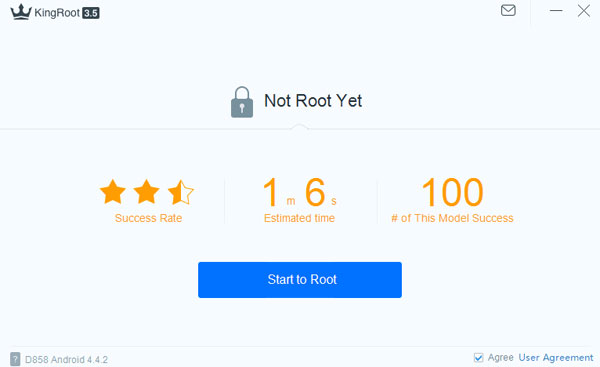
Step 1: Download and install the latest version of KingRoot on your computer and launch it.
Step 2: Reboot your Android phone by holding down the Power and Volume Down keys for then seconds to put it in fastboot mode. Make sure it has more than 50% of battery. Plug your Android phone into your computer and enable USB Debugging and OEM Unlocking.
Step 3: Click on the Start to Root button on the interface of KingRoot, it will do the rest work.
Step 4: Wait until the message Successfully Gained Root appears on KingRoot. That means your smartphone is rooted.
Part 3. Root Android device with Easy Rooting Toolkit on Mac
There are several Android root tools available to Mac OS X, such as Easy Rooting Toolkit. It is a freeware and supports to root a wide range of phone models.
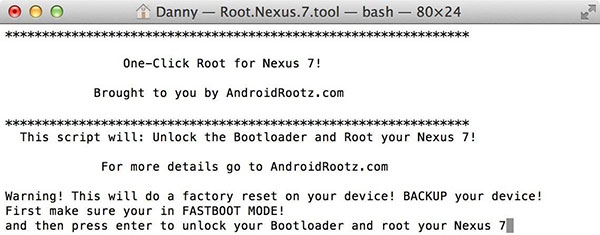
Step 1: Download the Easy Rooting Toolkit and the last update to your Mac computer from AndroidRootz.com.
Step 2: Put your Android phone to fastboot mode and open both USB Debugging and OEM Unlocking. Link the handset to Mac computer with a cable.
Step 3: Unzip the downloaded file and run RUNME.bat. Press Enter key to start rooting Android phone.
Step 4: Choose Recovery mode and hold Power key on your Android phone to boot into recovery mode.
Step 5: Flash the SuperSU under CWM Recovery mode from SD card and reboot you handset. Then the root Android on Mac process is complete.
After rooted, you can reboot your Android device and use a root status checker to see whether you have root Android successfully.
Part 4. Root Android with Towel Root APK
More and more people are mobile-first users. They hold Smartphone every minute and do not use computers at all. To catch up such trend, developers released many root Android APKs. These APKs could help people root Android devices without PCs. In this part, we use Towel Root APK as the example.
Step 1: Unlock your Android phone and go to Settings app on home screen, turn on Unknown Sources option in Security section. If you do not enable Unknown Sources, Android phone will not allow you to install the APK.
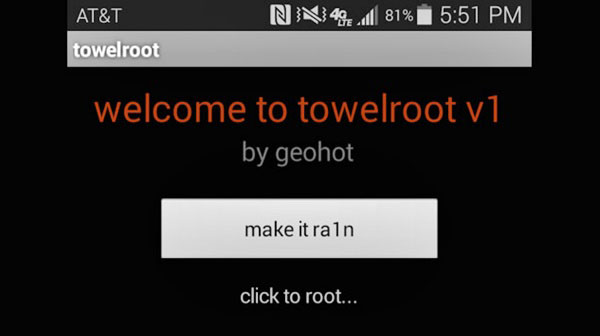
Step 2: Download Towel Root APK from official site in mobile browser for free. Touch the downloaded APK and install it in your Android device.
Step 3: Access the TowelRoot app on home screen and tap on the make it ra1n button. If your handset is supported, TowelRoot will start rooting it immediately. Otherwise, you have to try other root Android APKs.
Step 4: When you get the notification said successfully rooted, you can manage your phone as a developer.
Part 5. Root Android phone with RootMaster
Sometimes root your Android phone is a tough task, but sometimes rooting is necessary for you to work out some problem. If you never learn anything about rooting Android, you will get the very easy way to achieve it
Step 1: Download the app
First of all, you need to download RootMaster on your personal computer.
Step 2: Install the apps
Once you download the software, install it on your PC and Android device.
Step 3: Debugging your PC and Android phone
Open your Android phone and go to the setting menu. Try to make it to be debugging mode.
Step 4: Link your Android device to PC
When you enter the enable debugging mode, then connect your Android device with PC with a USB cable.
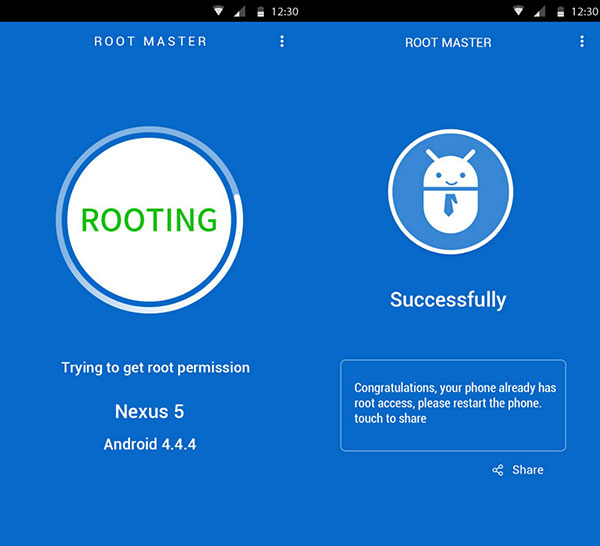
Step 5: Launch RootMaster
Run the RootMaster that your install on your PC. Then you will see a new interface. Click "Root" to start to root your Android Phone. Then you just need to wait for the phone to rebooting to confirm the rooting process is successful.
Conclusion
According to a recent survey, Android has surpassed iOS and become the largest mobile operating system in United States. Android is so popular, partly because it is an open-source operating system. And for the people want to control their mobile devices, root Android is the best choice. We have shared detailed tutorials to root Android devices in this article, from preparation to root Android on different platforms. If you want to root your Android phone, you can choose an appropriate tool and follow the instructions above. If you have any questions, please leave a message below.

 What is Rooting a Phone of Android
What is rooting a phone and how to root a phone? You can learn all necessary knowledge related to Android phone rooting.
 Kingo Android Root Apk/Software for Free
Kingo Android Root is one of the most popular Android root tools on market. Learn this easy-to-use Android rooting tool.
 Top 5 One Click Root Tools for Android
Here are 5 best tools to one click root Android. Learn how to root Android devices with these best one click root Android tools.
 3 Best Ways to Root Android Phone
Learn how to root Android phone and be able to modify your system with multiple ways. Just find the desired information.