
Easiest Ways on How to Delete Photos from iCloud
As you know, iCloud offers free 5GB storage space for people to manage and store files the first time you set up iCloud account, especially photos and videos. As time goes by, there will be one embarrassing situation appear, which is you are running out of iCoud storage space. To continue the free cloud storage usage, the essential and easiest solution is to delete photos from iCloud. Well, from iCloud official site, iCloud Photo Library and other iCloud storage organizers are all the right answers. To start with, I have sort out some frequently asked questions about iCloud, which may figure out your confusions as well.
Part 1: FAQ about iCloud Photo Library, My Photo Stream and More
Q 1: If I delete photos from iCloud Photo Library, will they exist in my iPhone still?
A 1: No. For people who delete one photo or video from Photos application, no matter in iOS or OS X, with the iCloud Photo Library has enabled, it will be removed from your iPhone automatically.
Q 2: What if I do not delete iCloud files, even though it has exceed 5GB free iCloud Storage?
A 2: Your iCloud will refuse to back up anything to iCloud. The photo and video importing will be stopped forcibly. In another word, no iCloud service will work normally.
Q 3: How can I check the left iCloud storage space I can use with iPhone?
A 3: Go to Settings on the home screen, select iCloud and iCloud storage buttons in order. If you run iOS 10.3 or later, then click your account name after tapping Settings.
Q 4: Can I recover deleted photos from iCloud?
A 4: You are able to retrieve deleted iCloud photos and videos within 30 days, fro the recently deleted album. Keep attention about your iCloud storage limit. Or your recent deleted files will be removed immediately, with which to disable your deleted iCloud photo recovery.
Part 2: Delete Photos from iCloud.com
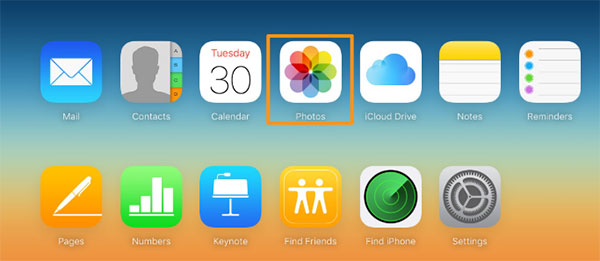
Delete Method: It is the method aims for people who prefer to delete photos from iCloud on computer. Enter the official iCloud website, to sign in with your Apple ID. Later, choose Photos icon to open all your pictures stored on the air, select which ones to delete from iCloud, and hit Delete button to erase iCloud images.
Recover Operation: If you delete important pictures from iCloud not up to 30 days, then you are lucky to get deleted pictures back. Turn to Recently Deleted and click Recover button, to recover deleted iCloud photos.
Part 3: Erase iCloud Photos from My Photo Stream
My Photo Stream is the iCloud setting, which can back up your pictures on the cloud storage, not up to 30 days, and not exceed 1000 photos. Once you enable My Photo Stream option, your new shot images will be sent to iCloud automatically over Wi-Fi. Sounds good to back up iPhone files for free, right?
Open Photos application on your iOS device.
Delete photos from iCloud with My Photo Stream.
Open Albums, to choose My Photo Stream and click Select option. Select iCloud images you wanna to remove. Find the Trash Bin and choose Delete Photos.
Disable My Photo Stream. (Optional)
Go to Settings, to find Photos & Camera option, later, turn off My Photo Stream.
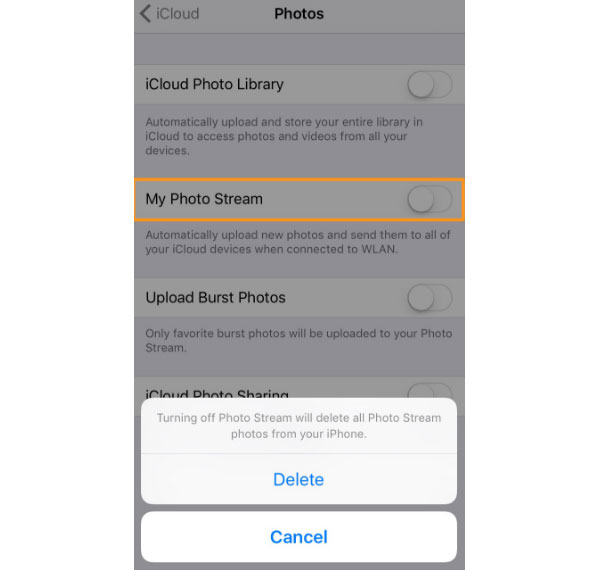
Disabling My Photo Stream indicates that you refuse further cooperation with iCloud storage. If you just delete multiple photos from iCloud for once, there is no need to turn off My Photo Stream.
Part 4: Remove Photos from iCloud via iCloud Photo Library
iCloud Photo Library is another iCloud free collector, to enable everyone access all iOS files whenever and wherever. You can organize and sort out in customizable way. Compares with My Photo Stream, iCloud Photo Library will cost your limited iPhone storage, unlike other cloud storage program. As a result, you need to delete photos in iCloud Photo Library, to balance and free up space regularly.
The whole process of deleting photos from iCloud Photo Library is easy to achieve. Turn to Settings first. Later, move to Storage and choose Manage Storage option, to get iCloud Photo Library. A, last, click Disable and Delete to delete entire photos from iCloud Photo Library.
Part 5: Turn Off & Delete Photos from iCloud Backup Files
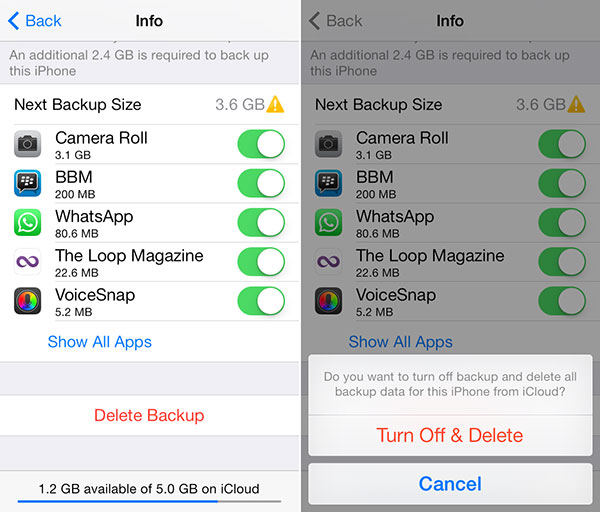
Backing up files is a good habit to recover iPhone data easier in emergency situations, and to free up iCloud storage. Deleting images from iCloud differs in iOS 9 and iOS 8 devices. To remove iCloud picture from iOS 8, turn to iCloud app on home screen, later, select Storage & Manage option, to get Manage Storage choice, and at last, turn off Camera Roll to erase current images stored in iCloud. As for iOS 9 iCloud images removing, click Storage & Manage first, later, click Manage Storage option, to turn off Photo Library to delete iCloud pictures as well. The common ground is the message requires your command whether to turn off backup service and delete the backup data. If you have prepared already, then click Turn Off & Delete to clean your iCloud..
Clean iPhone Photos Permanently to Get A New iPhone
You may need the iPhone cleaner software – Tipard iPhone Eraser, to help you delete unwanted iPhone files and reset iPhone settings. Just like the powerful eraser, all your history searching records, personal data, music, videos, contacts, notes, call history and other iPhone files will be wiped as well.
There are three different levels of iOS overwriting services, which refers to low level, medium level and high level. For deleting photos from iCloud permanently, Low level in iPhone Eraser is enough to erase all existing iOS files, to get the "new" iPhone. If you wanna to resale iPhone and bought the new one, using iPhone Eraser to wipe all iOS data permanently is better than factory resetting.
Well, if you have several Apple devices need to be wiped, connect them together to one computer, to detect and erase more than one iDevice at the same time. Highly compatible with iOS 9.3 and Windows 10, coupled with your iPhone 7 Plus.

 How to View iCloud Photos Online
View iCloud Photo online from iCloud official website, and manage and preview iCloud photo stream on Mac or PC.
 How to Retrieve Deleted Photos from iCloud
How can you restore iPhone from iCloud? The article explains an easy way to retrieve deletedphotos from iCloud.
 How to Delete Photos from an iPad With Ease
When you have many photos on iPad, you need to know the different methods to delete photos from an iPad accordingly.
 Top 4 Methods to Delete Photos from iPhone
Learn 4 best methods to delete photos from iPhone, including duplicate images, all iPhone photos, and more.