
Best Way to Convert DVD to MP4
DVD Ripper allows you to take whatever DVD source and convert DVD to MP4 ,AVI, WMV, RM, MP3, WMV, etc.You can put your DVD video on your iPod, iPhone, PSP, iRiver, Mobile Phone, Sansa View, etc after the conversion .The following are the specific steps showing you how to convert DVD to MP4.
Download this Tipard DVD to MP4 installation file. Double click the downloaded installation file to start installation. Follow the instructions to finish the installation. Launch DVD Ripper.
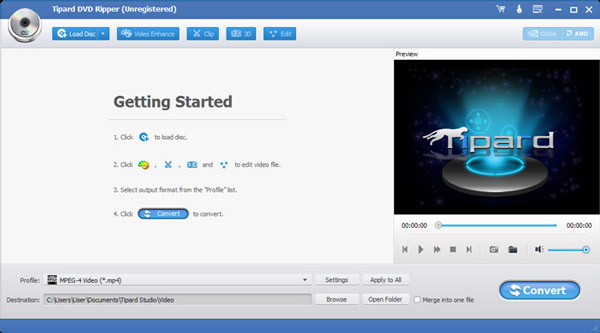
DClick "Load DVD" to select Load DVD, Load DVD Folder and Load IFO File.
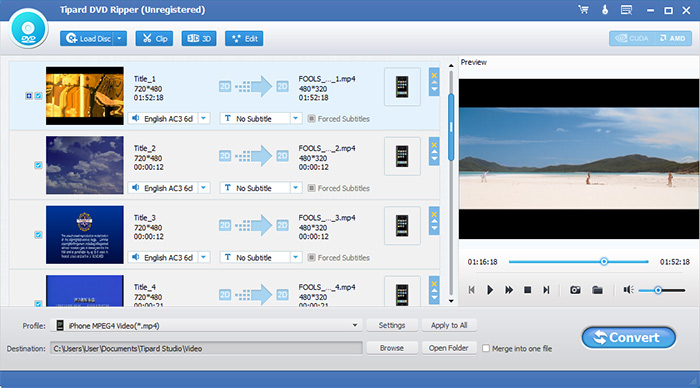
After you select the titles or chapters you want to convert, you can set the output settings for the conversion under preview window and the DVD content list.
Audio Track: Select audio track for your selected file (either a title or a chapter).
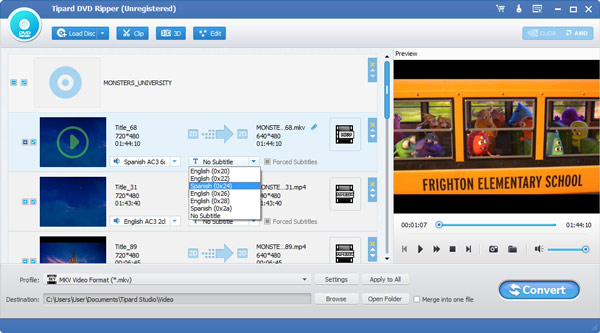
Subtitle: Select subtitle for your selected file (either a title or a chapter)
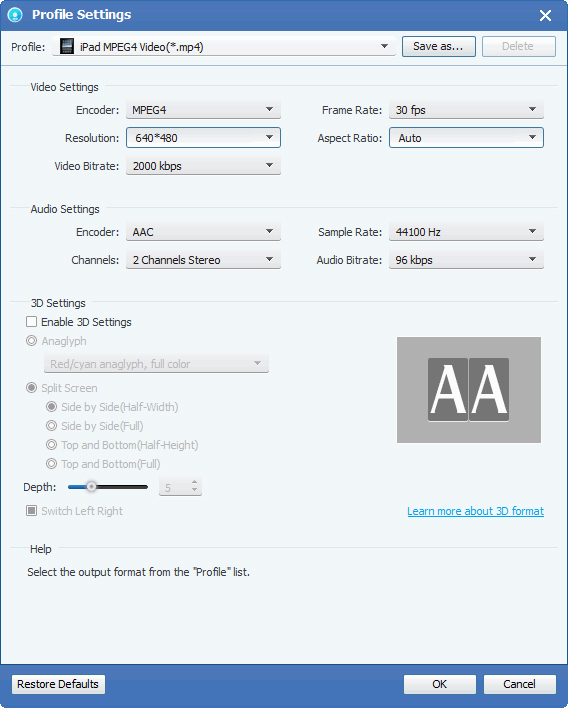
Settings: Click "Settings" to open the Settings window.
In the Video Settings, you can select Encoder, Frame Rate, Resolution and Video Bitrate to convert your movie.
In the Audio Settings, you can select Encoder, Channels, Bitrate and Sample Rate to convert your movie.
Destination: Click "Browse" to specify a location on your computer to save the converted movie. If you want to open the output folder, you can just click "Open Folder".
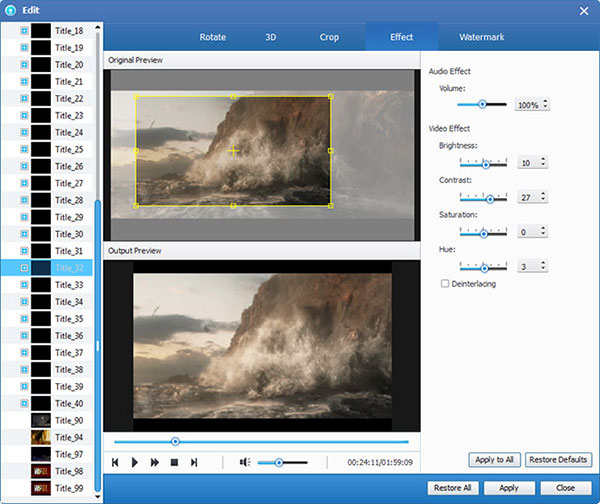
Click "Edit" > "Effect" to open the Effect window. Tipard DVD Ripper allows you to adjust the brightness, contrast and saturation of video and volume of the audio by drag and click the adjustment bar.
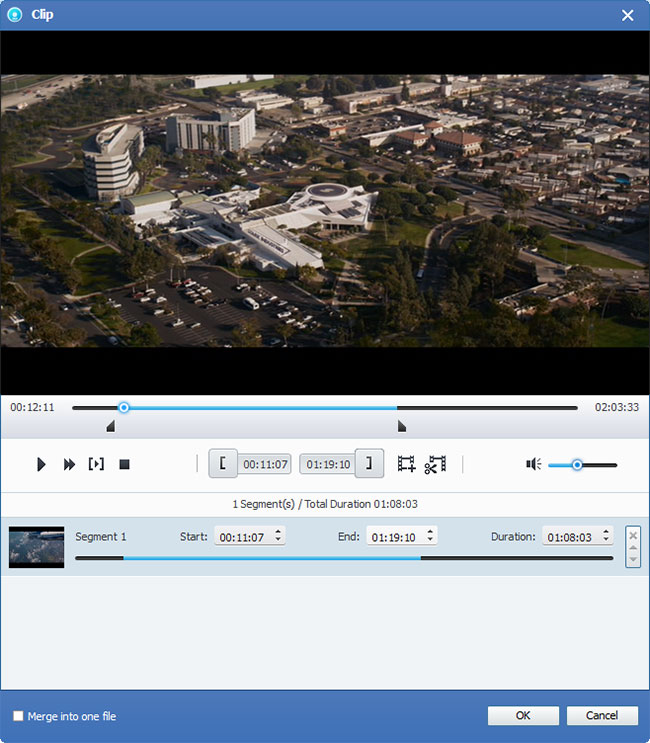
Tipard DVD to MP4 Converter allows you to cut your movie, so you can capture your favorite clips from your DVD movie. Click "Clip" button to open the "Clip" window. Tipard DVD to MP4 Converter provides you three methods to trim your DVD.
◆ Method 1: Enter the start time in the Start Time box and click OK, then enter the end time in the Set End Time box and click OK.
◆ Method 2: Drag the scissors bars under the preview window when you want to trim, then the time will be shown in the Start Time box and End Time box for your reference.
◆ Method 3: Click "Trim From" button when you want to begin your trimming. Click "Trim To" button where you want to stop your trimming.
After you set trim time, the length of the captured clip will be shown in the Select Length box for your reference.
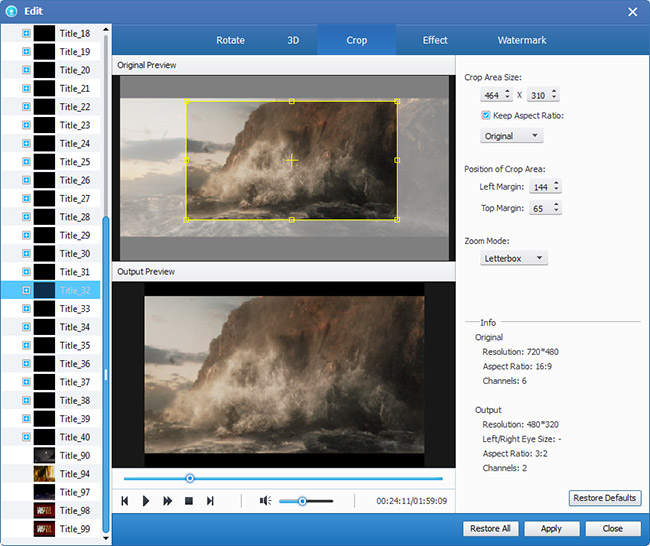
Tipard DVD Ripper allows you to remove the black edges around your video and customize the size of video play region. There are three methods available to crop your video:
◆ Method 1: Select a crop mode in the Crop Mode drop-down list and click OK to save the crop. There are six pre-set crop modes for your choice: No Crop, Cut off Top and Bottom black edges, Cut off Top black edge, Cut off Bottom black edge, Cut off Left and Right black edges, Cut off All black edges.
◆ Method 2: The crop frame is the yellow line around the movie video. There are eight small adjustment boxes on the crop frame. Each adjustment box allows you to crop the movie video from a different position. To crop your movie video, you can just move your mouse cursor to an adjustment box and drag the crop frame.
◆ Method 3: There are four crop values on the lower right part of the crop window: Top, Bottom, Left and Right. You can set each value to crop your movie video, and the crop frame will move accordingly.
If you want to join your selected chapters or titles into one file you can check the "Merge into one file" option. As default the merged file is named after the first selected file (either a title or a chapter).
Click "Snapshot" button and the current picture in the Preview window will be captured and saved. Click "Folder" button to open the folder where the captured images are saved. As default the captured image will be saved at users' My Documents\Tipard Studio\Snapshot. Click "Preference" menu, you can reset the snapshot folder and the type of your captured image: JPEG, GIF or BMP formats.
Before you start conversion, click "Preference" menu to adjust the settings related to conversion.
◆ After Converting Done: You can choose to "Shut Down" your computer or "No Action" after the conversion.◆ CPU Usage: You can choose the max CPU Usage for your computer: 50%, 60%, 70%, 80%, 90%, 100%.
After you finish the pre-settings, you can just click "Start" button to start to convert DVD to MP4 format. Now enjoy your high-resolutin DVD video on your MP4 player.

 How to Rip a DVD with 3 Easy Methods
You want to watch it on your phone, tablet, somewhere else. You can follow this tutorial to rip a DVD to digital videos.
 How to Burn DVD on Mac OS X
If you have any query about how to burn DVD on Mac? You can go through the article to learn more detail about the methods.
 Top 8 Free DVD Ripper Software
This article is going to talk about the 8 best Free DVD Ripper Software, which rip DVD discs to other videos with best quality.
 How to Rip CD to MP3 With the Top Methods
In this tutorial, you will learn to rip CD to MP3 and other audio format using Windows Media Player, iTunes and third party programs.